Quick Start Guide
Let's create your first RAW API hosted in GitHub. All the code for this tutorial can be found in our GitHub demos repository.
You can also watch the video below to follow this guide:
Step 1: Create GitHub repo and Authorize RAW
Now you have RAW set up and running, you will probably want to create a new repository in GitHub, and add it to RAW.
For this demonstration, let's create a new repository in GitHub and call it raw-demo.
If you are not familiar with GitHub and how to create new repositories, check this quickstart guide to creating a GitHub repo.
Authorize RAW
A new GitHub repository needs to be authorized so that can read it. Go to the GitHub app and give it permissions to read the newly-created repository raw-demo.
Next, we will add code definitions to this repository.
Step 2: Add Code
Start by cloning your newly-created GitHub repository to your local machine. If you are not familiar with GitHub and how to clone repositories, check this guide on cloning GitHub repos.
At this point, you will have an empty directory (perhaps with a README.md file) that looks like the following:
$ cd raw-demo
$ ls
README.md
Choose a source
We have chosen https://theunitedstates.io data, and for this example a dataset in CSV format: https://theunitedstates.io/congress-legislators/legislators-current.csv. If the link is broken, you can use this backup link here
We use a simple CSV file, but RAW can read mulitple types of data including XML, JSON, and Log files.
Run a simple query
Open up VS Code, and open the scratchpad window (see how here).
Enter the following RAW SQL code:
Csv.Read("https://theunitedstates.io/congress-legislators/legislators-current.csv")
Click the Execute icon in the scratchpad, or hit F8 key to execute the query.
You should now see the results in a results window, displayed as JSON:
[
    {
        "last_name": "Brown",
        "first_name": "Sherrod",
        "middle_name": null,
        "suffix": null,
        "nickname": null,
        "full_name": "Sherrod Brown",
        "birthday": "1952-11-09",
        "gender": "M",
        "type": "sen",
        "state": "OH",
        "district": null,
        "senate_class": 1,
        "party": "Democrat",
        "url": "https://www.brown.senate.gov",
    ...
Create a function
The query above returns data, but for an API we will want to pass in some parameters to filter our dataset back.
Modify your code in the scratchpad, to create a function called legislators, that takes 3 parameters, which are string, and each has a default of %, so that if the parameter is not supplied the SQL query will use % as a wildcard:
legislators( state: string = ".*", legislator_type: string = ".*", party: string = ".*") =
    let
        data = Csv.InferAndRead(
            "https://theunitedstates.io/congress-legislators/legislators-current.csv"
        )
    in
        Collection.Filter(data, x ->
            Regex.Matches(x.state, state) and
            Regex.Matches(x.`type`, legislator_type) and
            Regex.Matches(x.party, party)

        )

// test the code:
legislators()
Execute this code above in scratchpad. This should return the same data as the CSV, but limited to 10 entries (rows).
Test the function
We can also run some more quick tests, to check the filters are working by replacing legislators() with these values below - choose one line at a time and comment out the others with //
legislators(state = "CA")
//legislators(state="CA",type ="rep")
//legislators(state="CA",legislator_type="rep",party="Democrat")
For more information on testing endpoints, go to our YAML Reference Guide
Create the RAW SQL and YAML files
Now we have a function, and have run some tests, we can create an API. In RAW you need two files:
- RAW SQL file defining code which gets executed whenever the endpoint is invoked (we use
.rqlconvention) - YAML defining the API endpoint itself (we use
.ymlconvention)
Firstly create and save the RAW SQL file as legislators.rql, with just the function definition above. You can see it here on GitHub
Next, create and save the YAML file legislators.yml for the API endpoint, again on GitHub here
raw: 0.9
endpoint: GET
code: rql
codeFile: legislators.rql
format: json
computeClass: normal
enabled: true
cacheSizeMB: 10
computeLimitSeconds: 20
declaration: legislators
metadata:
  title: Legislators of the United States
  description: search by type, party and state
  tags:
    - government
    - USA
security:
  public: true
refreshSeconds: 60
Side note: In VS Code, we have a helper function to add YAML files with the correct syntax, you can read about it here. For more information on the format of the endpoint YAML see: our YAML reference guide
Create a raw-site.yml file
Lastly, and this is a once per repository task - create a file called raw-site.yml.
This file lives at the top of the repository and is used for repository-wide configuration.
The presence of this file indicates that this is a repository with API definitions for RAW.
This file should have the following contents. You can see on GitHub here
raw: 0.9
publishUrl: root
enabled: true
Setting enabled: true means that the repository will be published.
The publishUrl: is the root value for the API structure, this will append to your instance, so that the API structure will be, in this instance:
https://<instance-name>.raw-labs.com/root/legislators
Step 3: Publish the API
Now it's time to host this API in RAW. For this you need to:
- ensure the code is committed and published to GitHub;
- ensure that RAW is authorized to read this repository.
Commit to GitHub
So, you should have 3 new files in your directory:
$ ls
raw-site.yml
legislators.rql
legislators.yml
README.md
There are many ways to commit and publish your code onto GitHub.
For instance, if you use the git command-line tool you can ensure the code is committed by executing the following commands from the top-level raw-demo/ directory:
$ git add raw-site.yml legislators.rql legislators.yml
$ git commit -a "My first API"
$ git push
or you can use VS Code with its source code integration (Watch the video above at 4:01, or read this link)
Your code should be pushed to GitHub now, and RAW will read the contents of the repository automatically and serve it as an API. This usually takes a few brief moments whilst our DataOps process runs and deploys the API.
Your new API is ready!
Check the API is published correctly
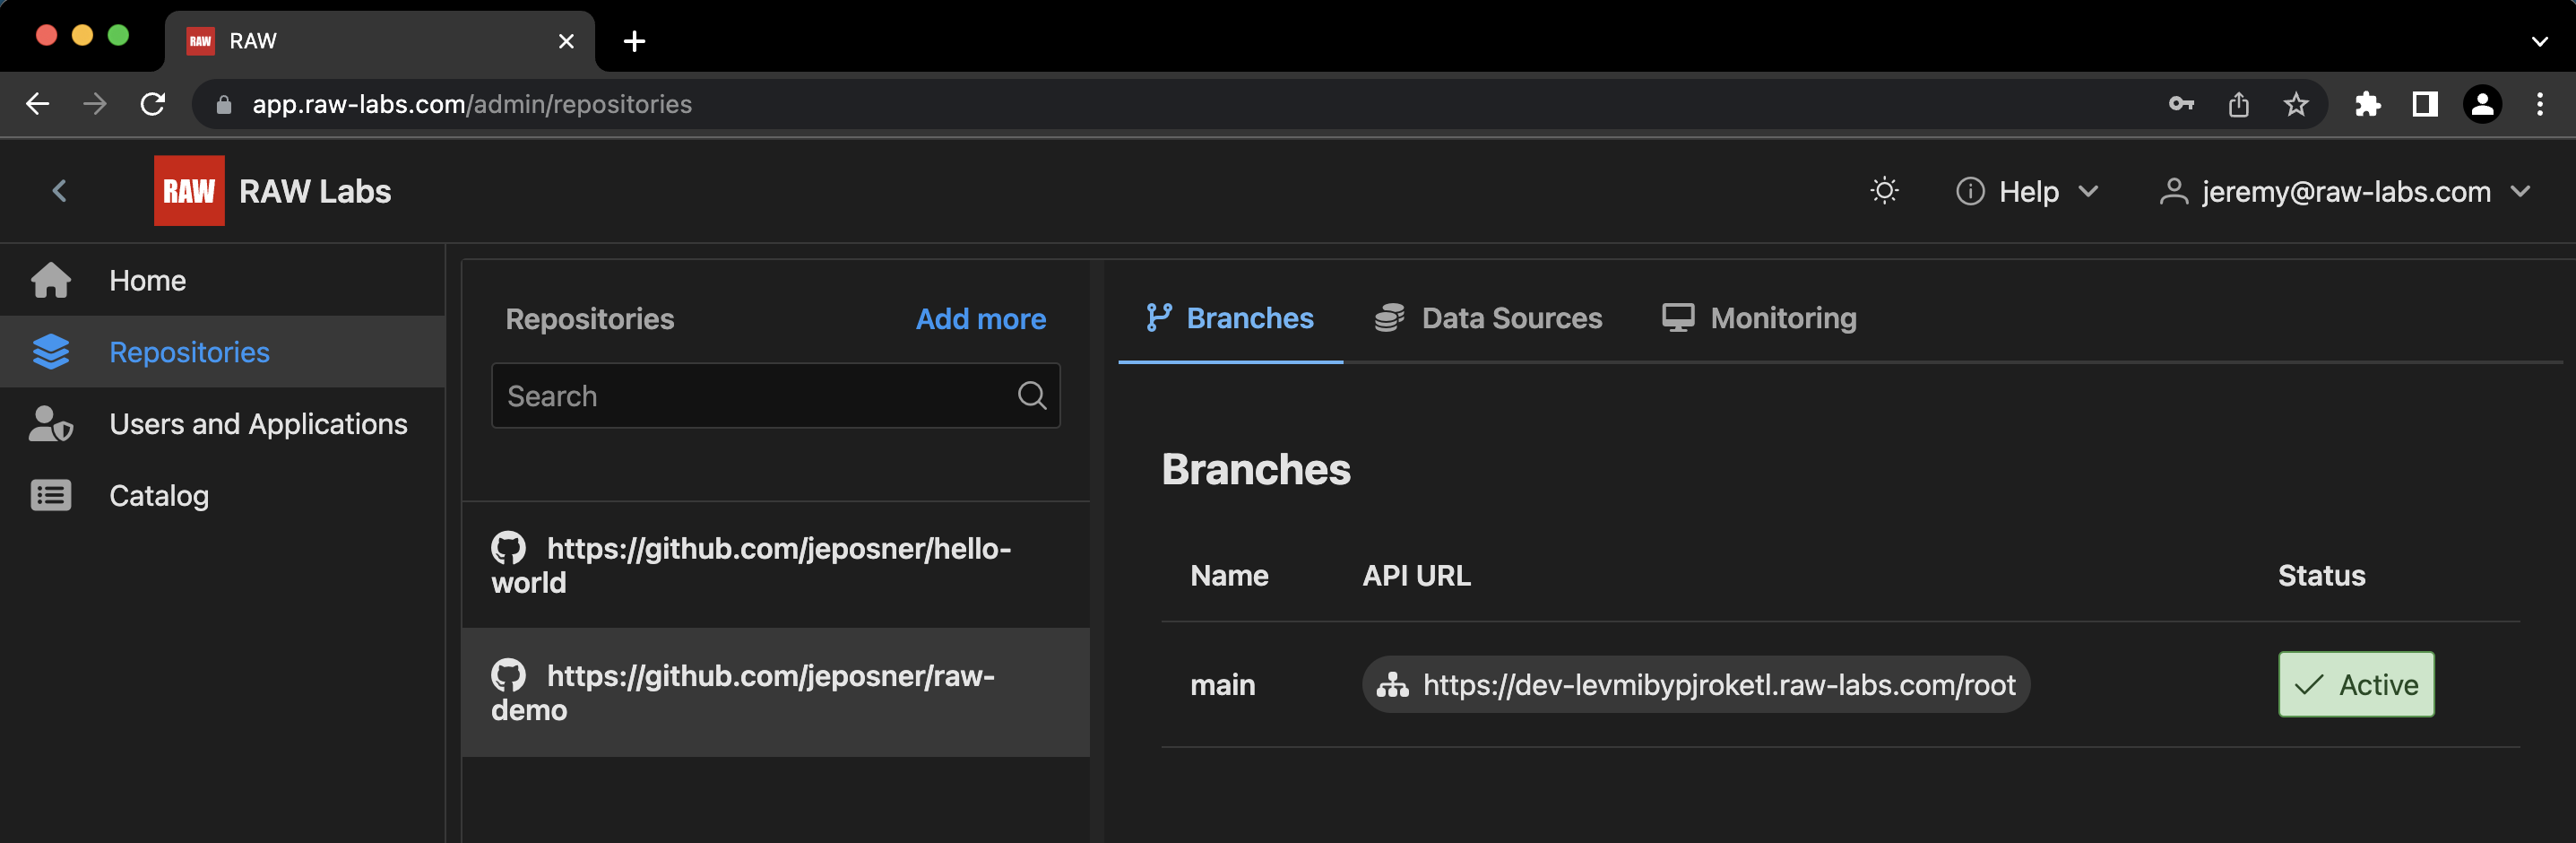
Open the RAW App, login to the Admin Console.
Click on "Repositories" on the left sidebar, and select your new raw-demo repository. It should show the main branch as Active:
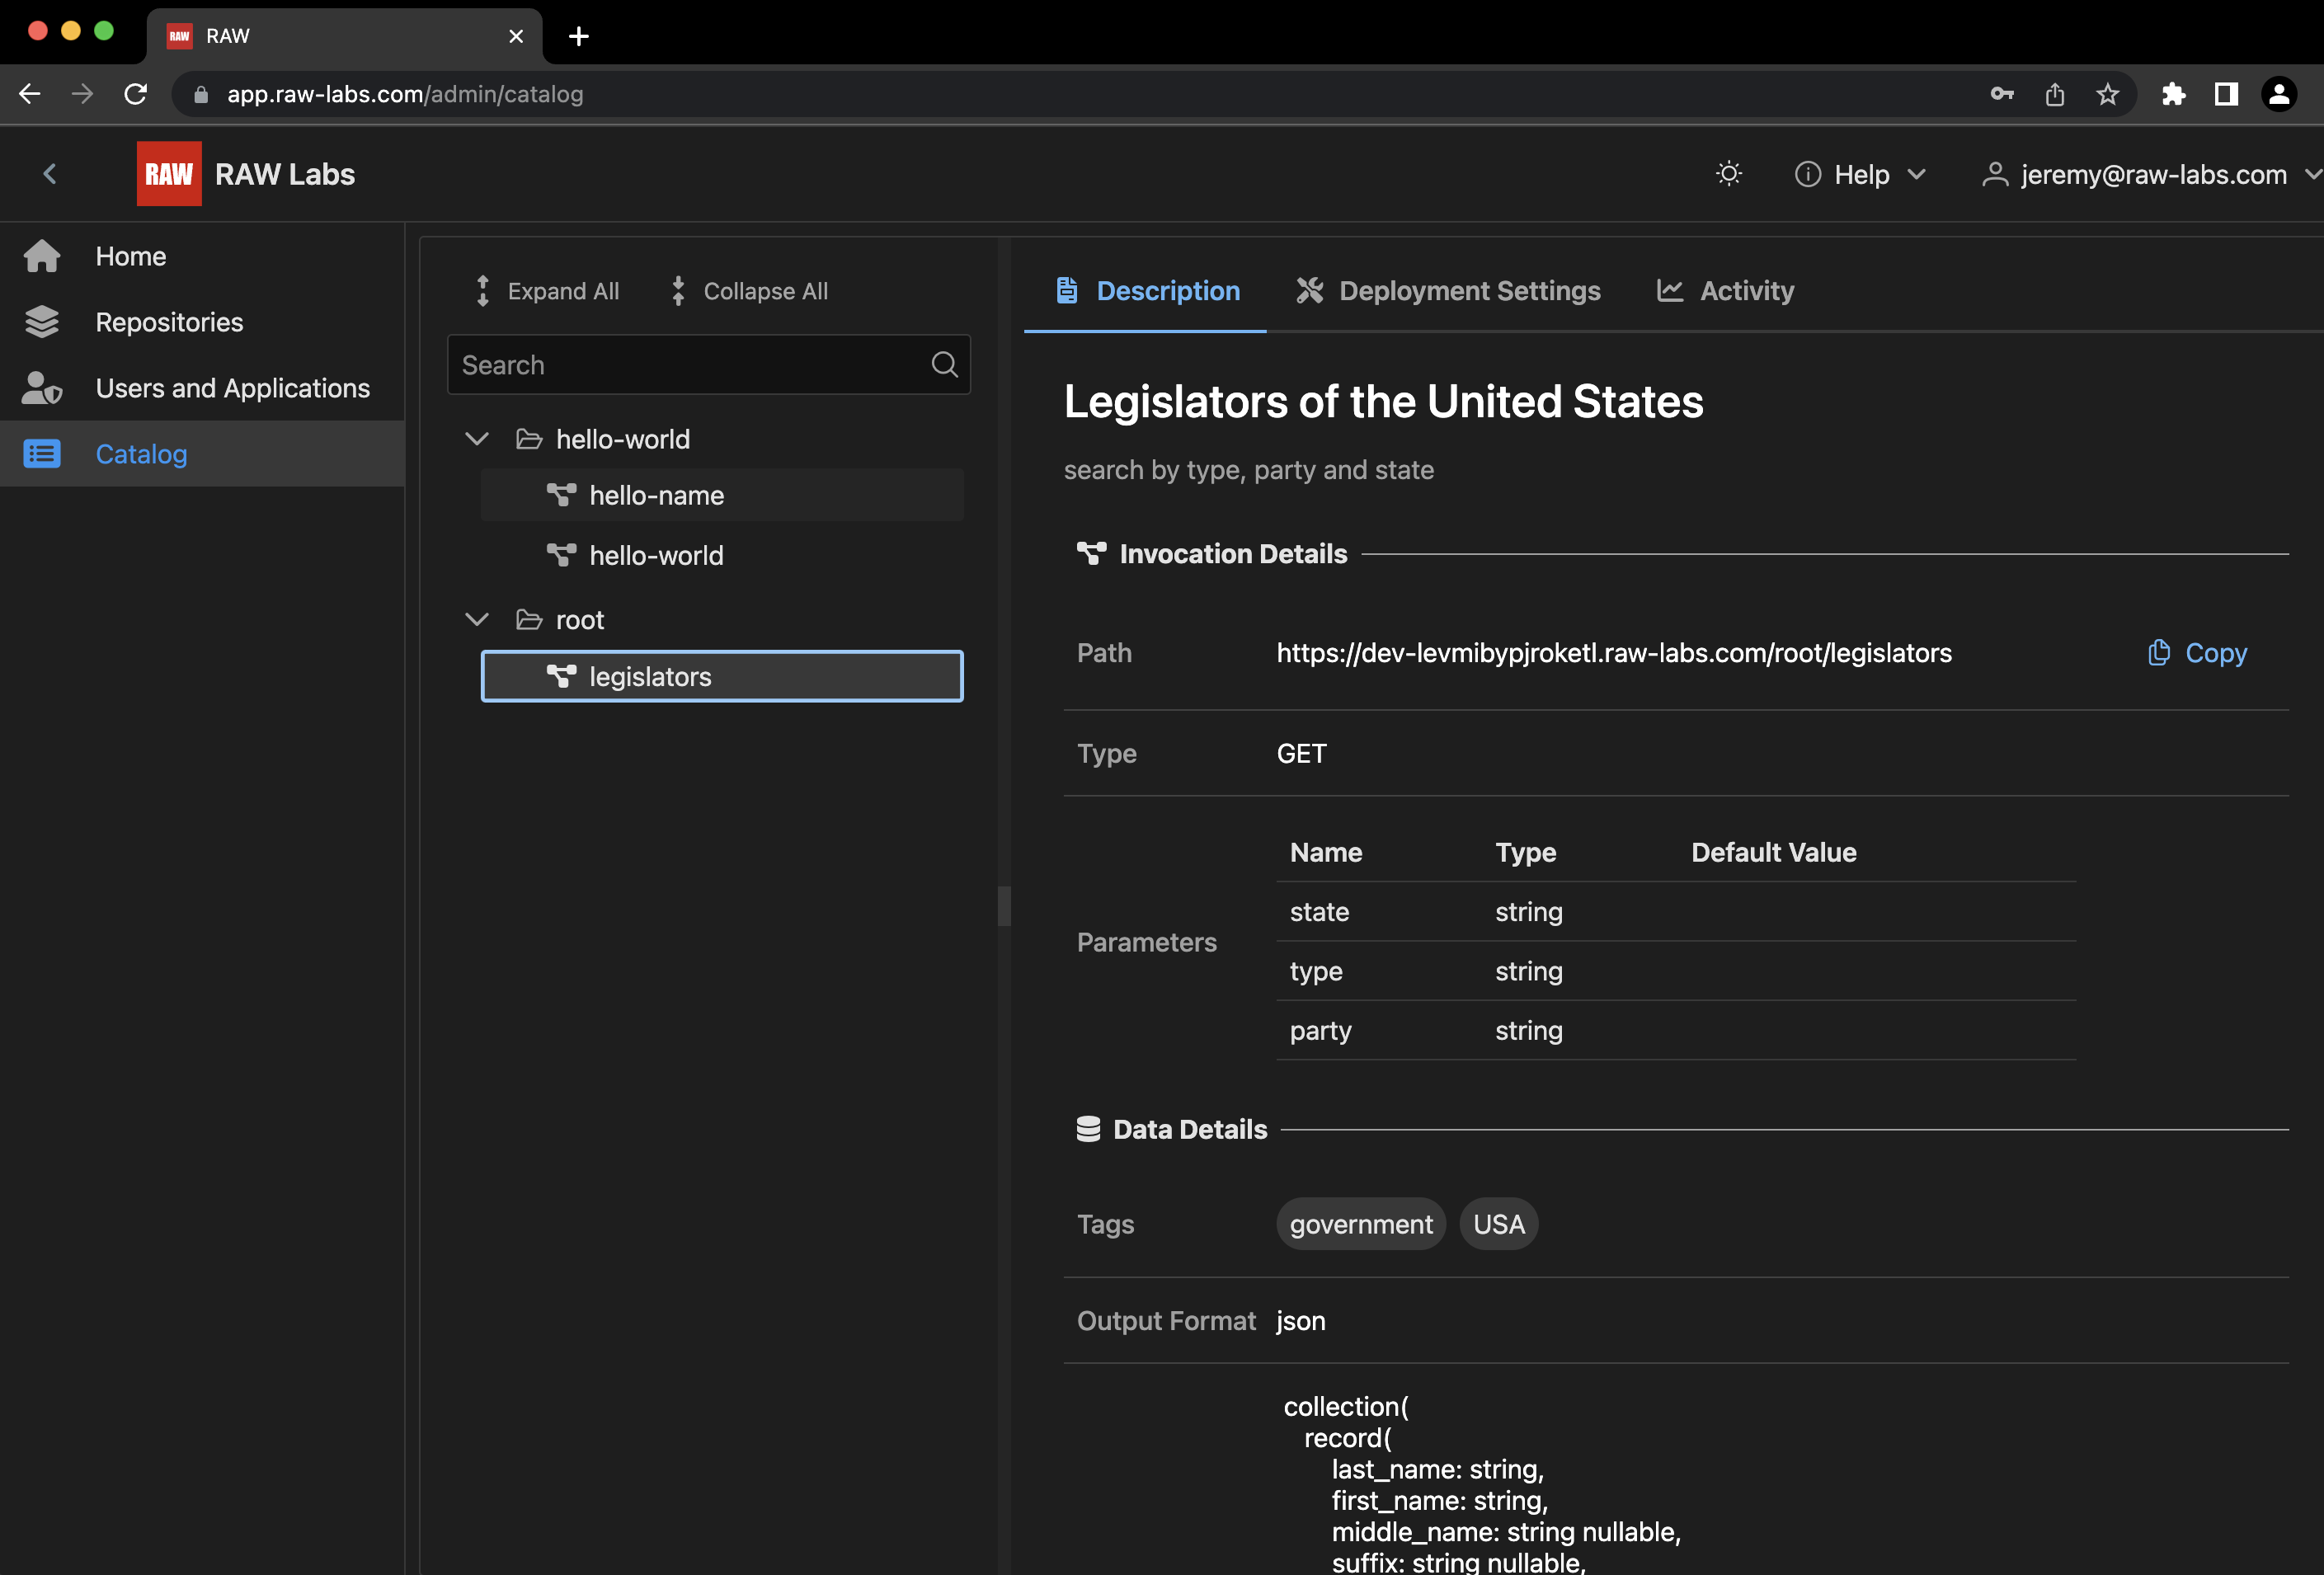
Next, Click on the "Catalog" on the left sidebar, and click on the legislators endpoint.
Here you can copy the endpoint URL, and see the metadata from the YAML and RAW SQL files:
Execute the API
There are many ways to use the API, you can use your browser or the curl command-line tool:
In a browswer, paste the invocation into the address bar. Hit enter. You should get data returned in JSON form. If you need a JSON formatter for your browswer download an extension from one of the marketplaces. You can also test the parameters using the
?param1=value¶m2=valueafter your endpoint.Using curl you can execute at the command line, (Remember to replace
<instance-name>by the actual name of your RAW instance)
$ curl "https://<instance-name>.raw-labs.com/root/legislators?state=CA&type=rep"
That's it. You created your first API. Now why not try some of our other tutorials?