Credentials
In this tab we can add, remove and test credentials of our repository.
HTTP
HTTP Credentials refer to HTTP-accessible endpoints, as the name suggests, protected by a security mechanism. Currently, we support: HTTP Basic Authentication and OAuth Token.
HTTP Basic Authentication Scheme: Is one of the simplest methods of protecting web resources. In this method the client sends a user-name and a password with the request. The server will service the request only if the user-name and password are valid for this resource.
Bearer Tokens: OAuth enables clients to access protected resources by obtaining an access token, which is defined in The OAuth 2.0 Authorization Framework as a "string representing an access authorization issued to the client", rather than using the resource owner's credentials directly.
Accessing protected API's from suppliers like: Shopify, LinkedIn, Google, Twitter etc. Is also supported. But each one of them will have it's own chapter explaining the necessary steps on how to generate and register them.
HTTP Basic Authentication
Description
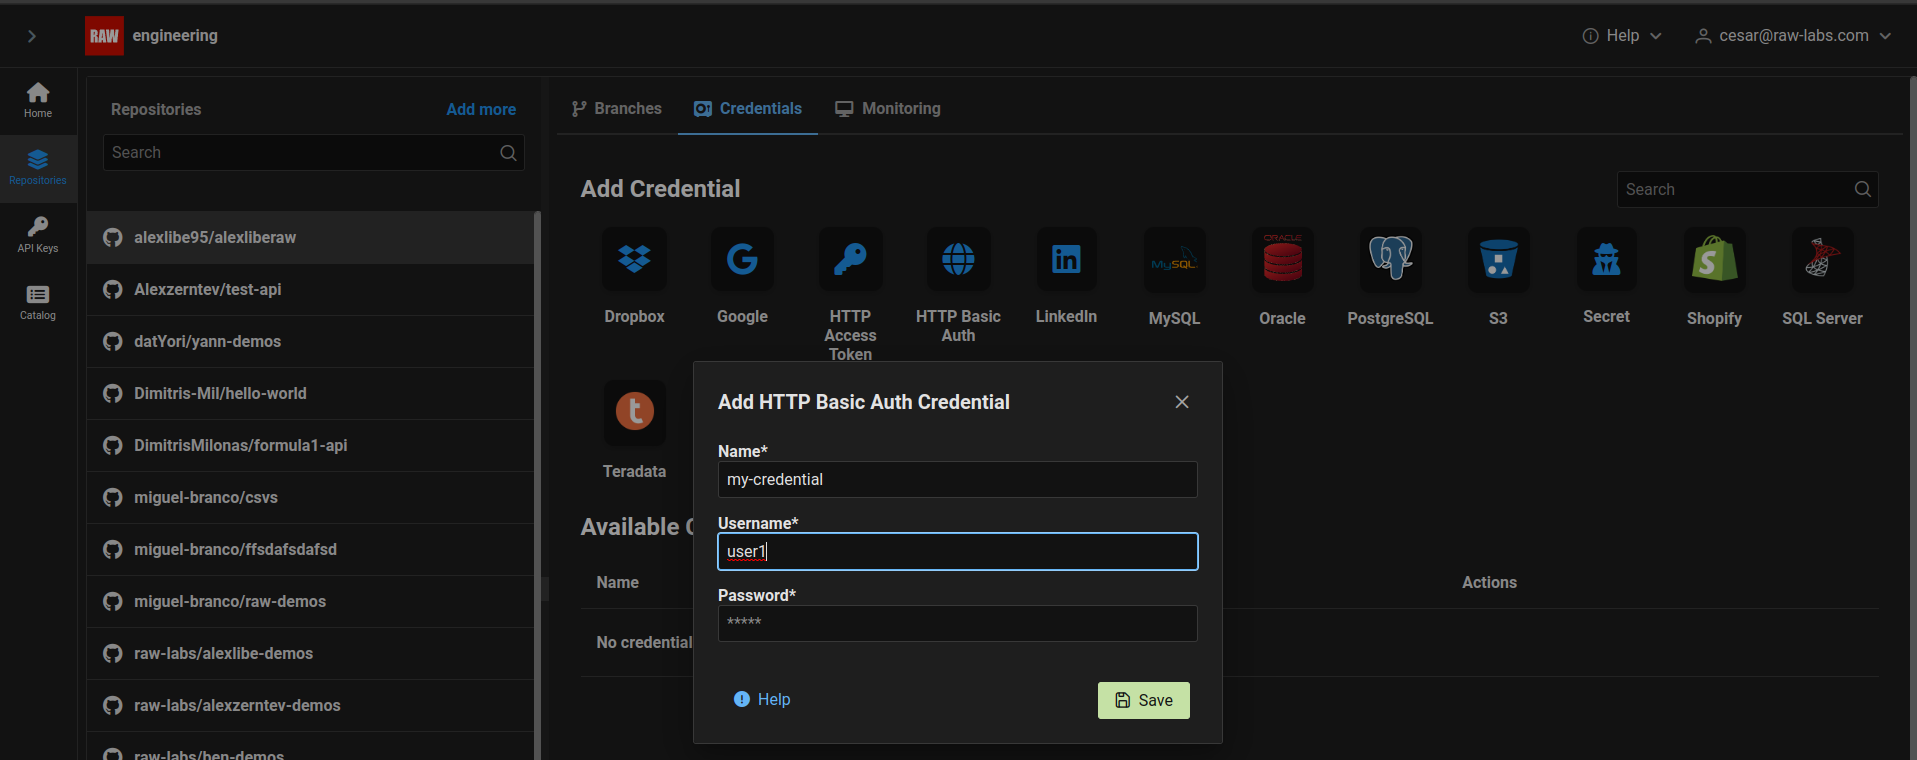
RAW can access HTTP resources protected by HTTP Basic Authentication mechanism. To define the respective credentials, you should click on the HTTP button in the list of Credentials. In the Http Type drop-down menu, select Http Basic and then you will be presented with the following form:
The following fields need to be specified:
Name: name you want to give to this credential.Username: usernamePassword: password
Example
For example, if we want to access protected resource https://myprotected.site.com/, with username user1 and a proper password, we could register a credential named my-credential like this:
Then reference this credential in the read command by using the authCredentialName parameter like this:
String.ReadLines(
    Http.Get(
        "https://myprotected.site.com/",
        authCredentialName = "my-credential"
    )
)
HTTP Access Token
Description
In this type of credential a Bearer Token is externally generated and it is registered RAW directly. Bearer Tokens are the predominant type of access token used with OAuth 2.0.
When using this credential RAW will just send the HTTP request with the token in the Authorization header as specified in the Bearer Token Usage Specification.
Example
We want o access an service protected with an access token.
For that purpose, a new access token is generated externally, and we will register an new credential RAWService with this token.

This can be used to invoke a protected endpoint https://dev-nuhynxsvnkentel.raw-labs.com/scopetest/1/public/ISS/isslocation, using the following query:
String.ReadLines(
    Http.Get(
        "https://dev-nuhynxsvnkentel.raw-labs.com/scopetest/1/public/ISS/isslocation",
        authCredentialName = "RAWService"
    )
)
The response is the current Earth location that ISS directly flies over, like:
[
    "\"Ulchsky Rayon, Russia\""
]
S3
Description
According to Amazon Documentation:
Amazon Simple Storage Service (Amazon S3) is an object storage service that offers industry-leading scalability, data availability, security, and performance. Customers of all sizes and industries can use Amazon S3 to store and protect any amount of data for a range of use cases, such as data lakes, websites, mobile applications, backup and restore, archive, enterprise applications, IoT devices, and big data analytics. Amazon S3 provides management features so that you can optimize, organize, and configure access to your data to meet your specific business, organizational, and compliance requirements.
To store your data in Amazon S3, you work with resources known as buckets and objects. A bucket is a container for objects. An object is a file and any metadata that describes that file. To store an object in Amazon S3, you create a bucket and then upload the object to a bucket. When the object is in the bucket, you can open it, download it, and move it. When you no longer need an object or a bucket, you can clean up your resources.
There are numerous authentication methods in order to access an S3 location. Programmatic access is accomplished using AWS access keys, which is a combination of an access key ID (for example, AKIAIOSFODNN7EXAMPLE) and secret access key (for example, wJalrXUtnFEMI/K7MDENG/bPxRfiCYEXAMPLEKEY) as a set.
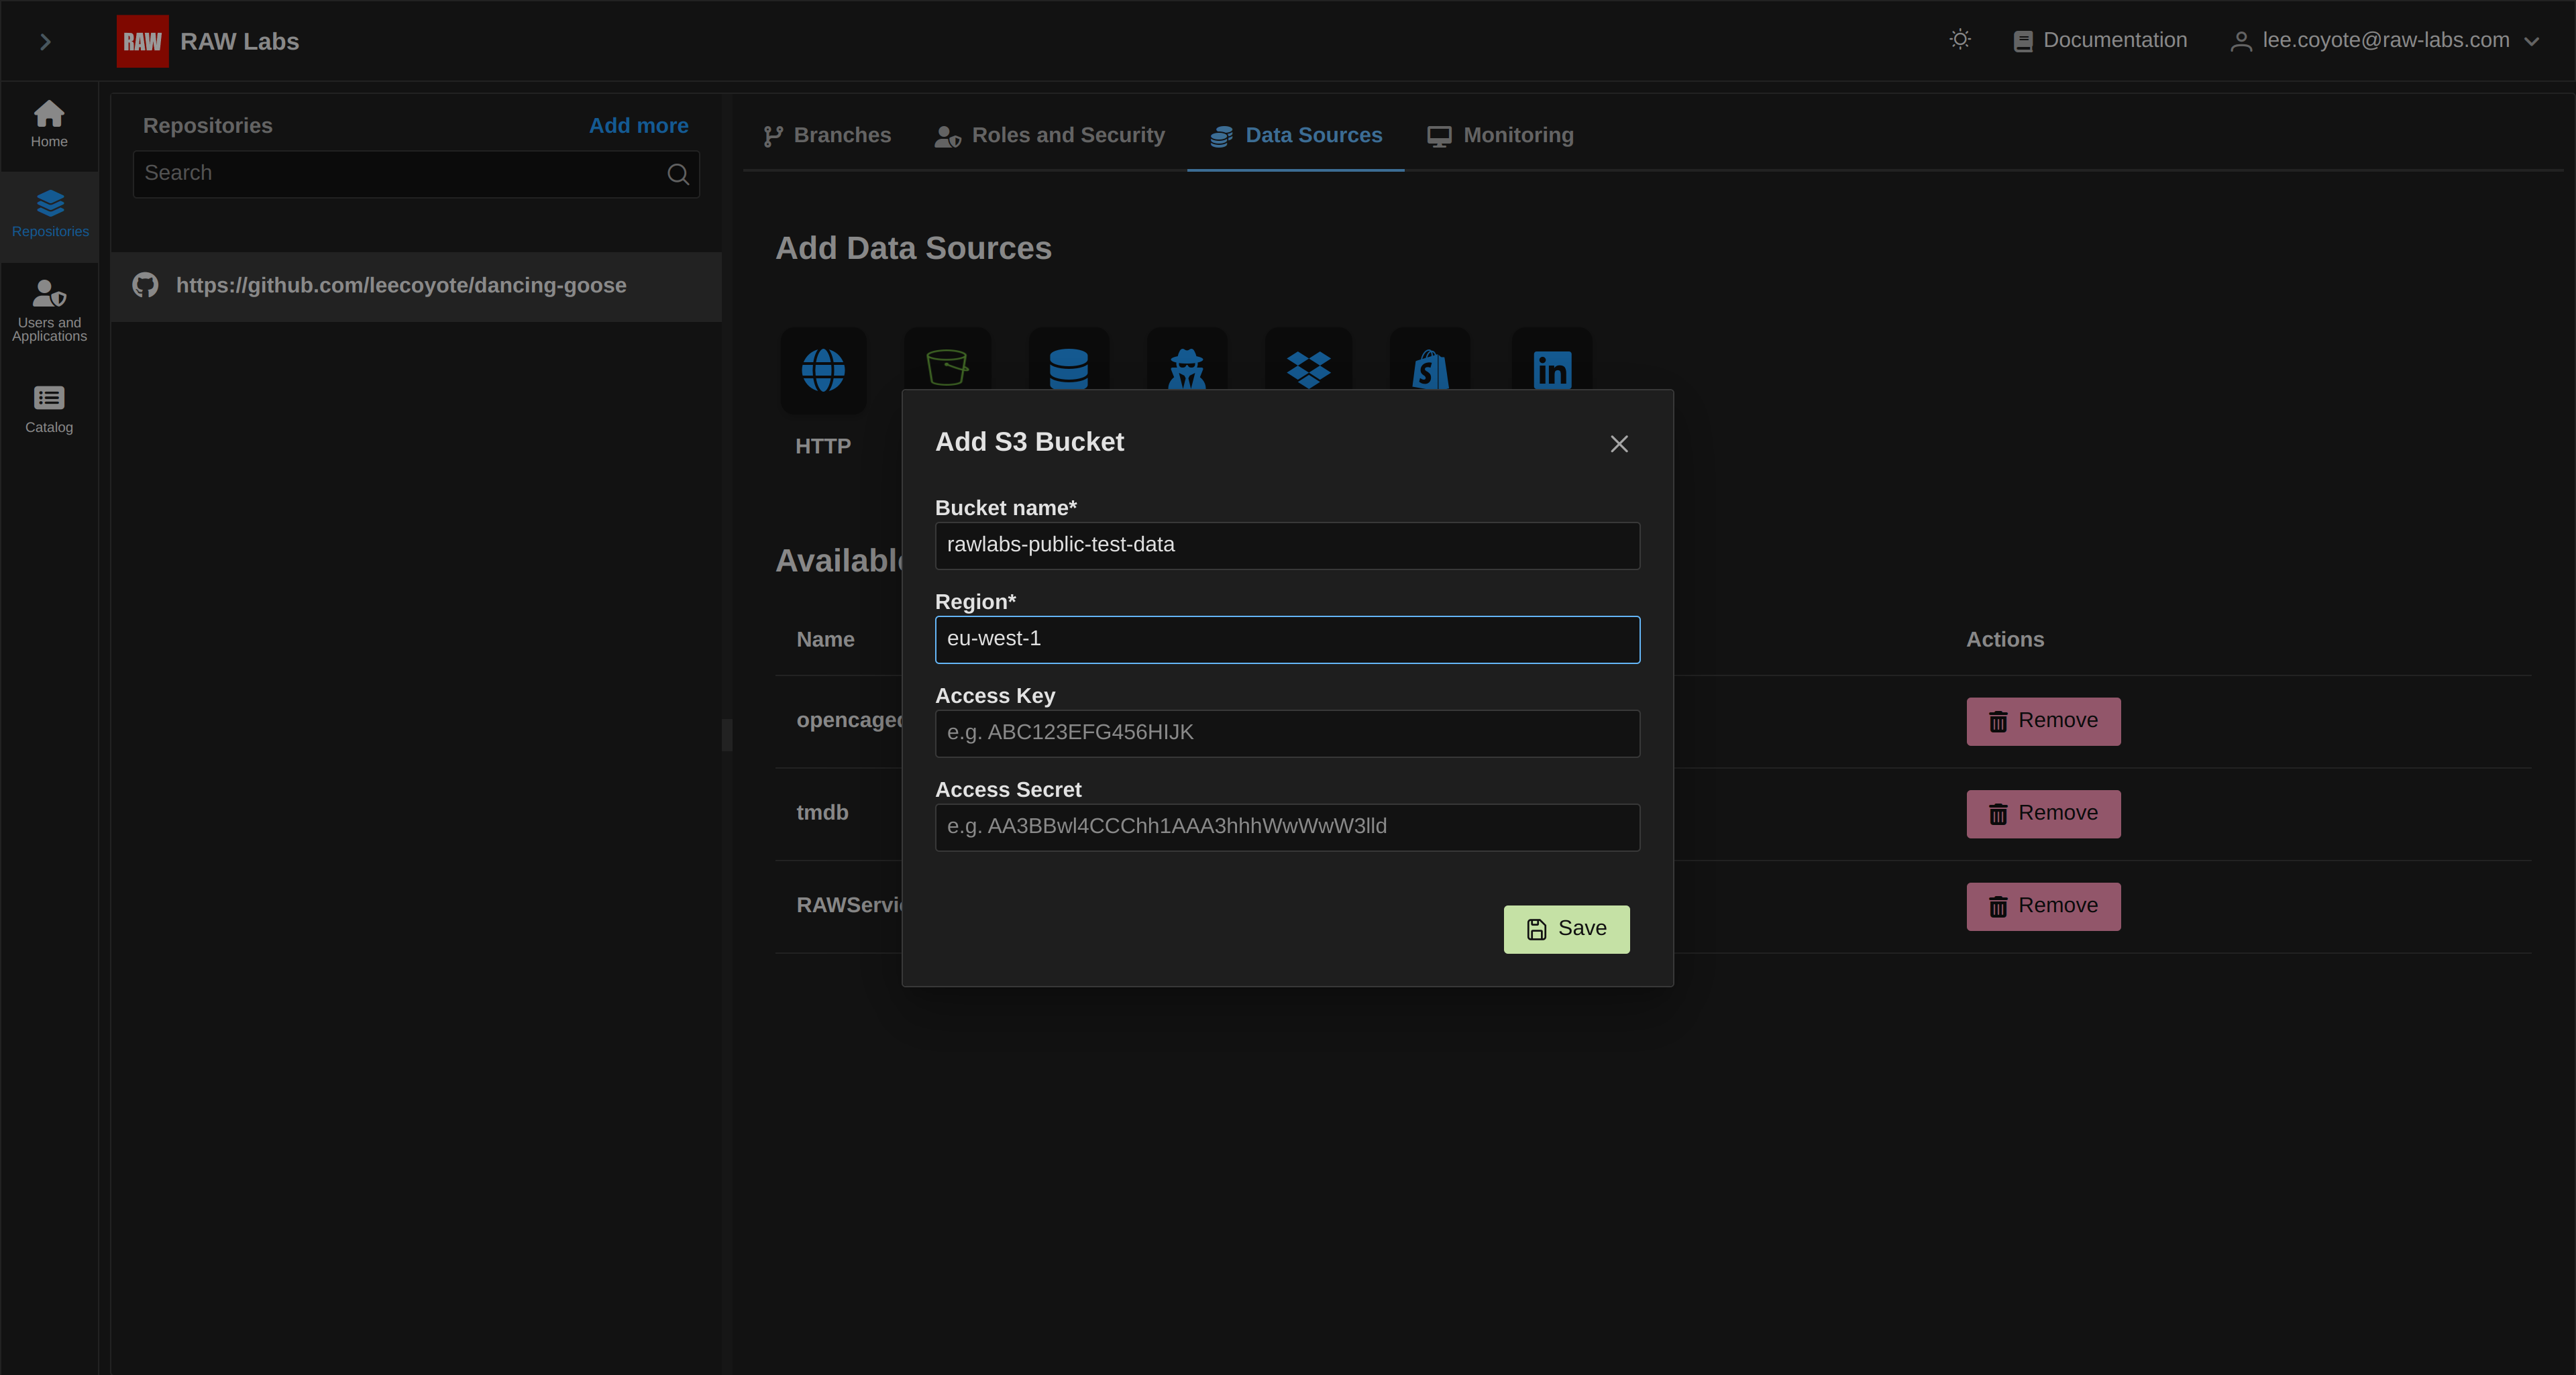
Using the S3 tab from the 'Credentials' list, we are able to set up public or private S3 buckets that reference data we want to process. To set up an S3 bucket, select the 'S3' button from the 'Credentials' tab, and you will be presented with the following form:
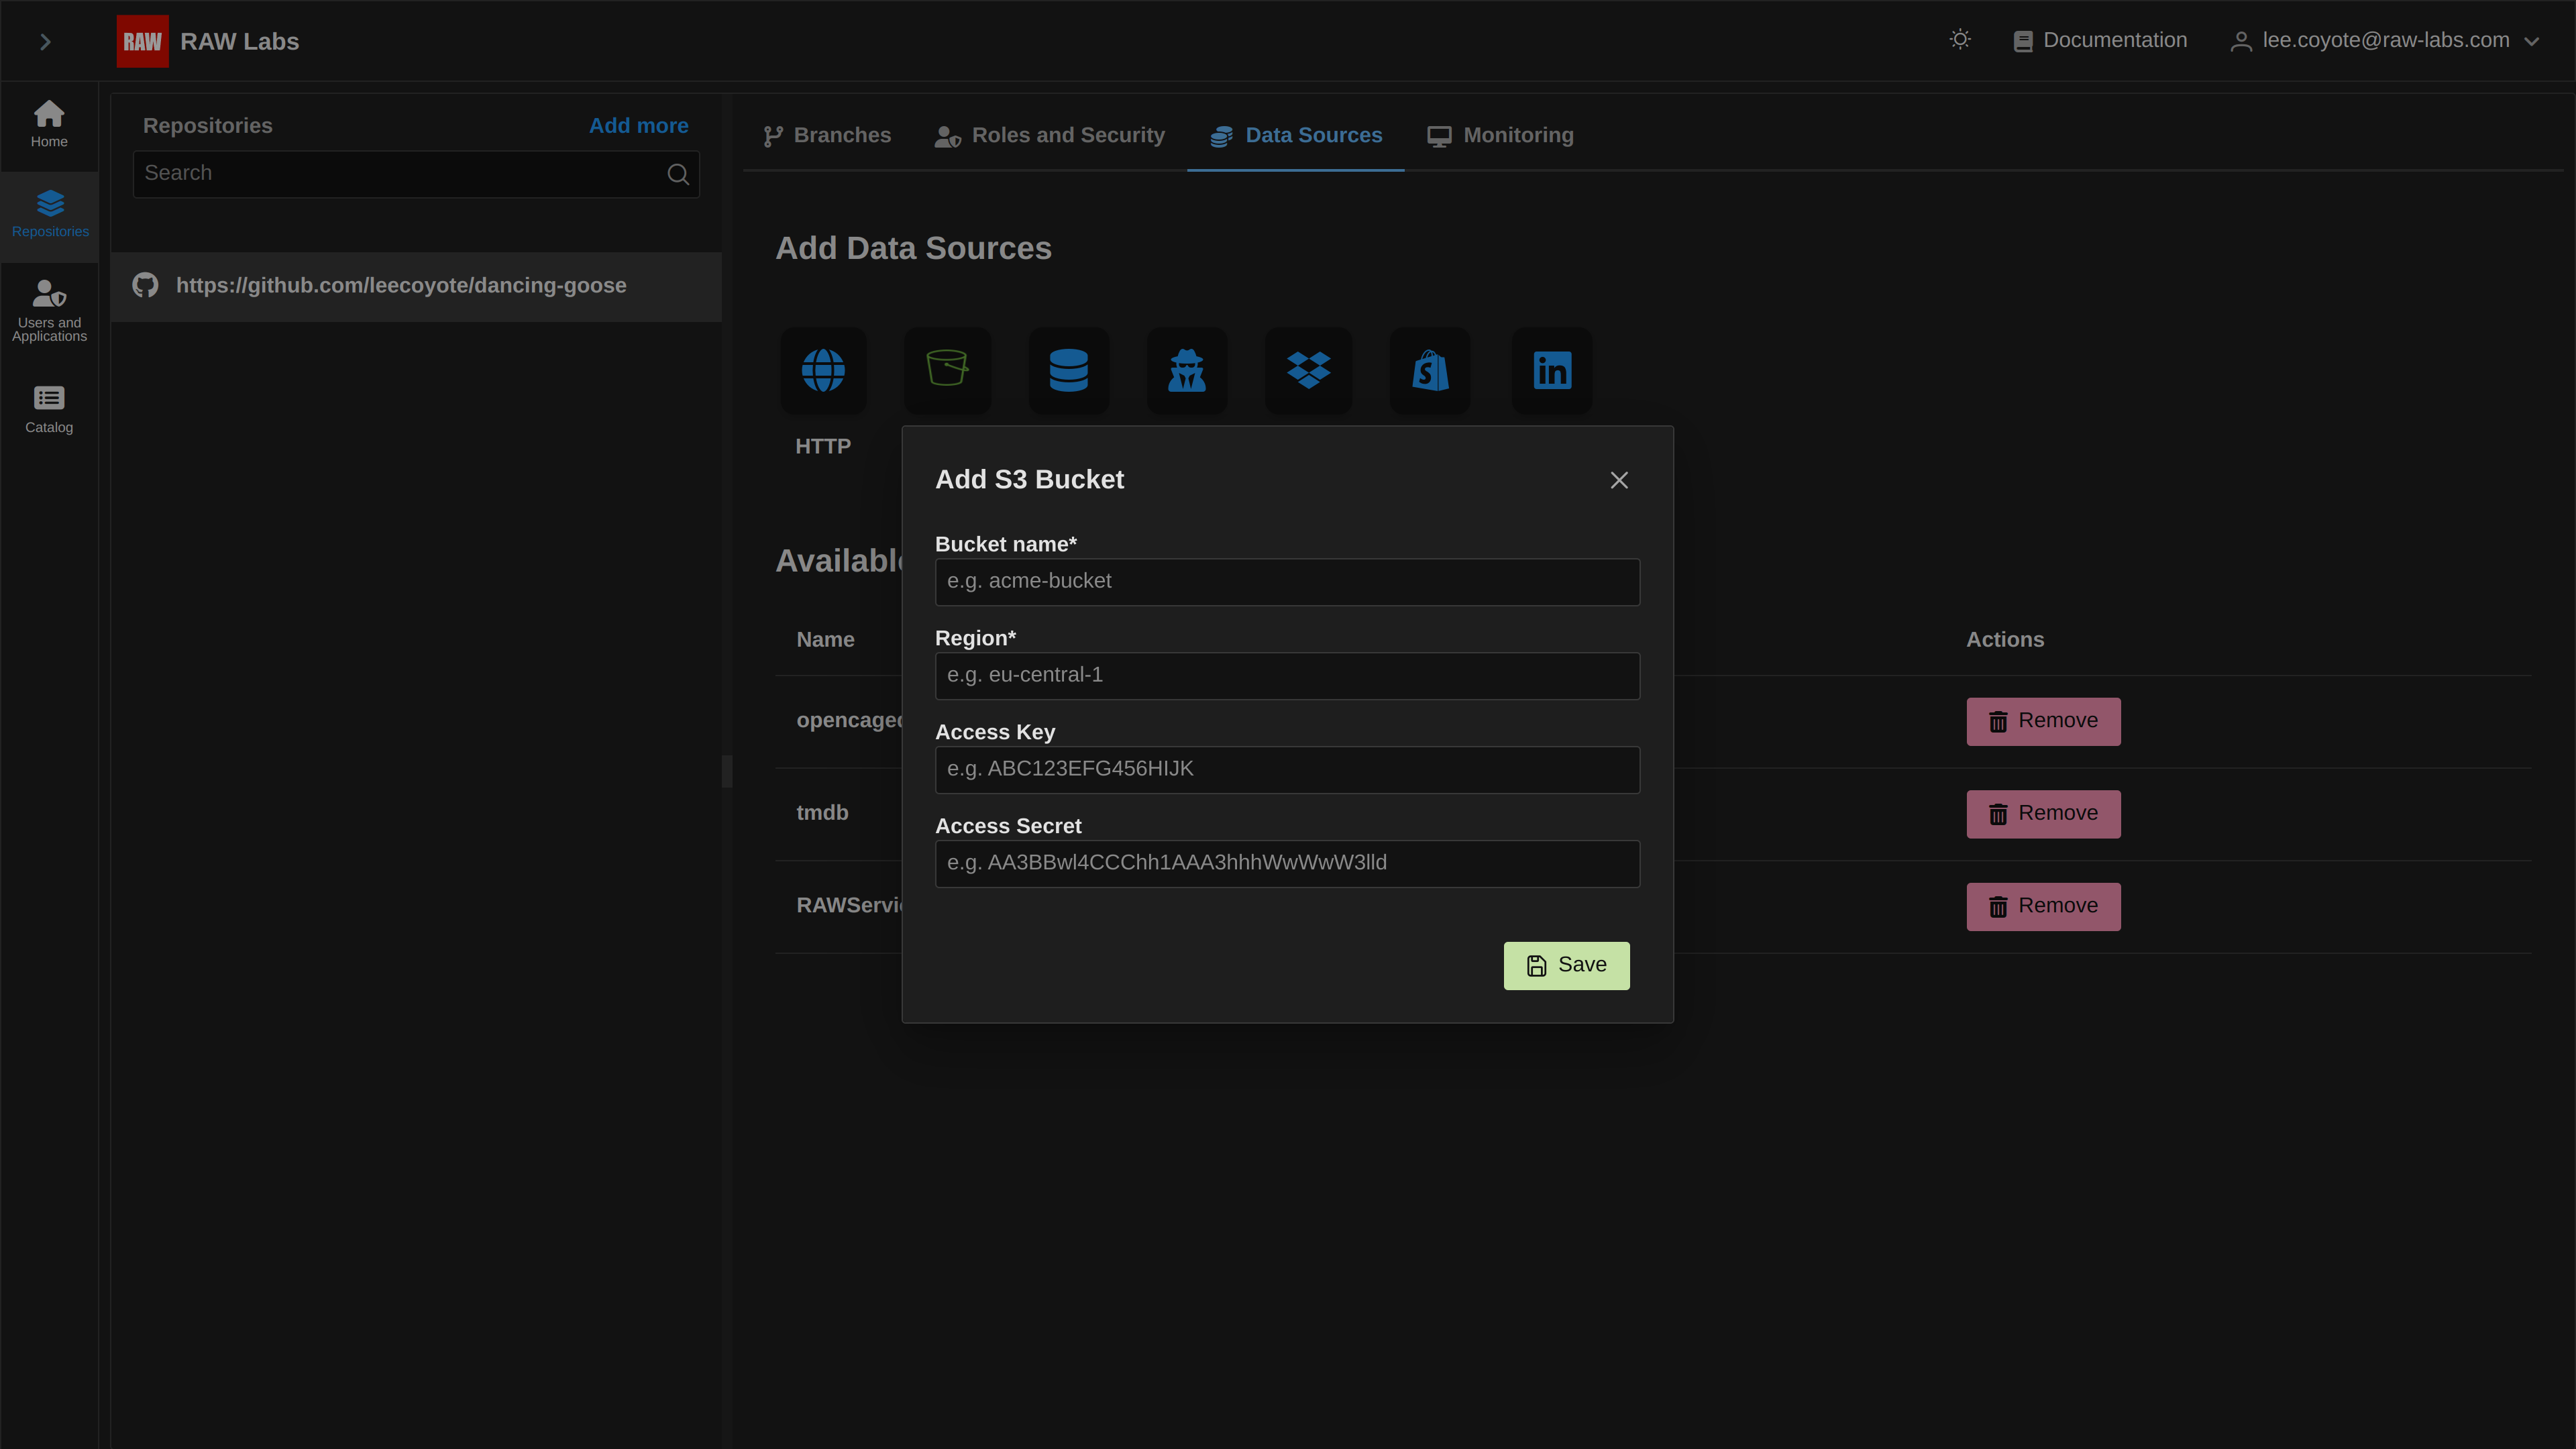
First, let's prepare a public bucket:
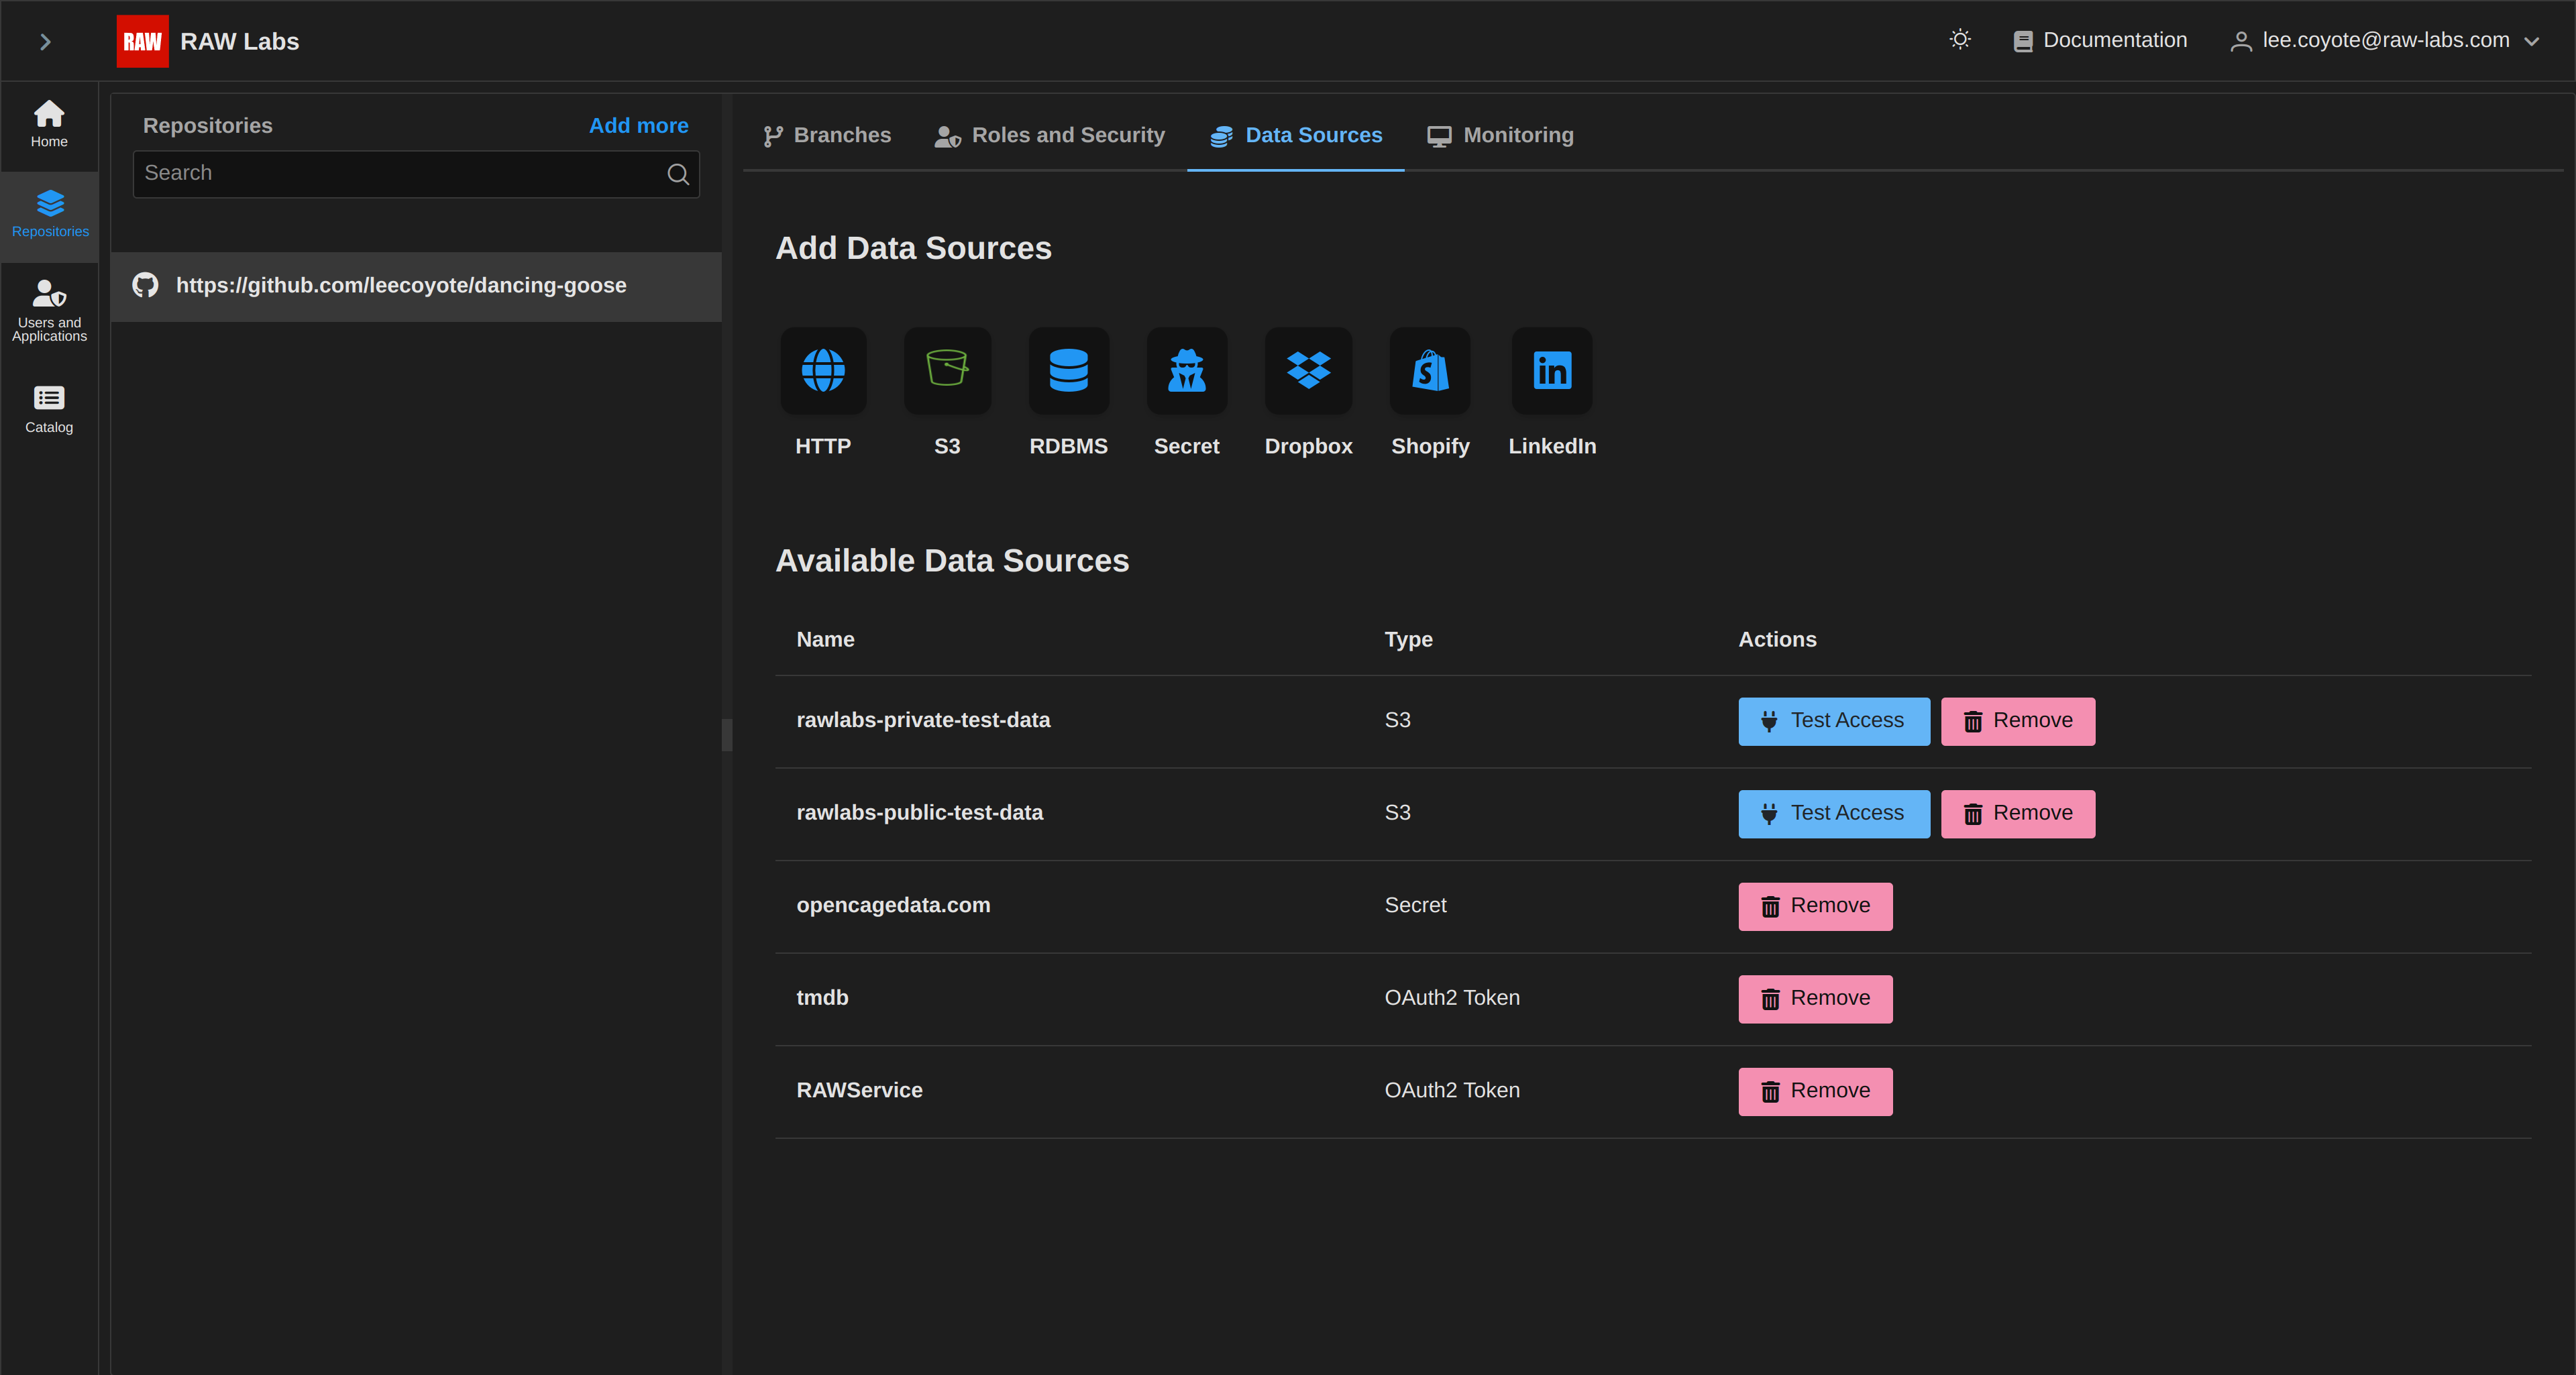
Select Save and you can see the generated entry in the list of Credentials:

By selecting Test Access, you can test the accessibility of the Credential:

The same process is followed for specifying private buckets. Again, after selecting S3, enter the bucket name, the respective region, and our AWS credentials, access key and access secret respectively:
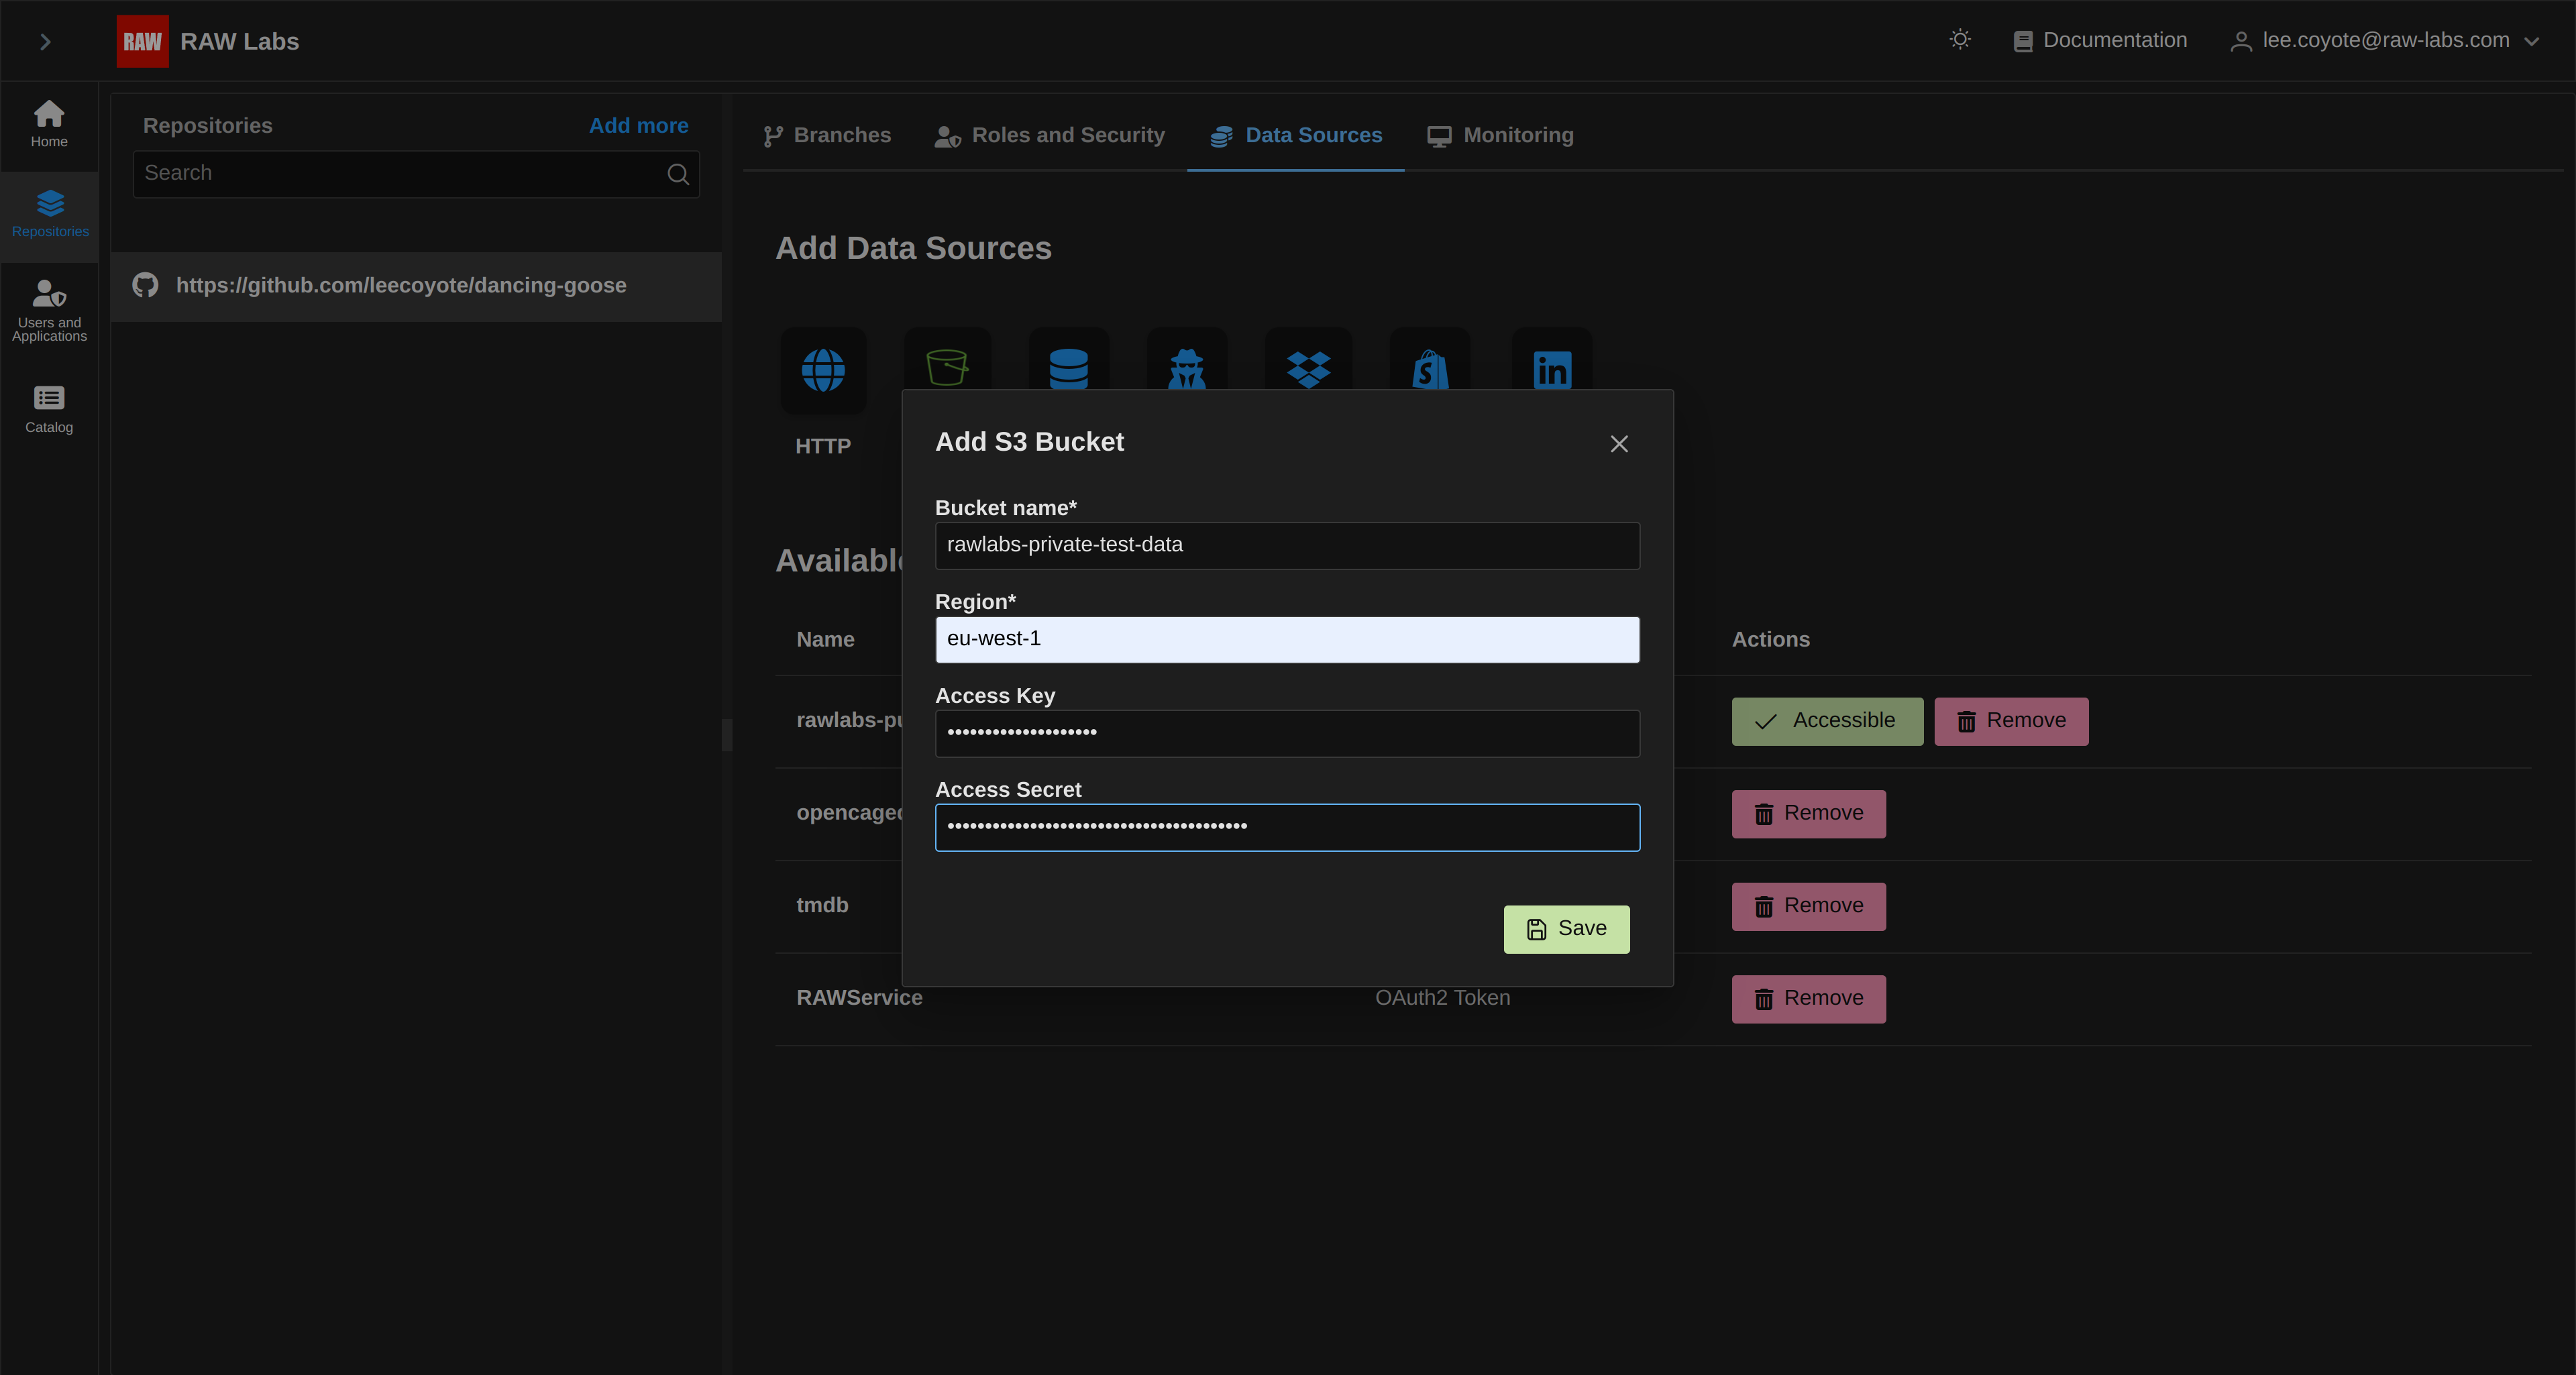
After selecting Save, the generated entry can be visuzalised in the list of Credentials:
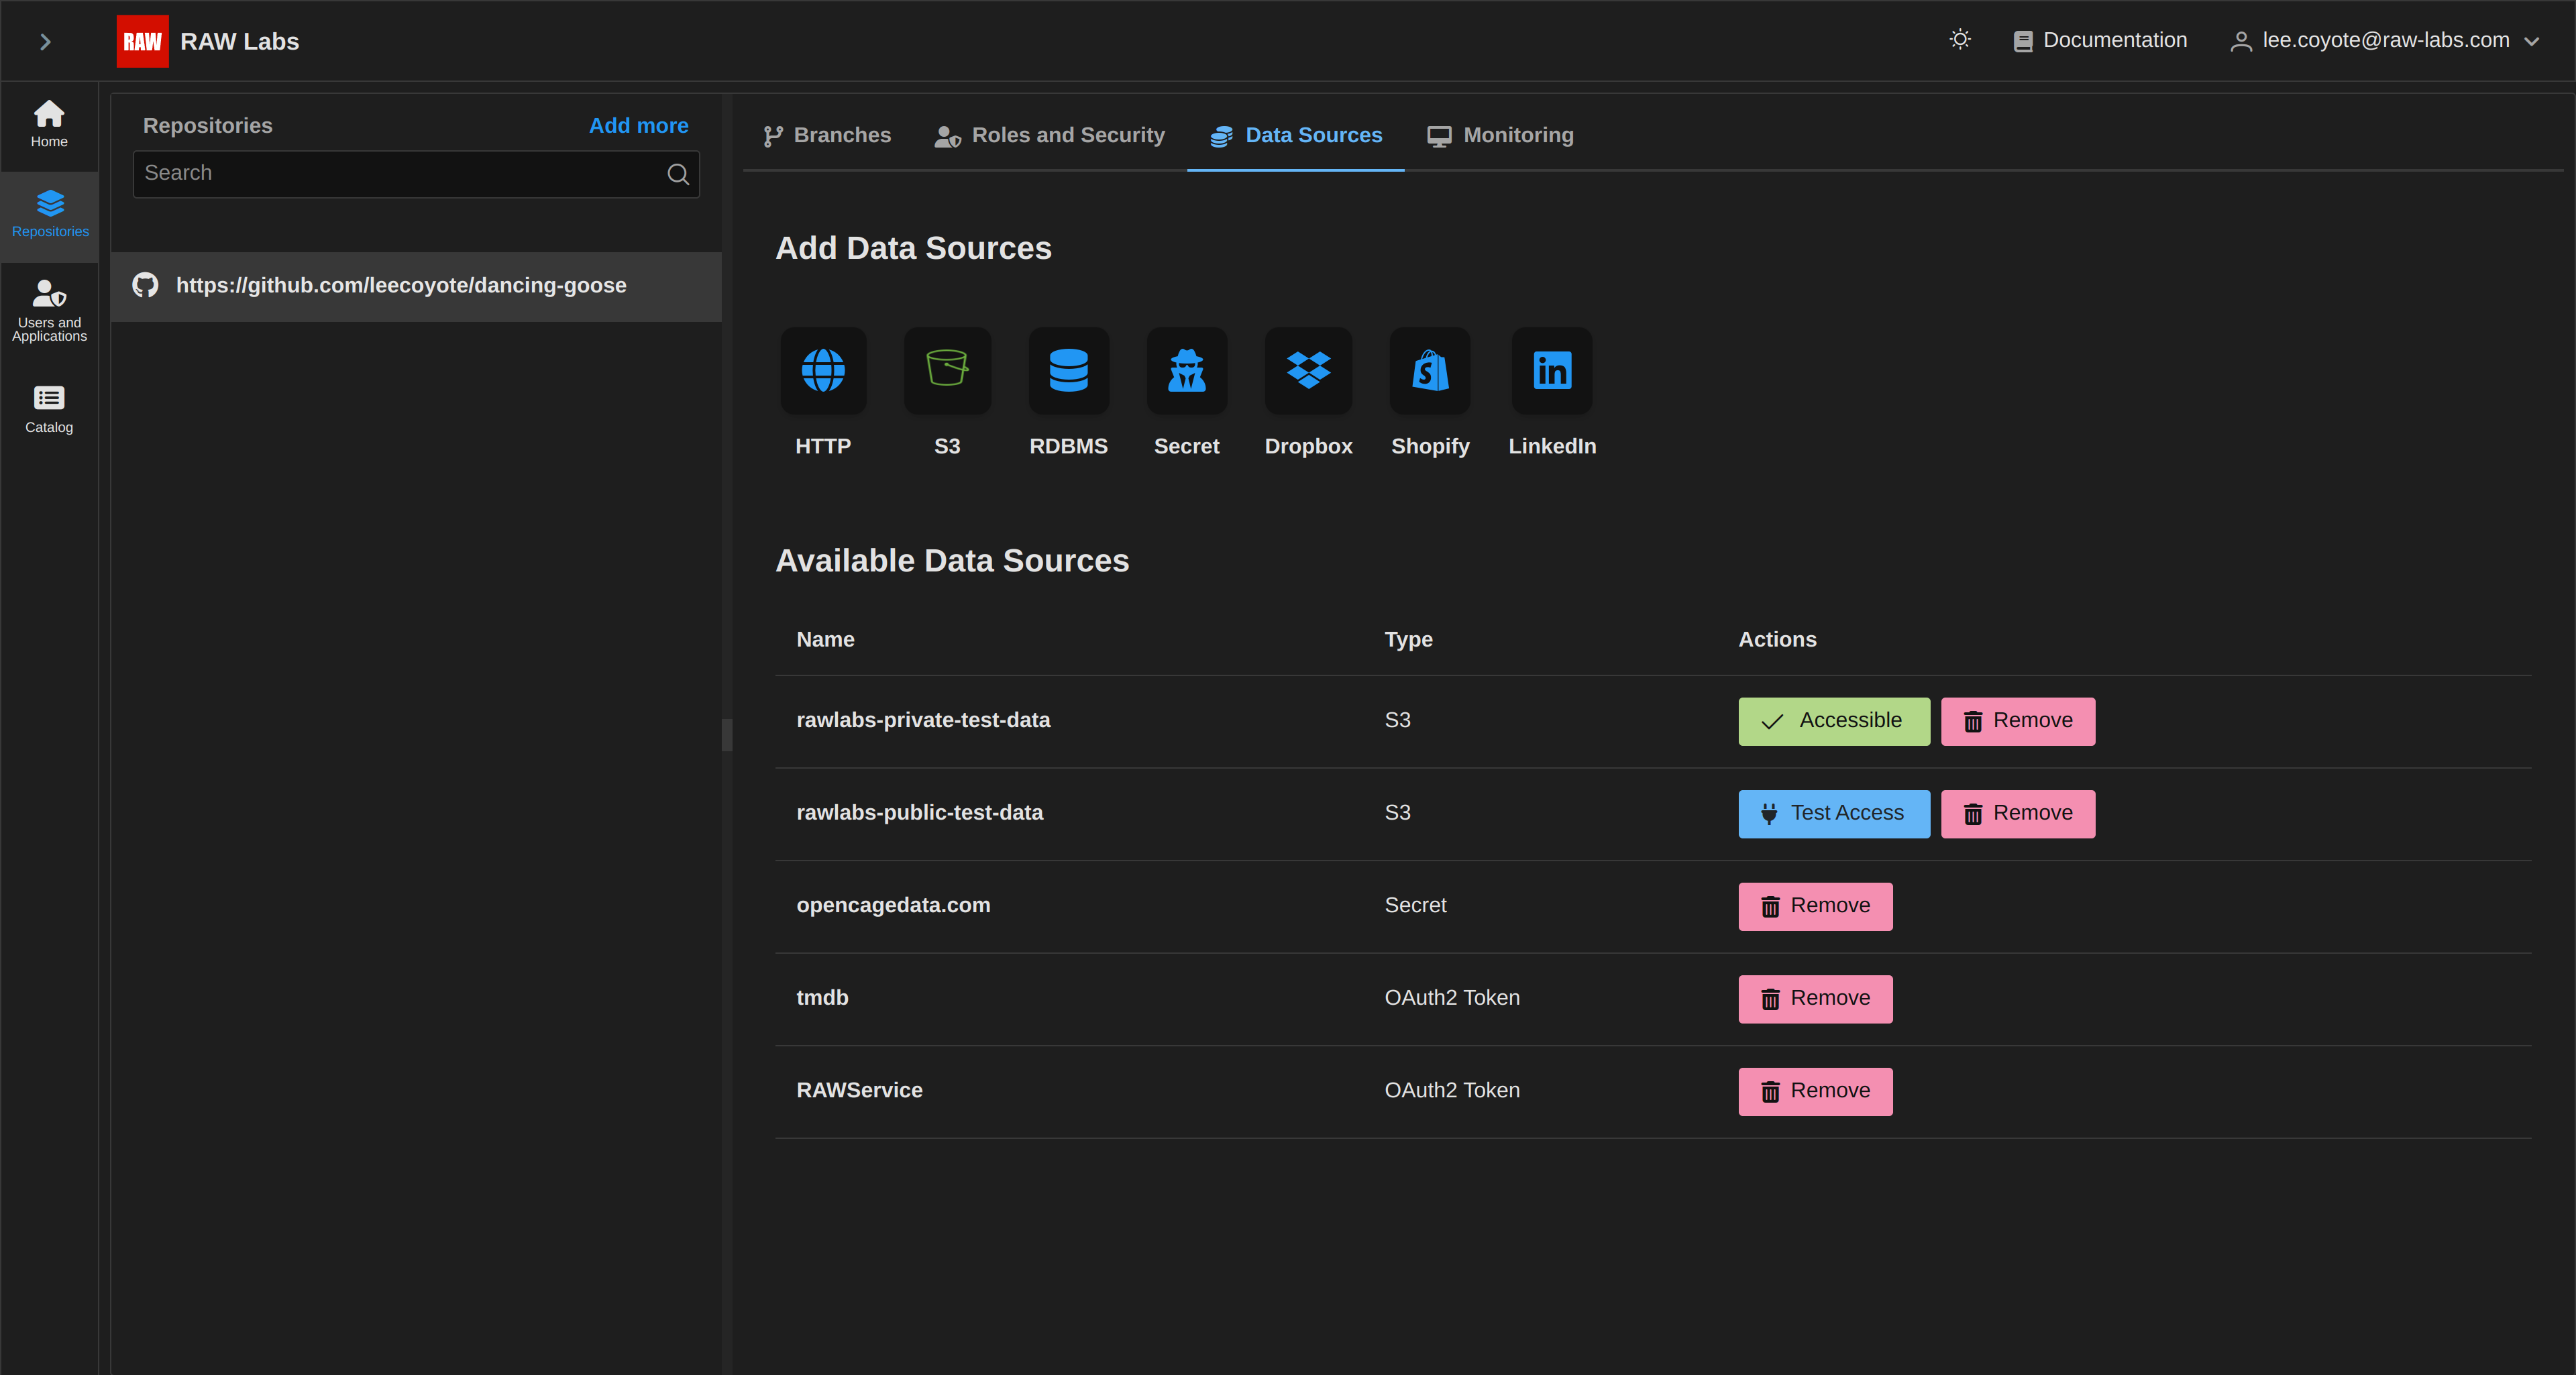
Checking whether the new Credential can be accessed by RAW is accomplished by clicking on Test Access:
If the specified bucket does not exist or is not accessible, we receive the following error message:

Example
An example of usage can be found in the following code:
athlete(name: string) =
  let
     summer = Csv.InferAndRead("s3://rawlabs-private-test-data/summer_olympics.csv"),
     winter = Csv.InferAndRead("s3://rawlabs-public-test-data/winter_olympics.csv"),
     total = Collection.Union(summer, winter)
  in
    Collection.Filter(total, x -> x.Athlete == name)
As can be seen above, the function athlete creates a UNION from reading CSV files residing in a private and public S3 bucket respectively. Then uses this union to search athletes by name.
RDBMS
Description
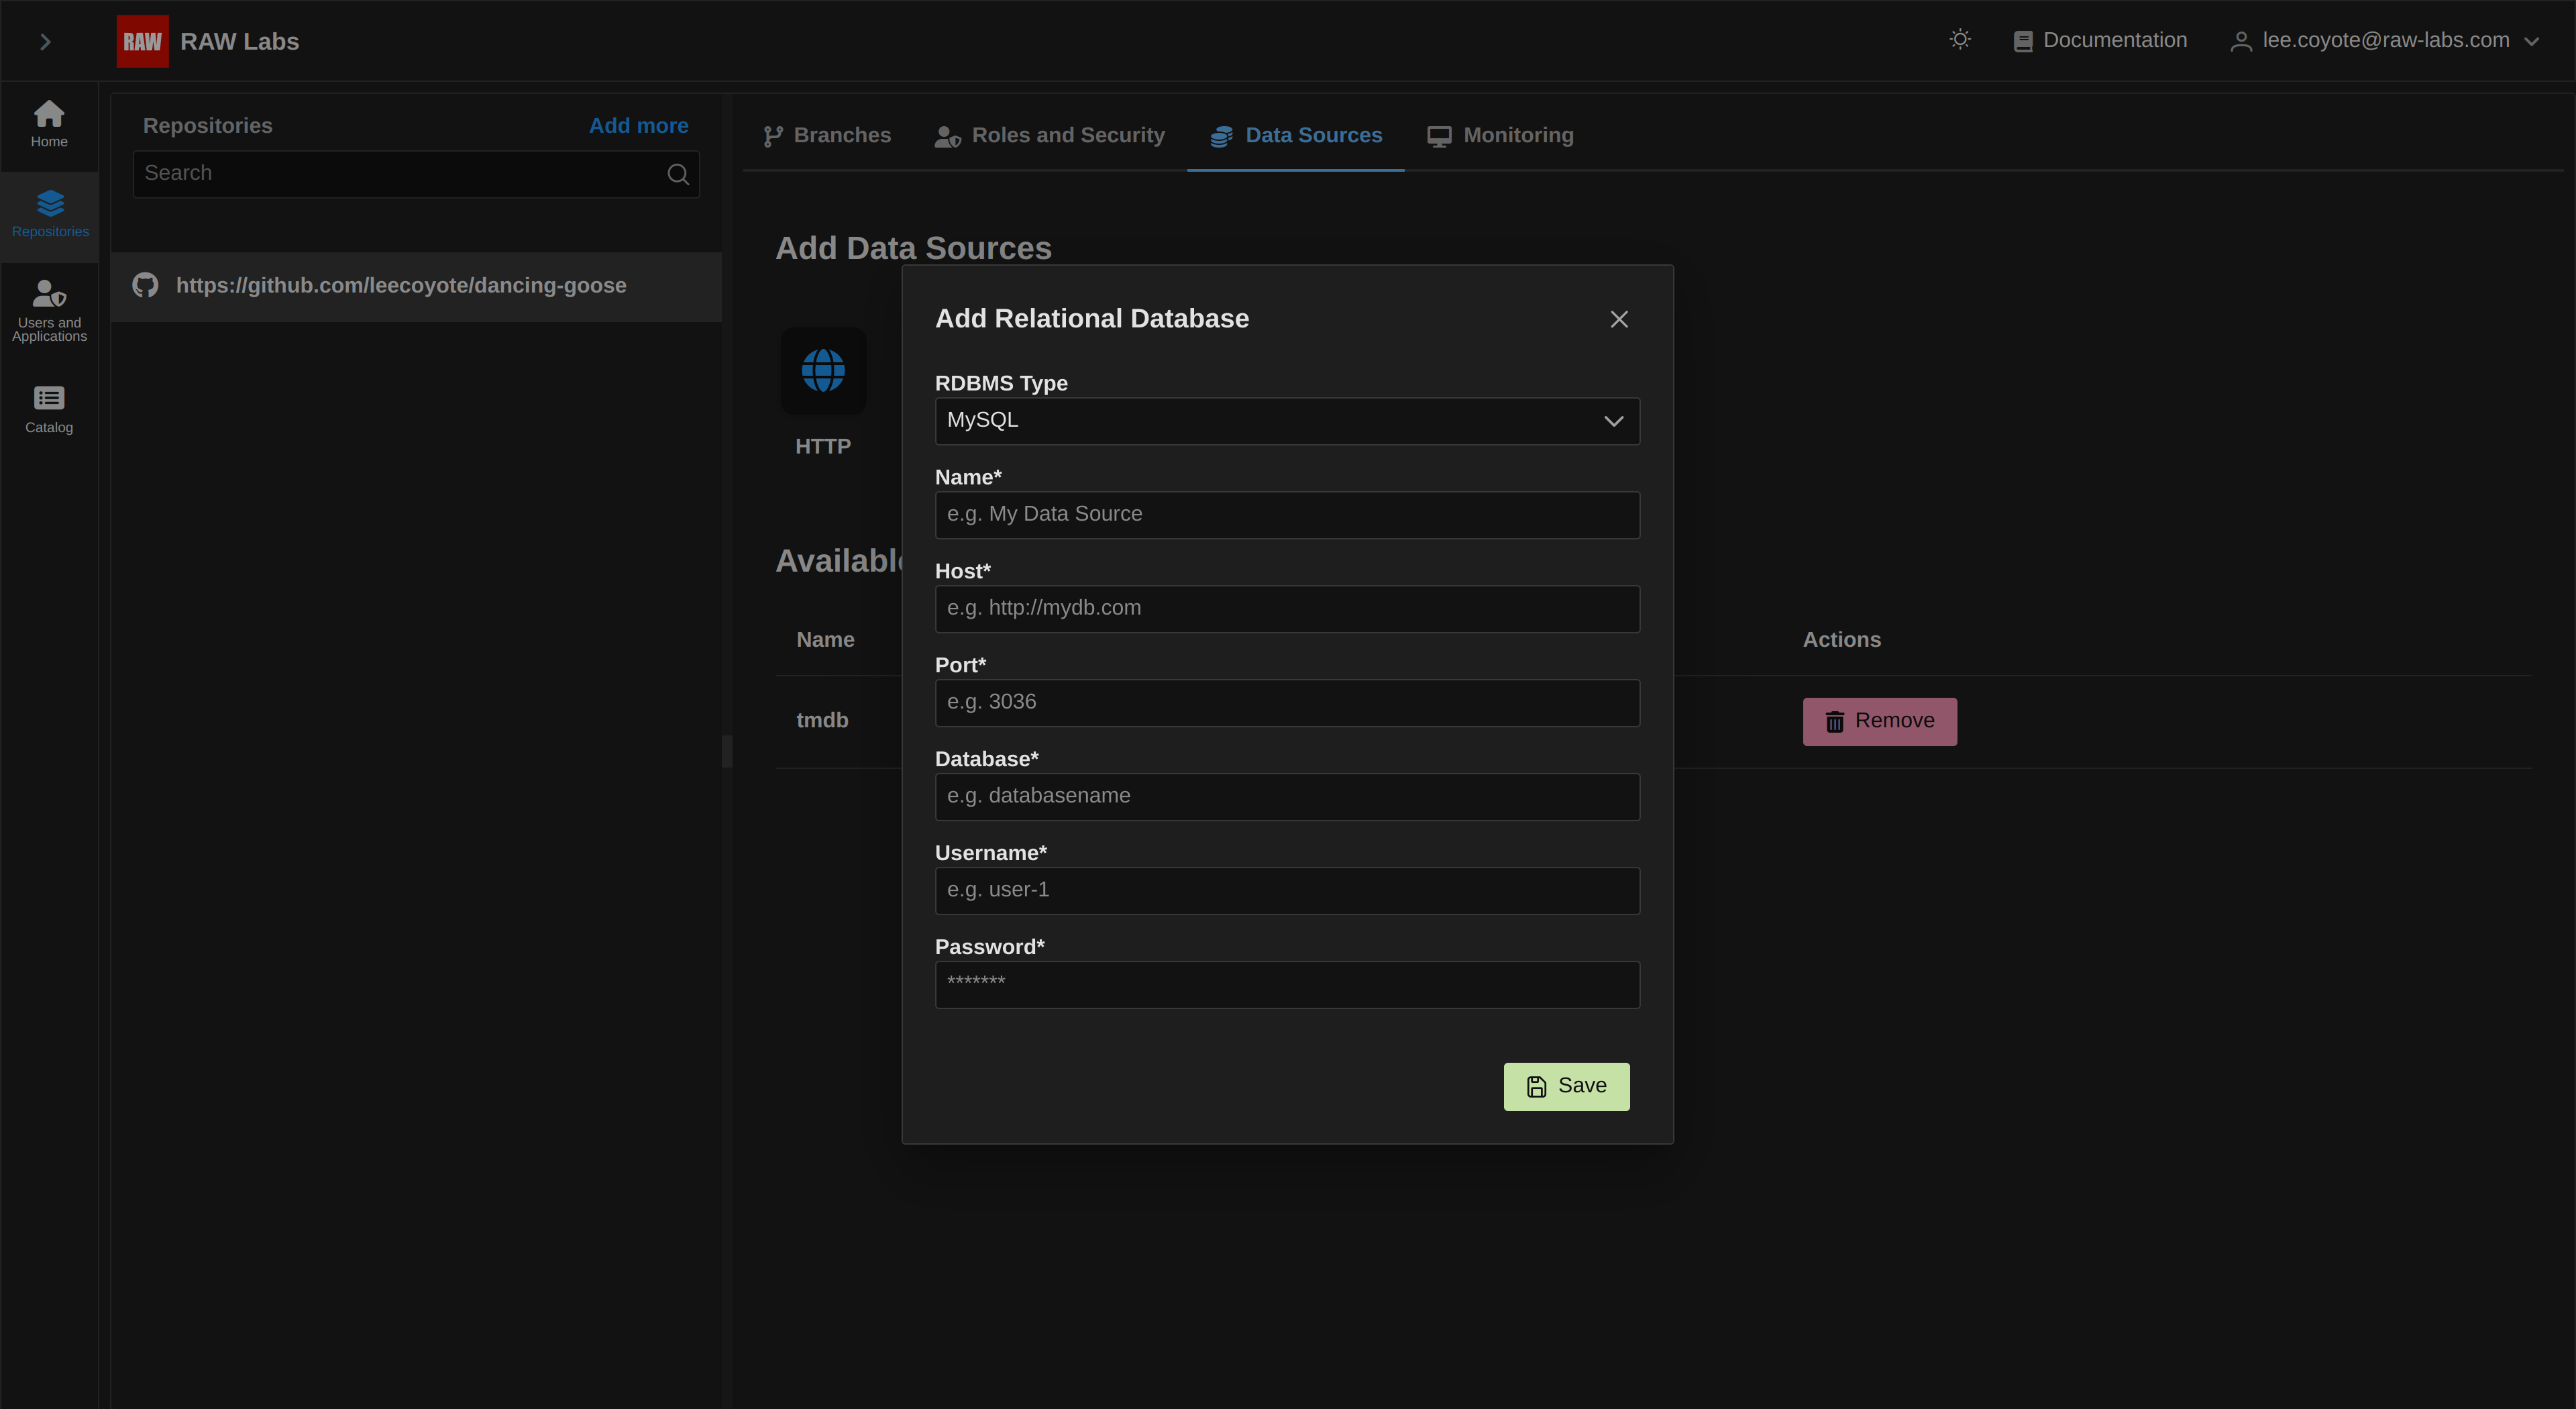
RAW supports using relational databases as Credentials. In order to set up an RDBMS source, select RDBMS tab from the Credentials view. The following form will be shown:
Currently, RAW supports the following RDBMSs:
- MySQL
- MSSQL Server
- PostgreSQL
- Oracle
- Teradata
For each RDBMS Credential, the following fields need to be specified:
- Name: Represents the name of our instance. This is arbitrary text and is intended to be referenced by our code file
- Host: The IP of the database server, i.e. 'localhost', '10.123.29.253', or 'mydb.mycompany.com'
- Port: The port that our db server is exposed to, e.g. '3306', '5432', etc
- Database: The schema we want to access, e.g. 'my_schema' or 'customers' or 'payments', etc
- Username, Password: Login credentials to our schema.
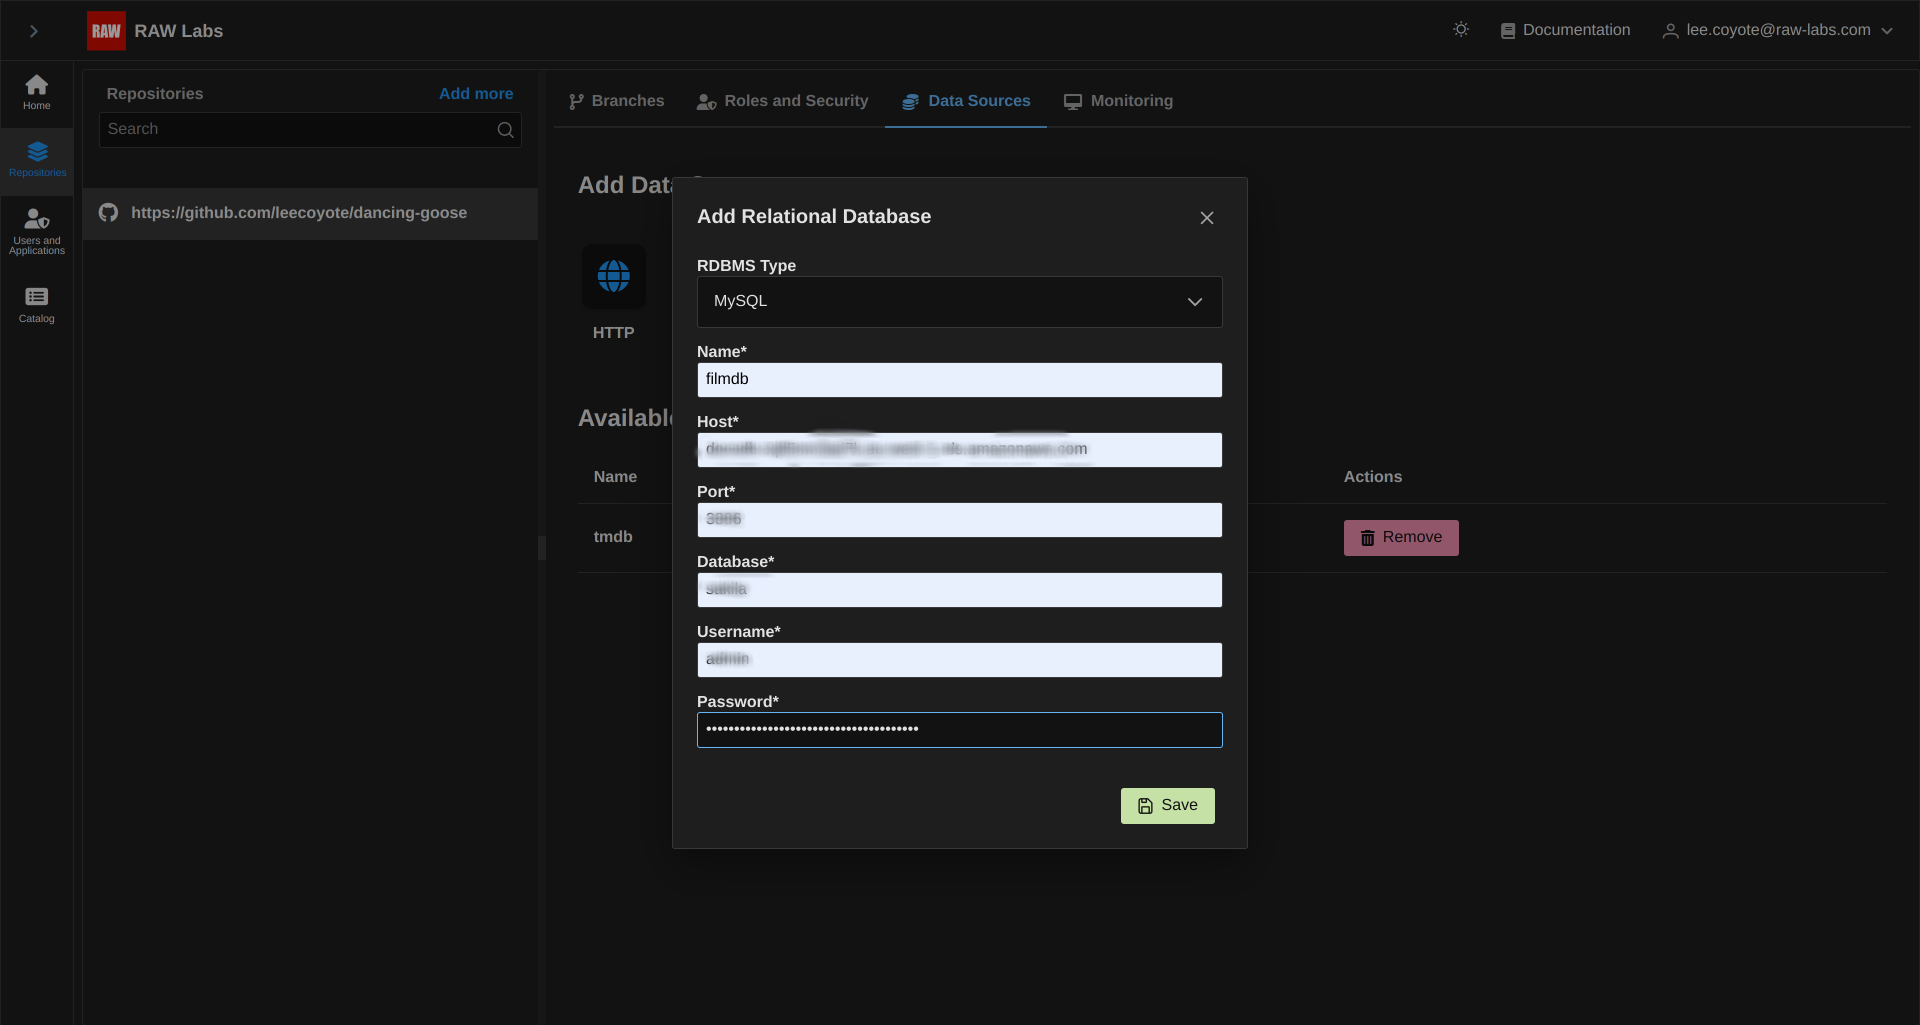
For reference purposes, a sample for MySQL Credential is shown. Fill the respective fields and select Save.
The fields are the following:
All the above are of course cryptographically stored in our system.
In the case that we have provided a host/port that is not accessible by our instance, upon saving the datasource you will see a popup alert on the bottom right side of the screen that will inform you that the specified data are not valid.

In the case where you provided a host/port correctly, but provided wrong credentials, you will again see the entry in the list, but when trying to verify accessibility you will get the visual notification 'No Access'
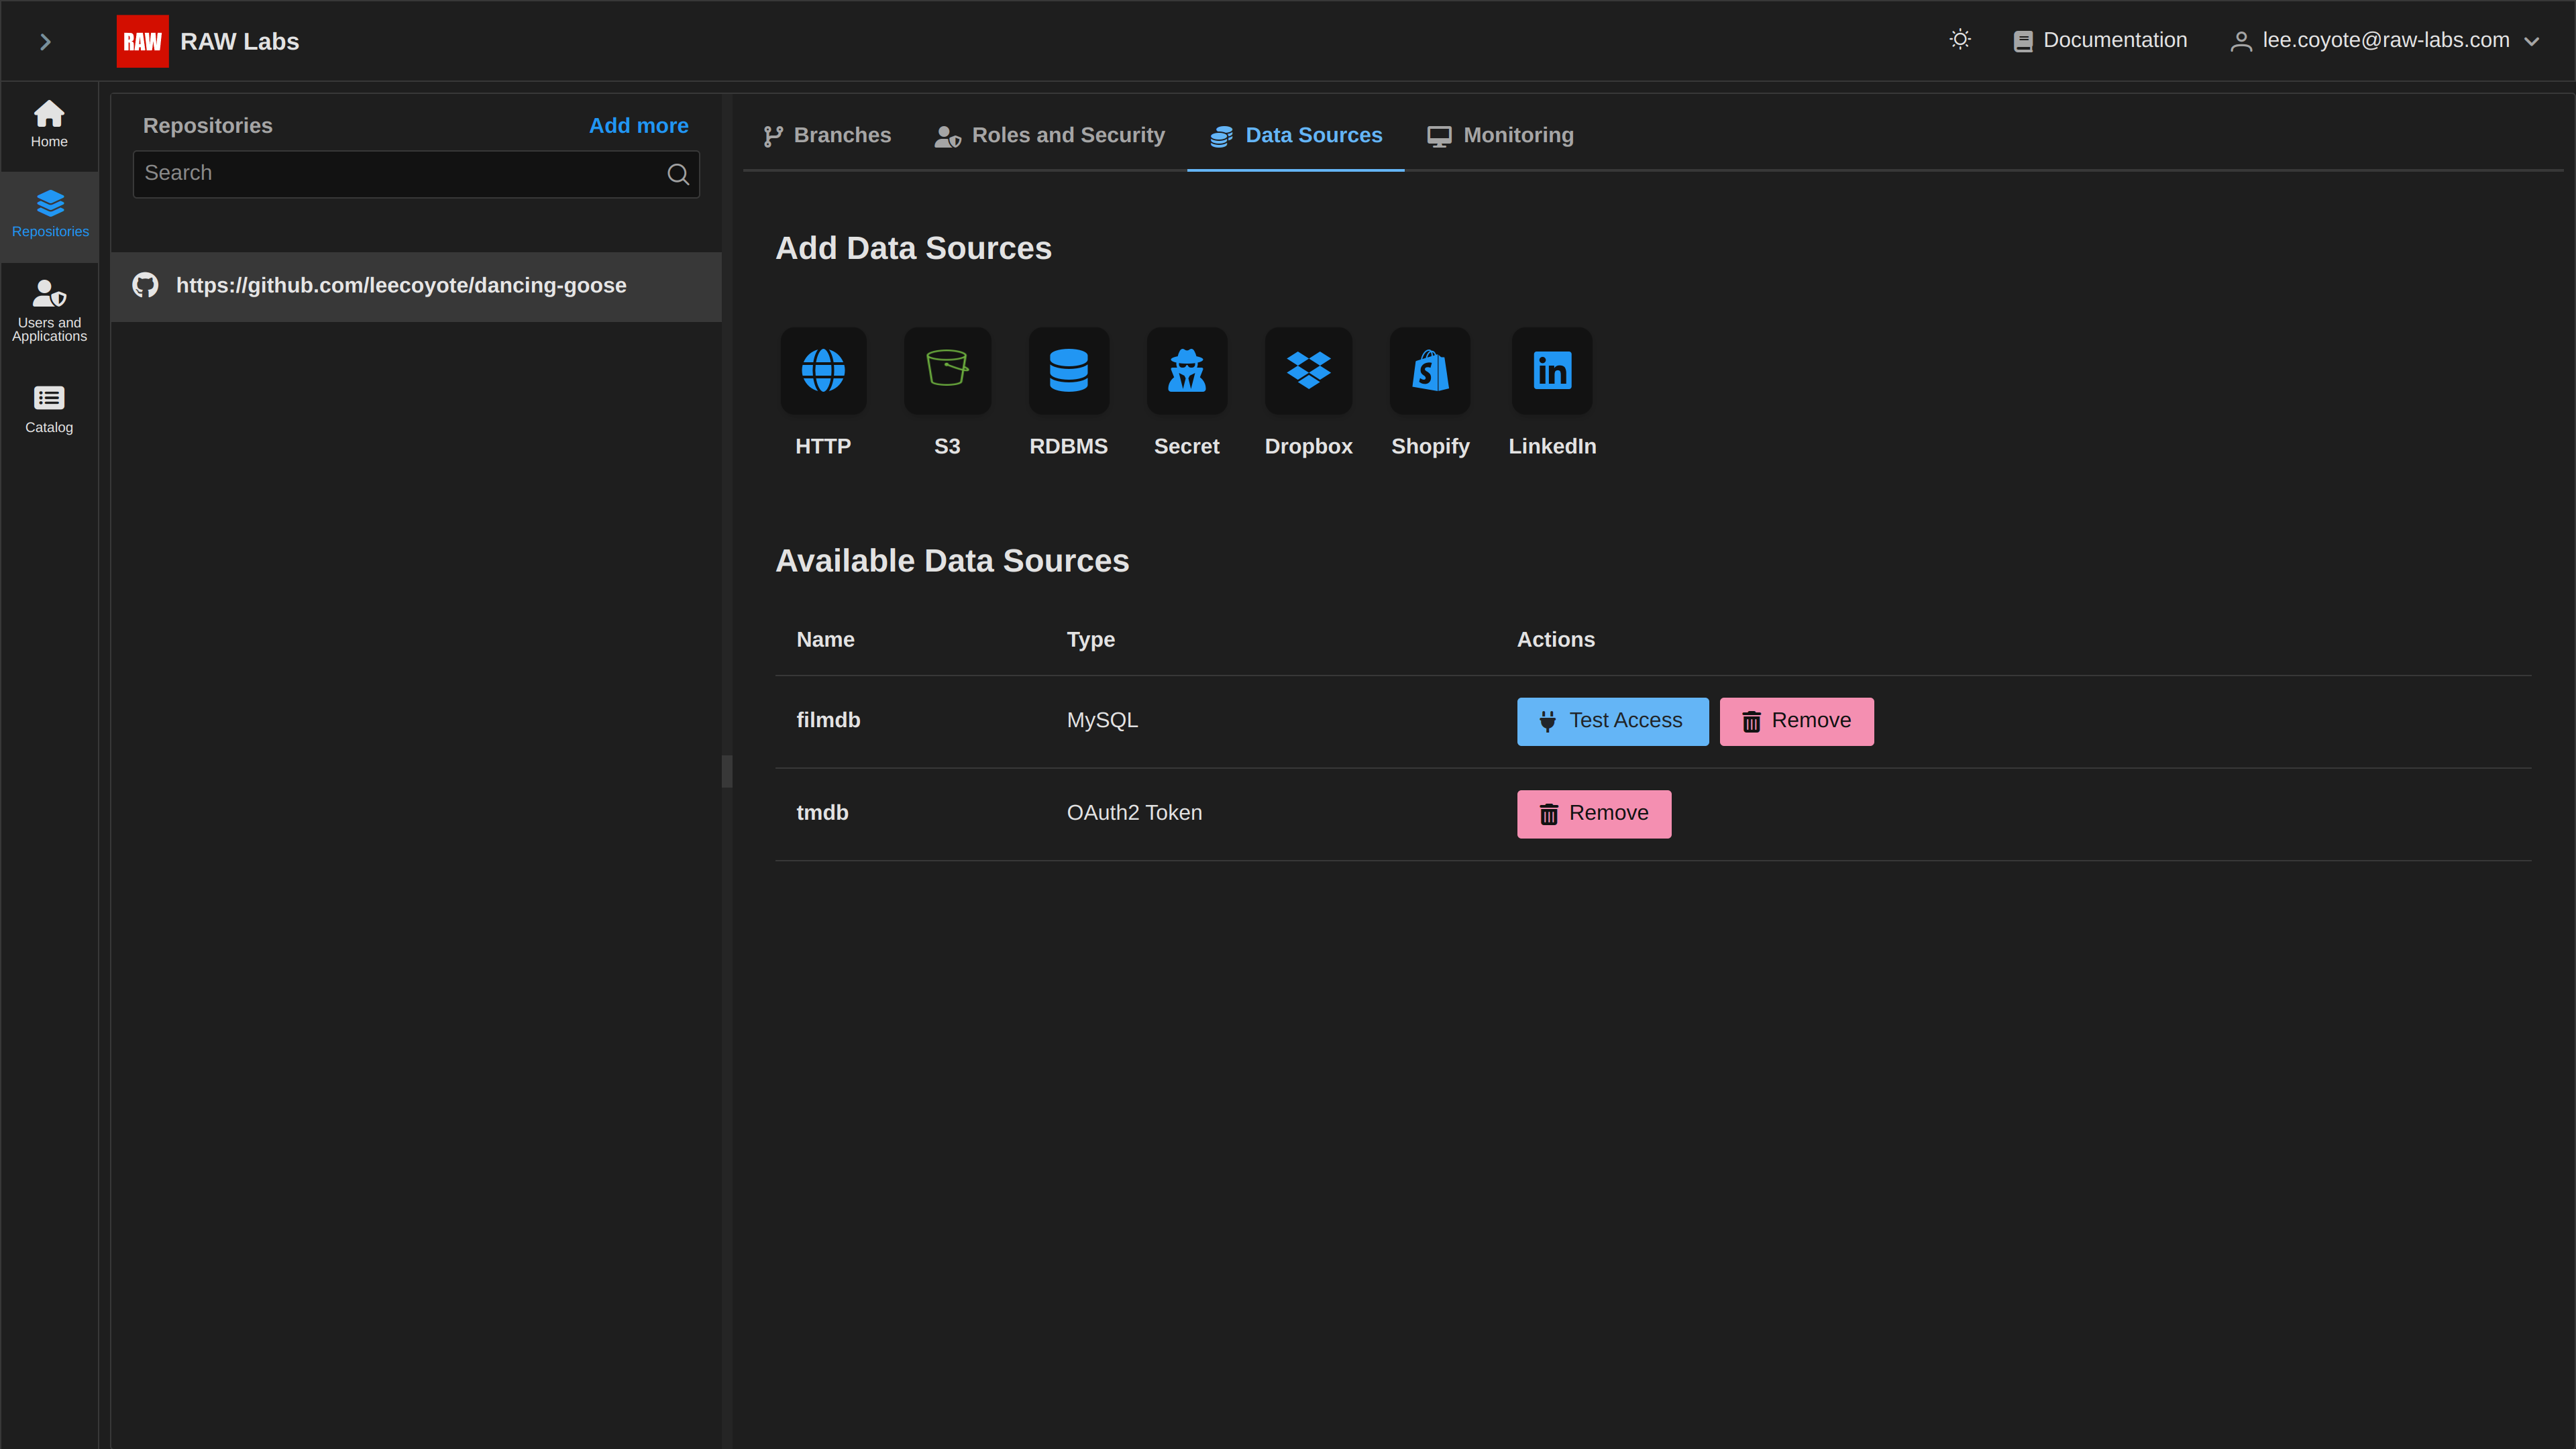
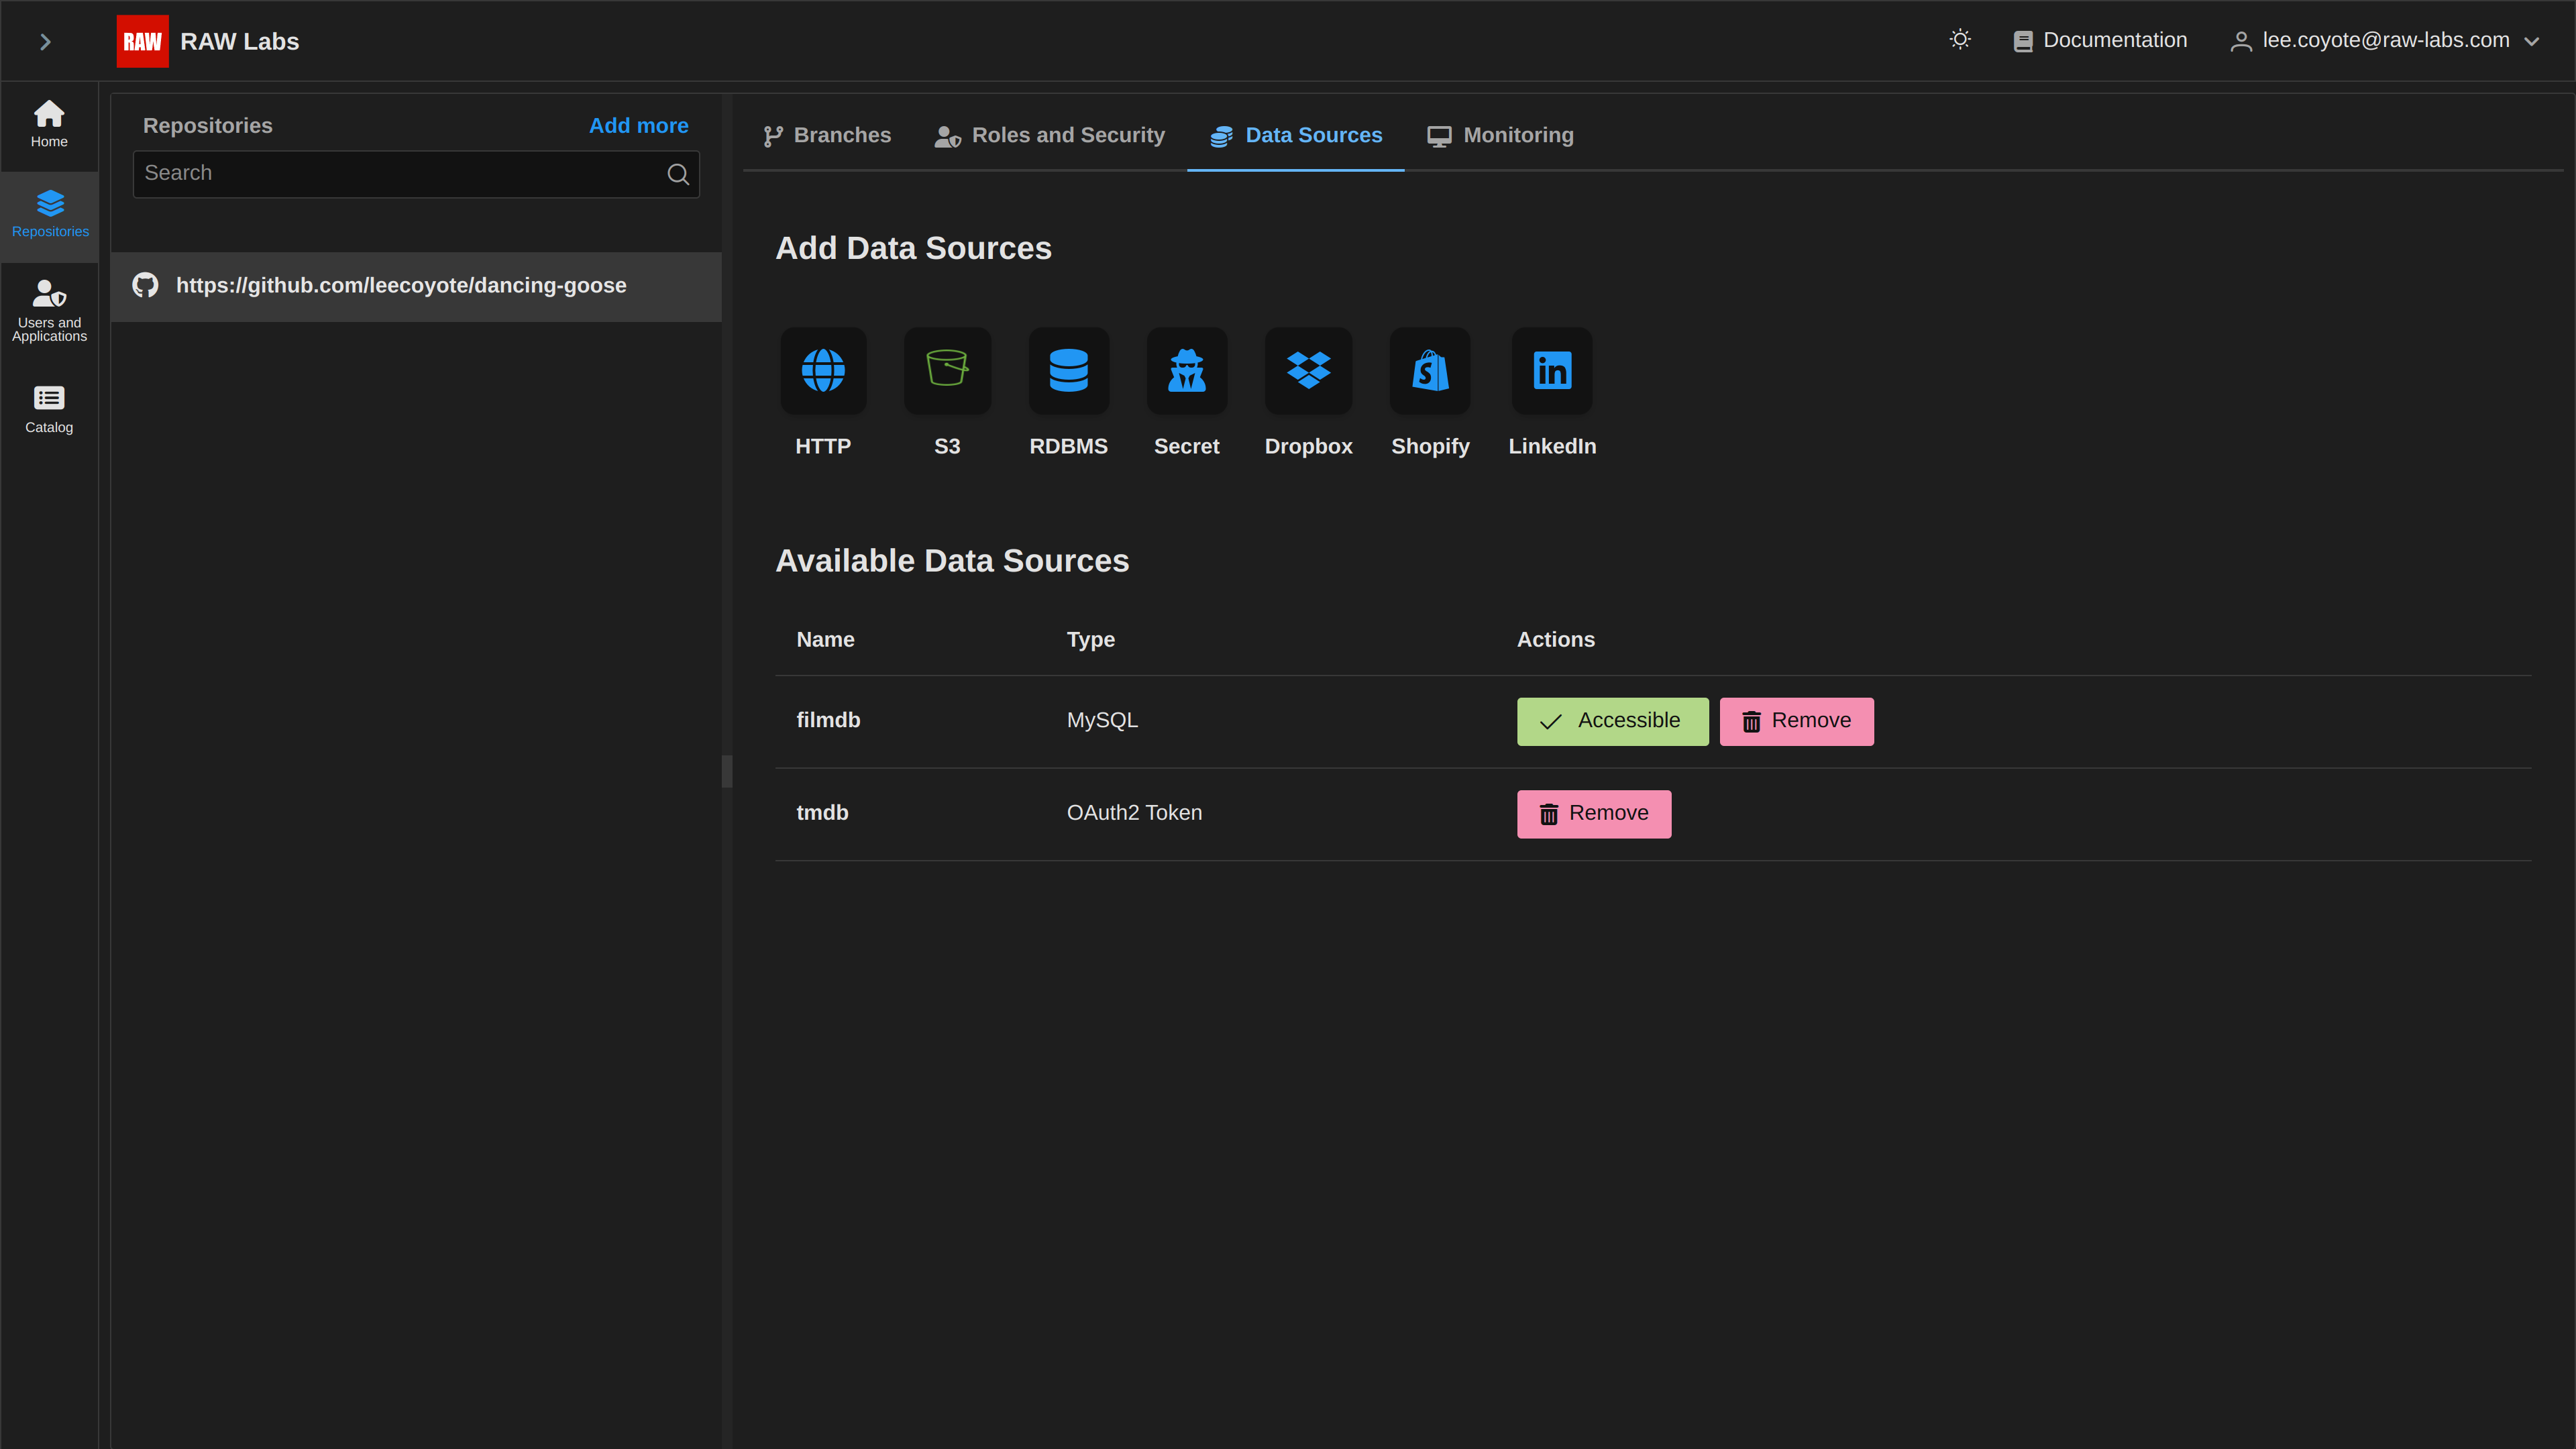
After selecting 'Test Access', and if our datasource is indeed accessible, we will see the visual notification on the changed button, as 'Accessible'
Example
An example of SQL access can be seen in the following code:
actors(name: string) =
    let
        data = MySQL.InferAndRead("filmdb", "actor")
    in
        Collection.Filter(data, x -> x.first_name == name)
Secret
Description
Secret serves as a flexible and interchangeable data encryption mechanism. It is essentially a key-value pair with the key being the secret name and the actual secret payload being the value. Users have the ability to create arbitrary named secrets and employ them in Snapi queries.
In order to add a secret, select the Secret from the Credentials tab. Then enter the secret payload. In this example, an tmpdb_api_key is stored as a secret for our demo TMDB API.
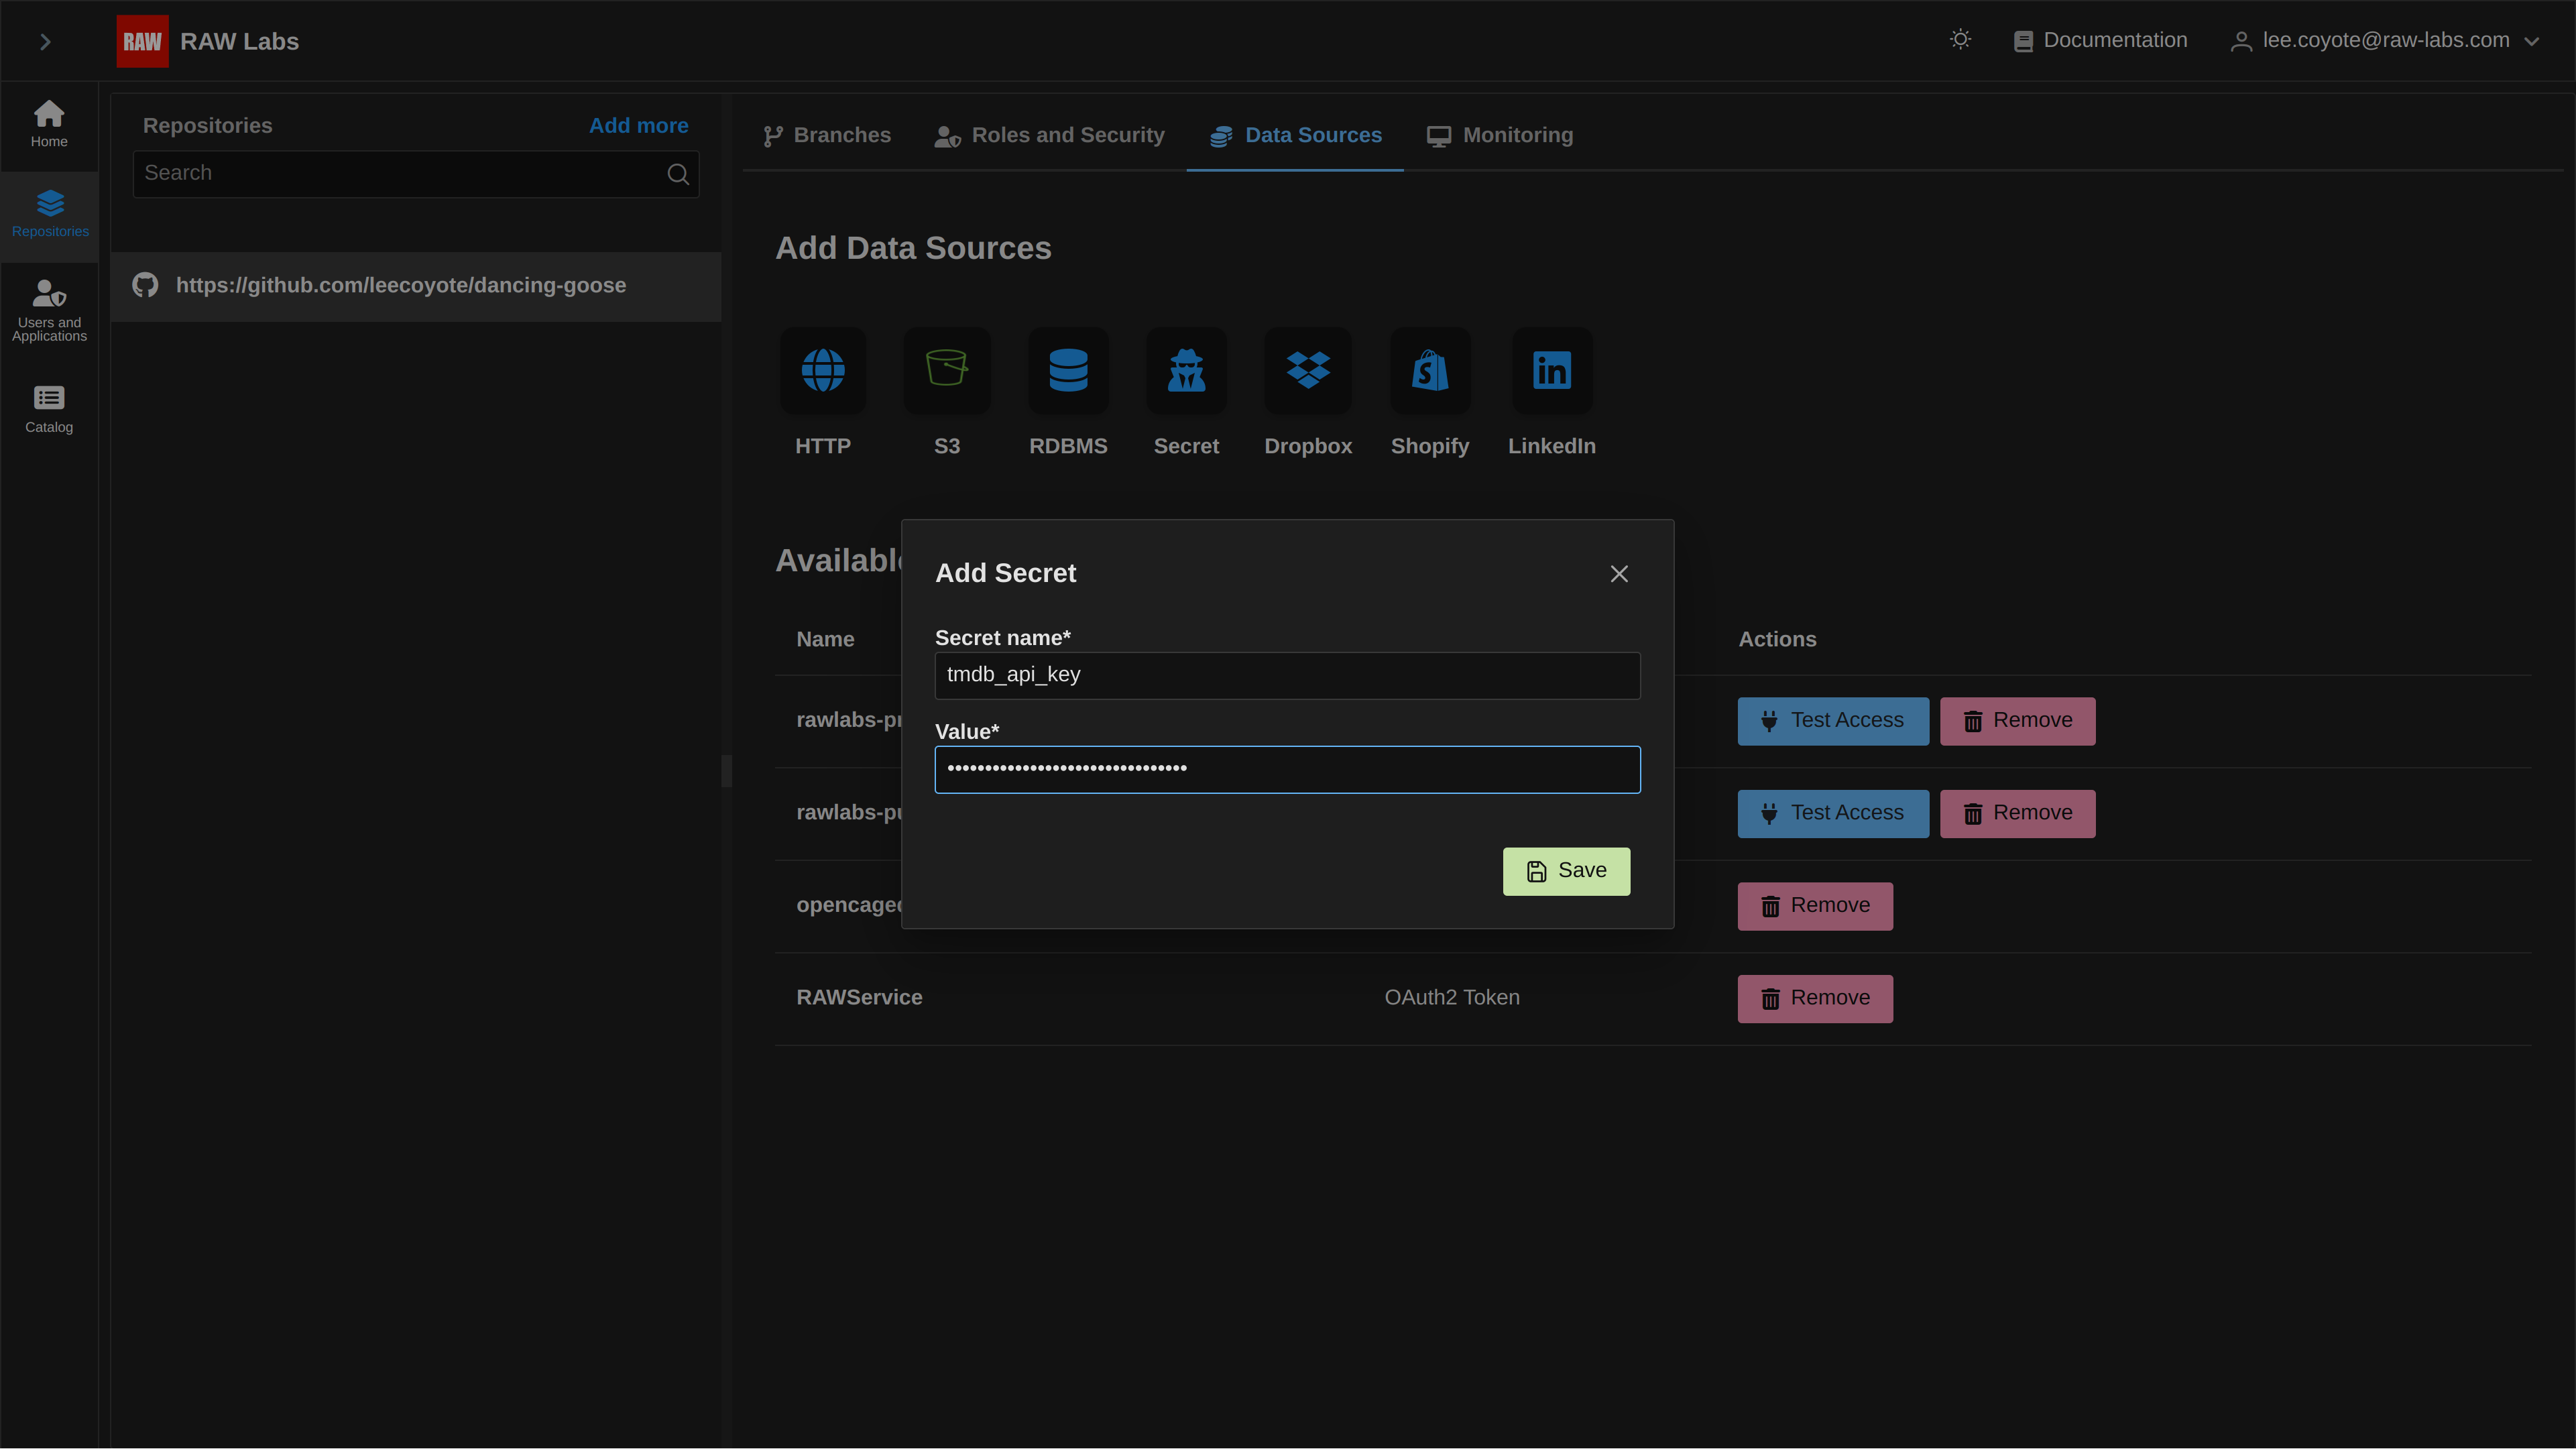
Upon saving the secret, it can be seen in the list of available Credentials.

Example
A concrete example of secret usage is the following code:
main(code: string = null) =
    let
        airports = PostgreSQL.InferAndRead(
            "raw", "example", "airports",
            host = "example-psql.raw-labs.com",
            username = "guest",
            password = Environment.Secret("guest-password")
        )
    in
        Collection.Filter(airports, x -> Nullable.IsNull(code) or x.iata_faa == code)
In this code we stored the database password in a secret guest-password and use to access the table "airports".
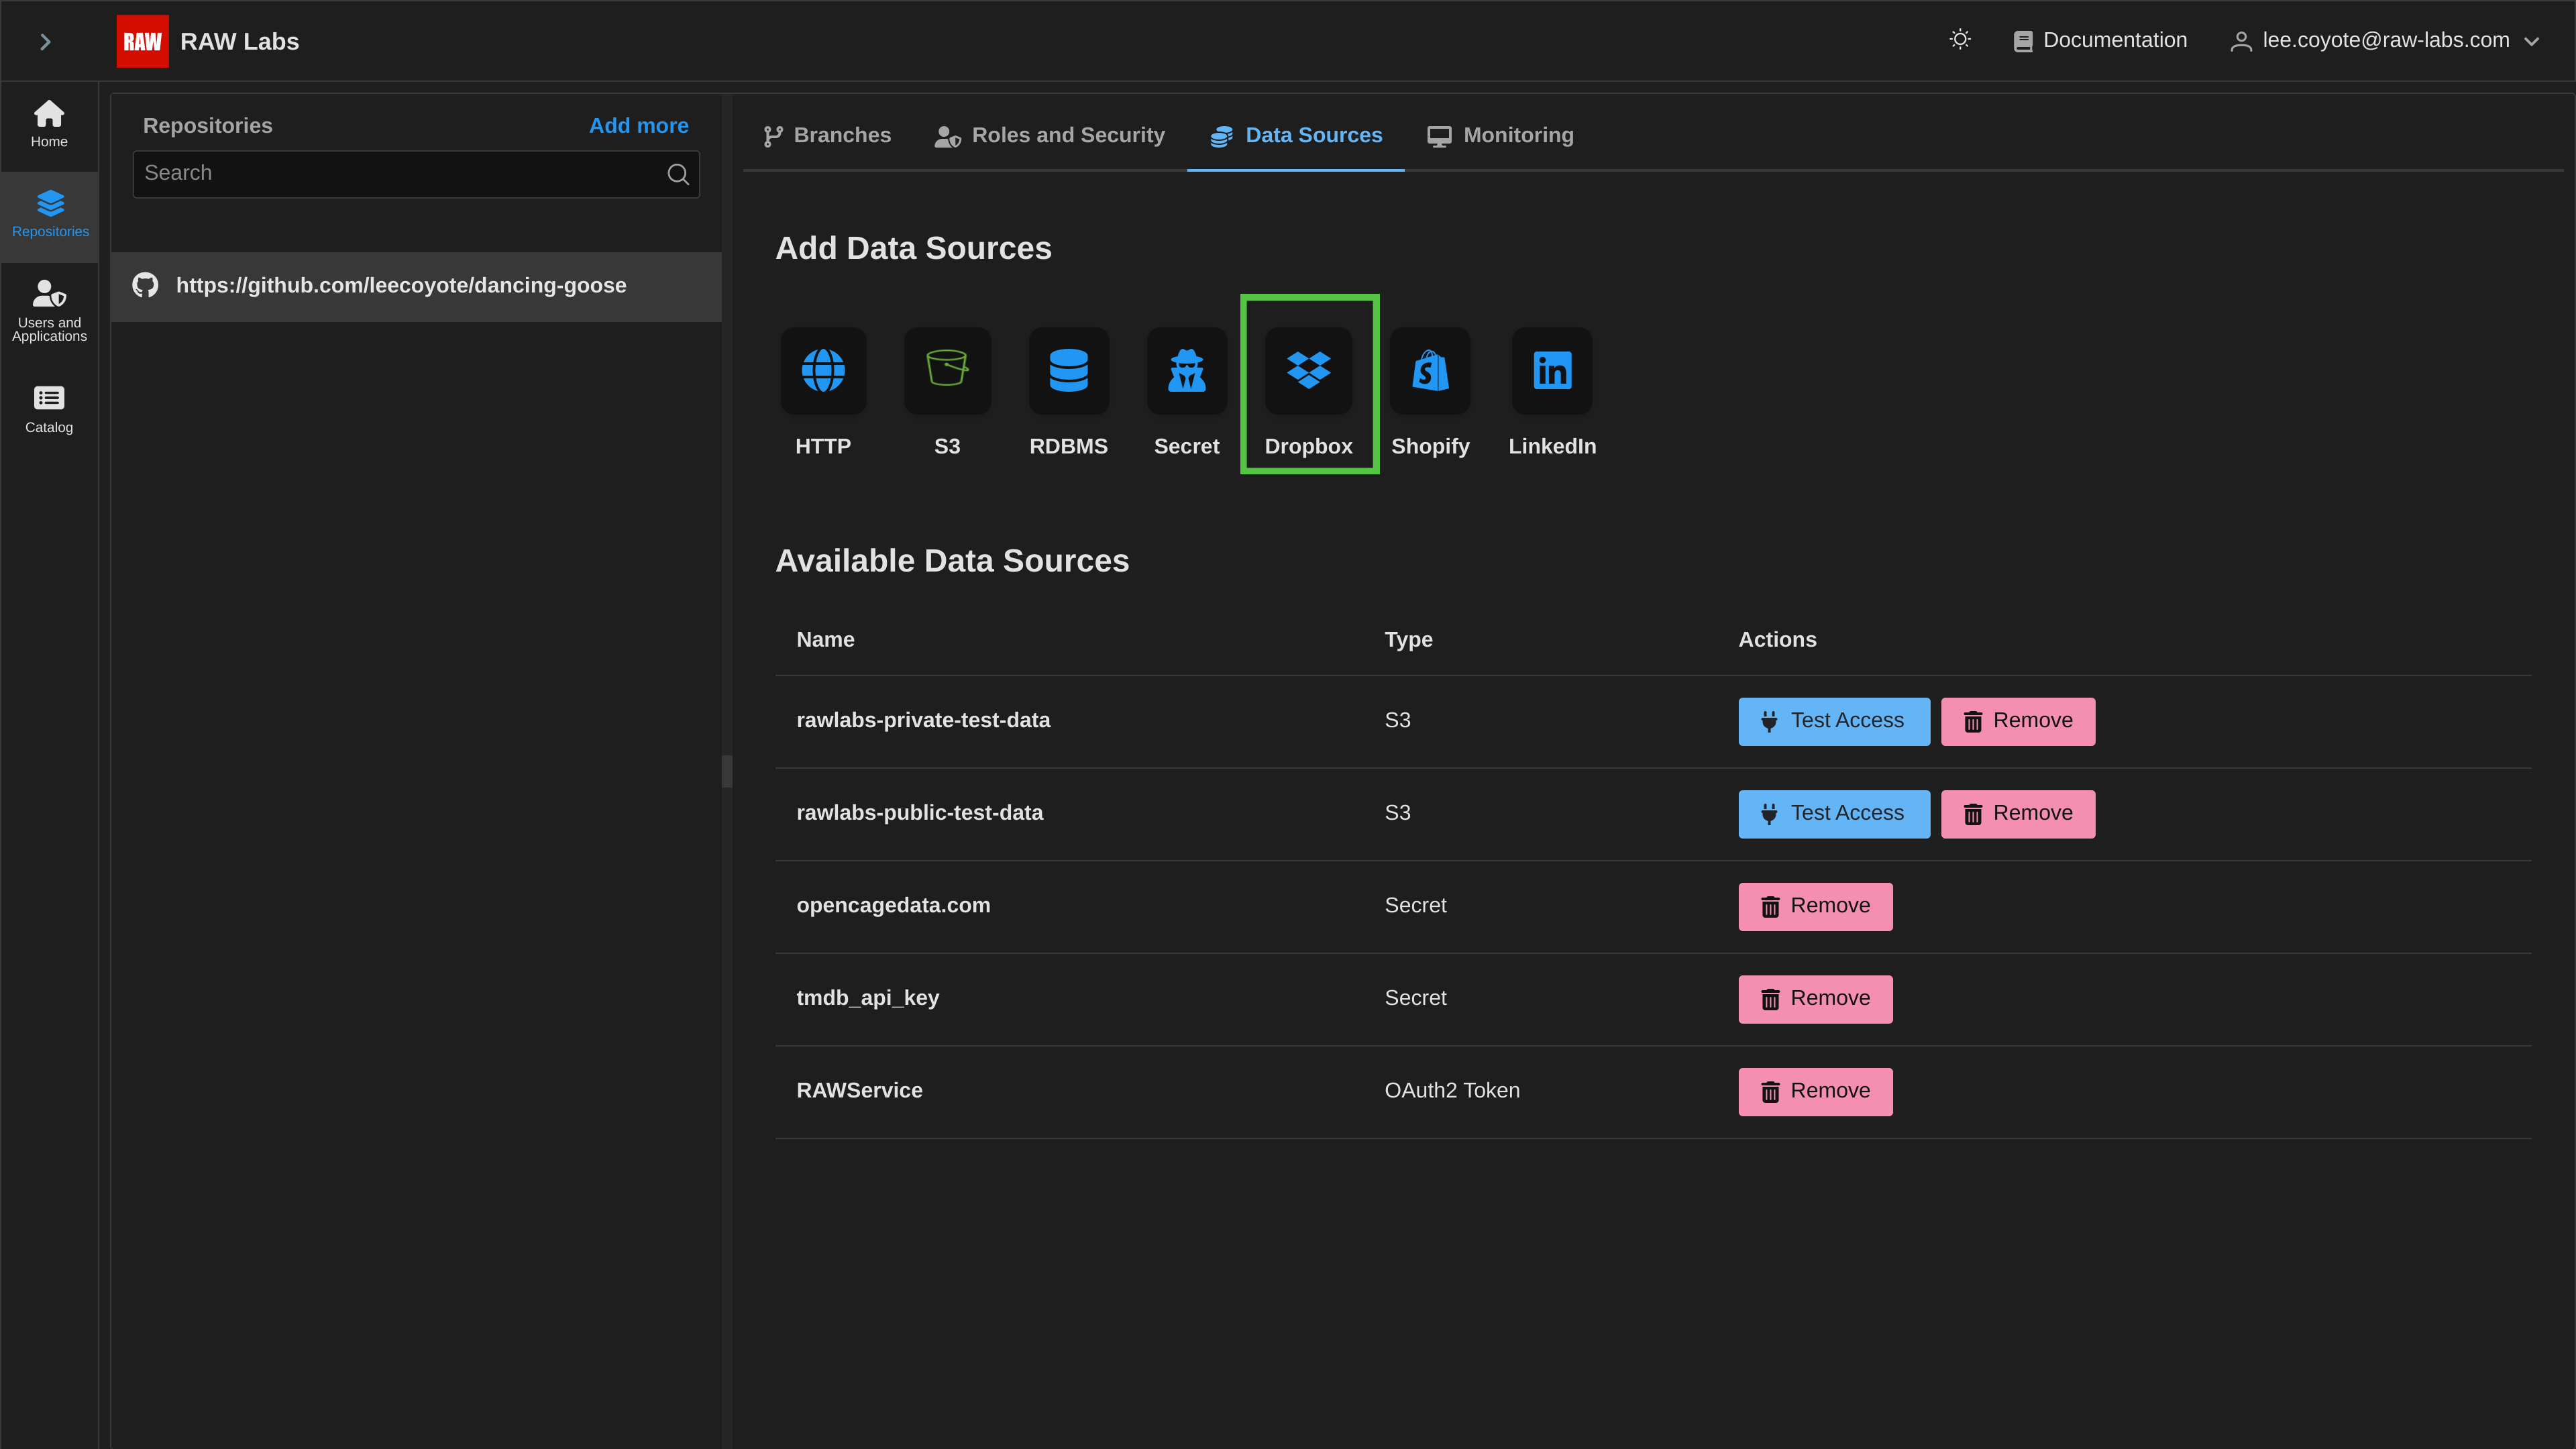
Dropbox
Description
Dropbox is a popular file hosting service created in 2008. Dropbox brings files together in one central place by creating a special folder on the user's computer. The contents of these folders are synchronized to Dropbox's servers and to other computers and devices where the user has installed Dropbox, keeping the same files up-to-date on all devices.
RAW Labs supports accessing individual Dropbox accounts and retrieving files.
The first step is to navigate to the respective control entry in Credentials view:
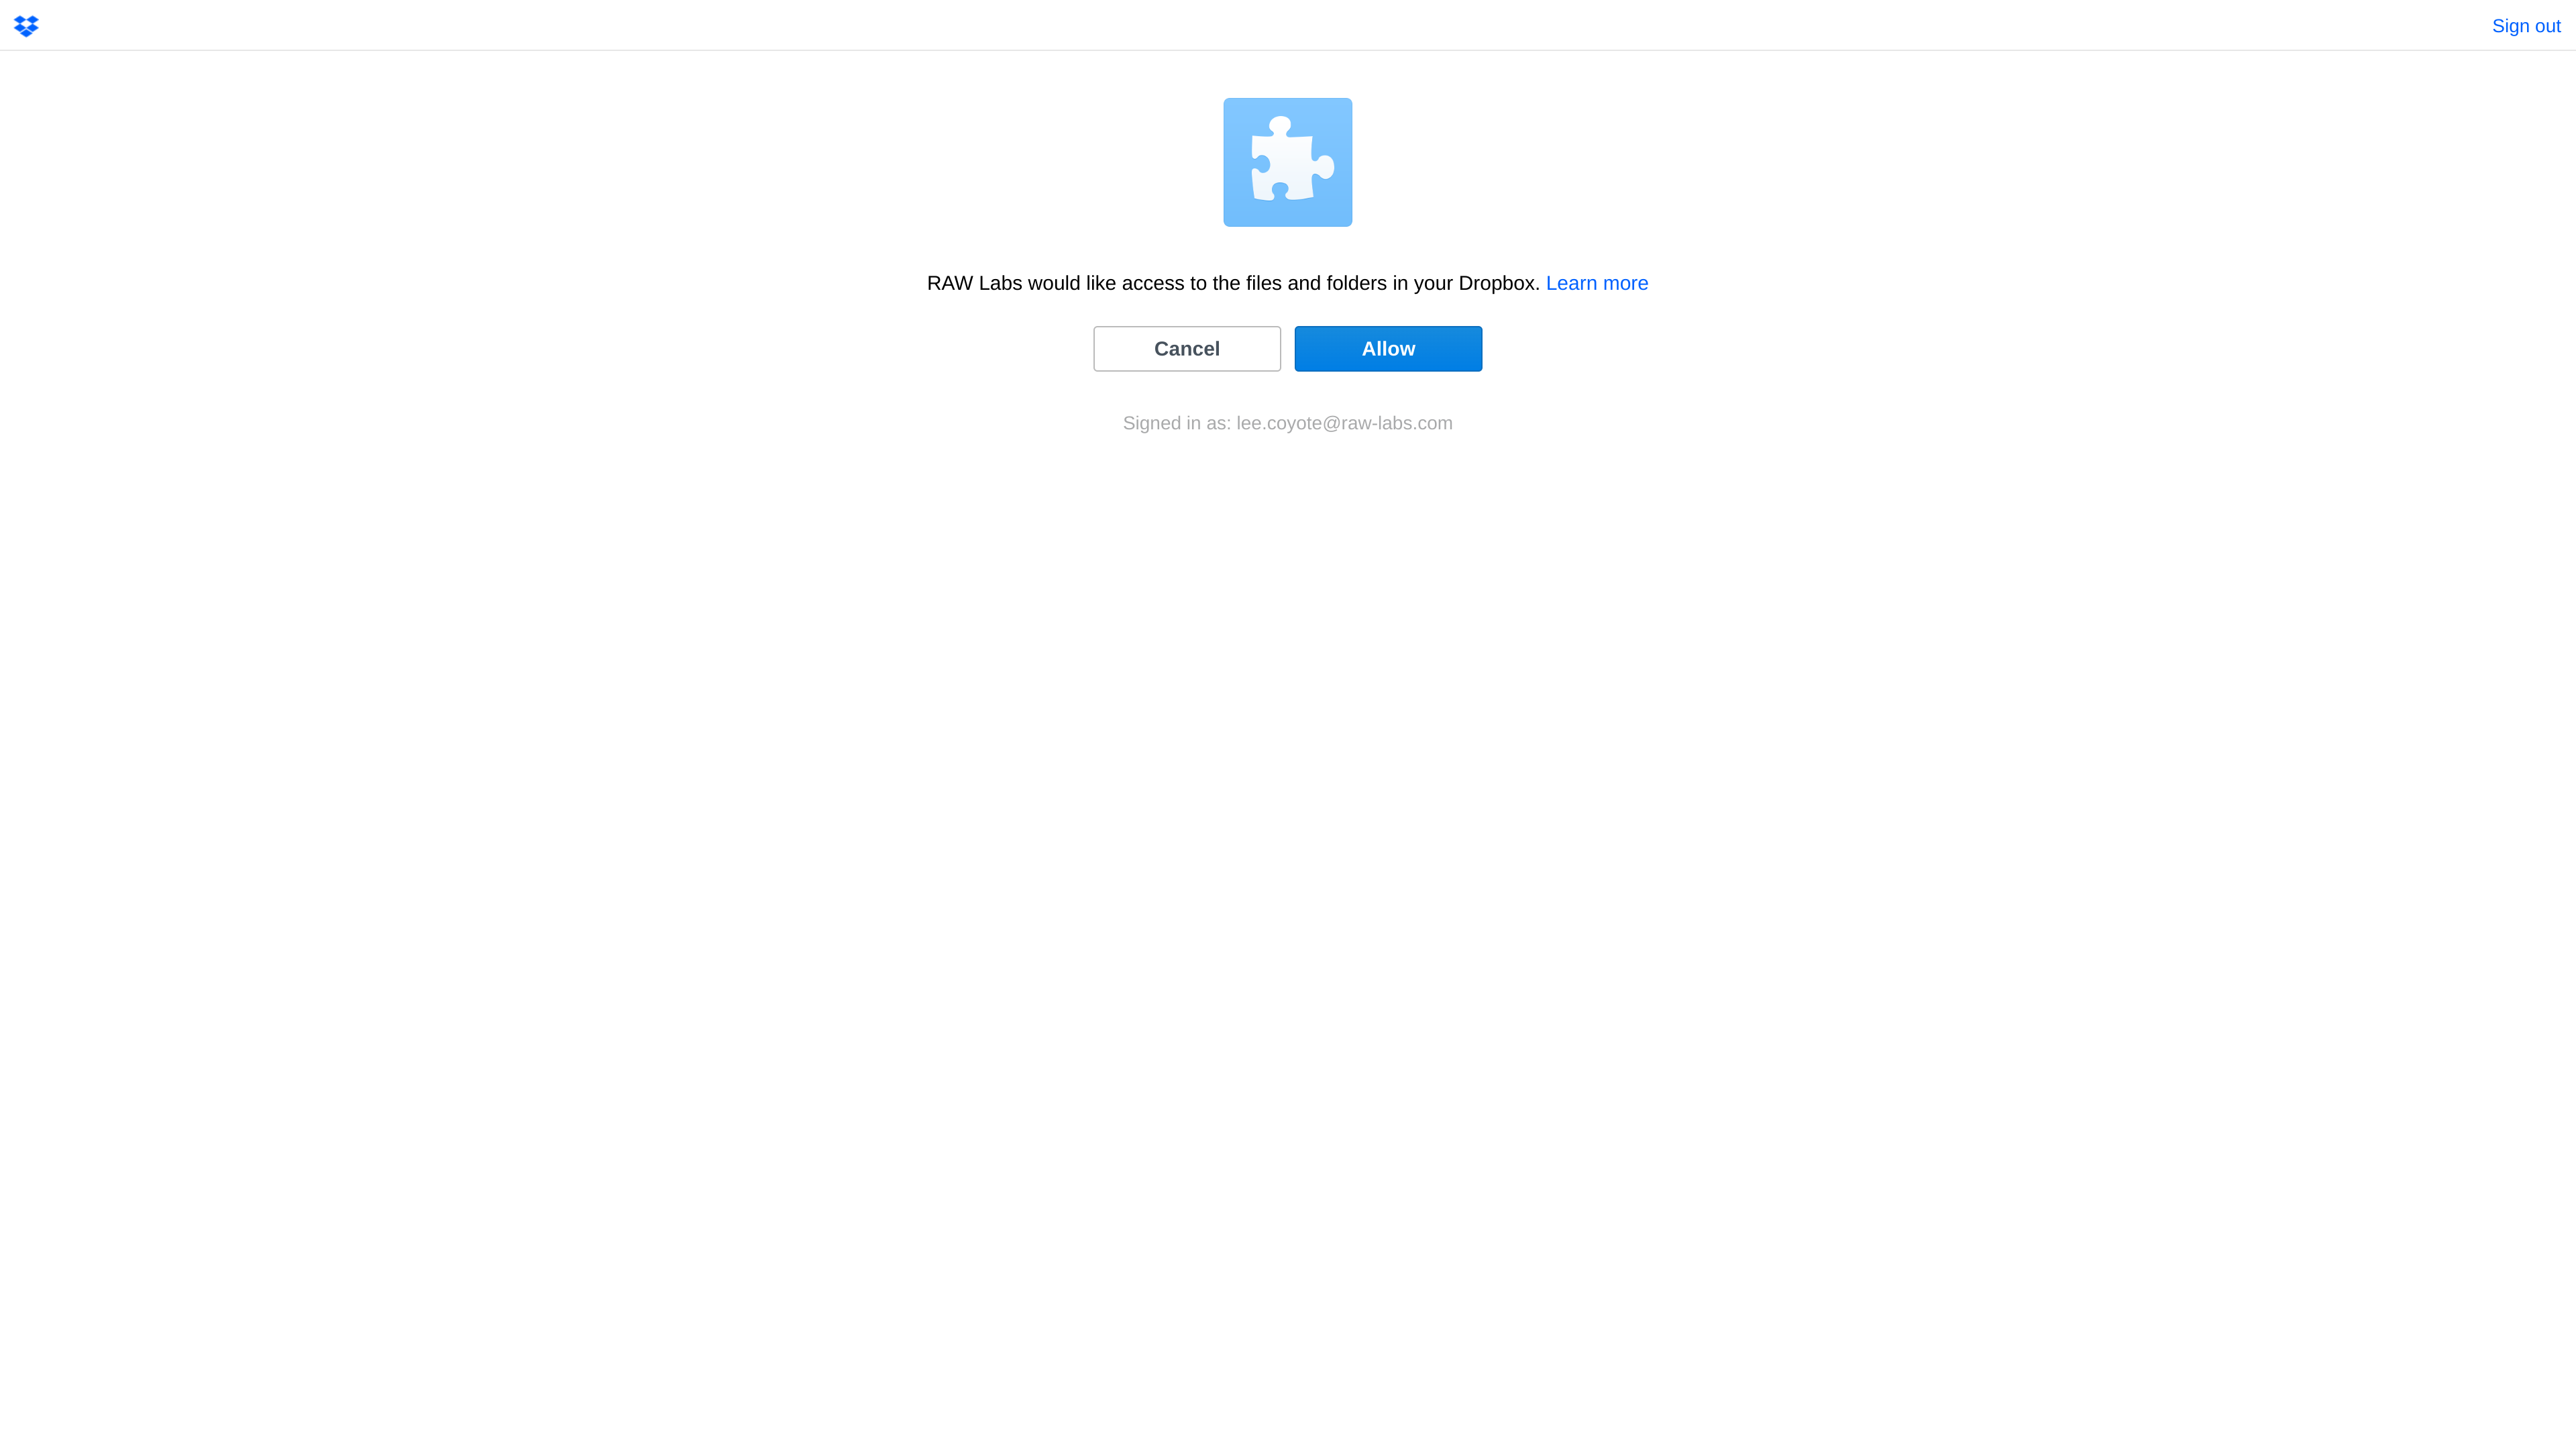
By clicking on the dropbox button, a new tab emerges prompting for the user's dropbox credentials.
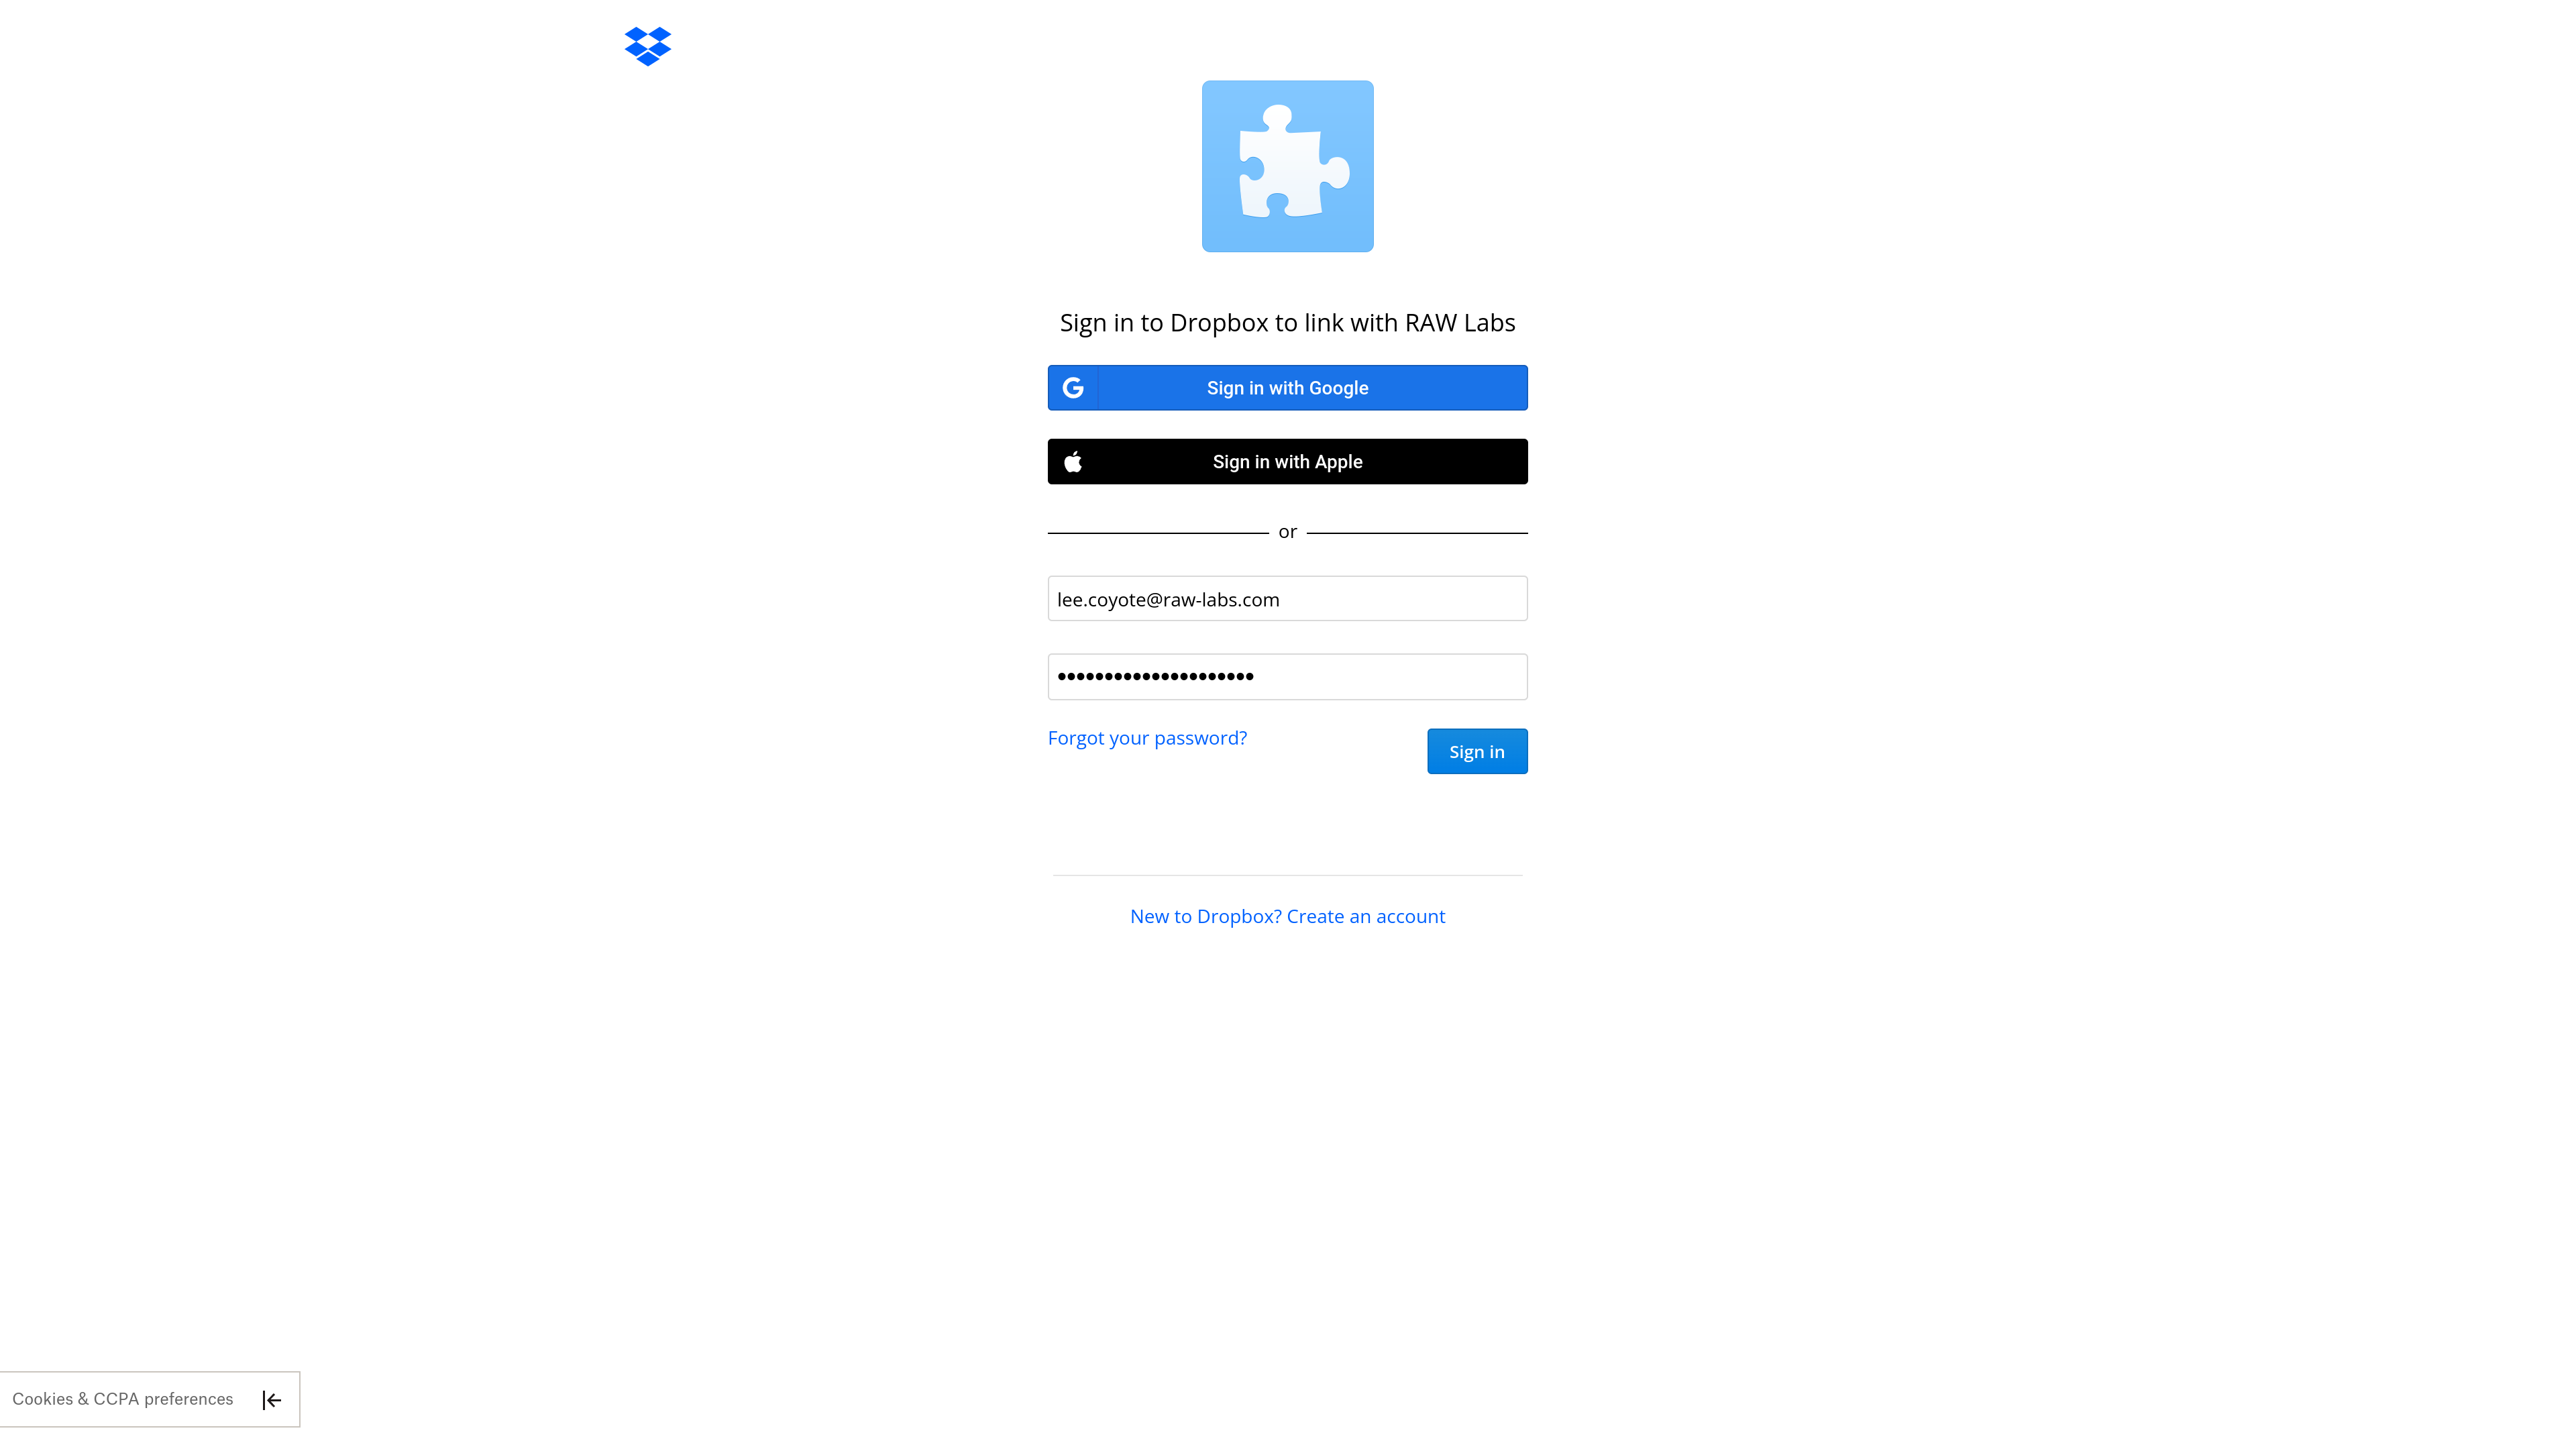
After providing then credentials, please press Sign In. A warning that RAW Labs will be able to access your data will emerge, please press Continue.
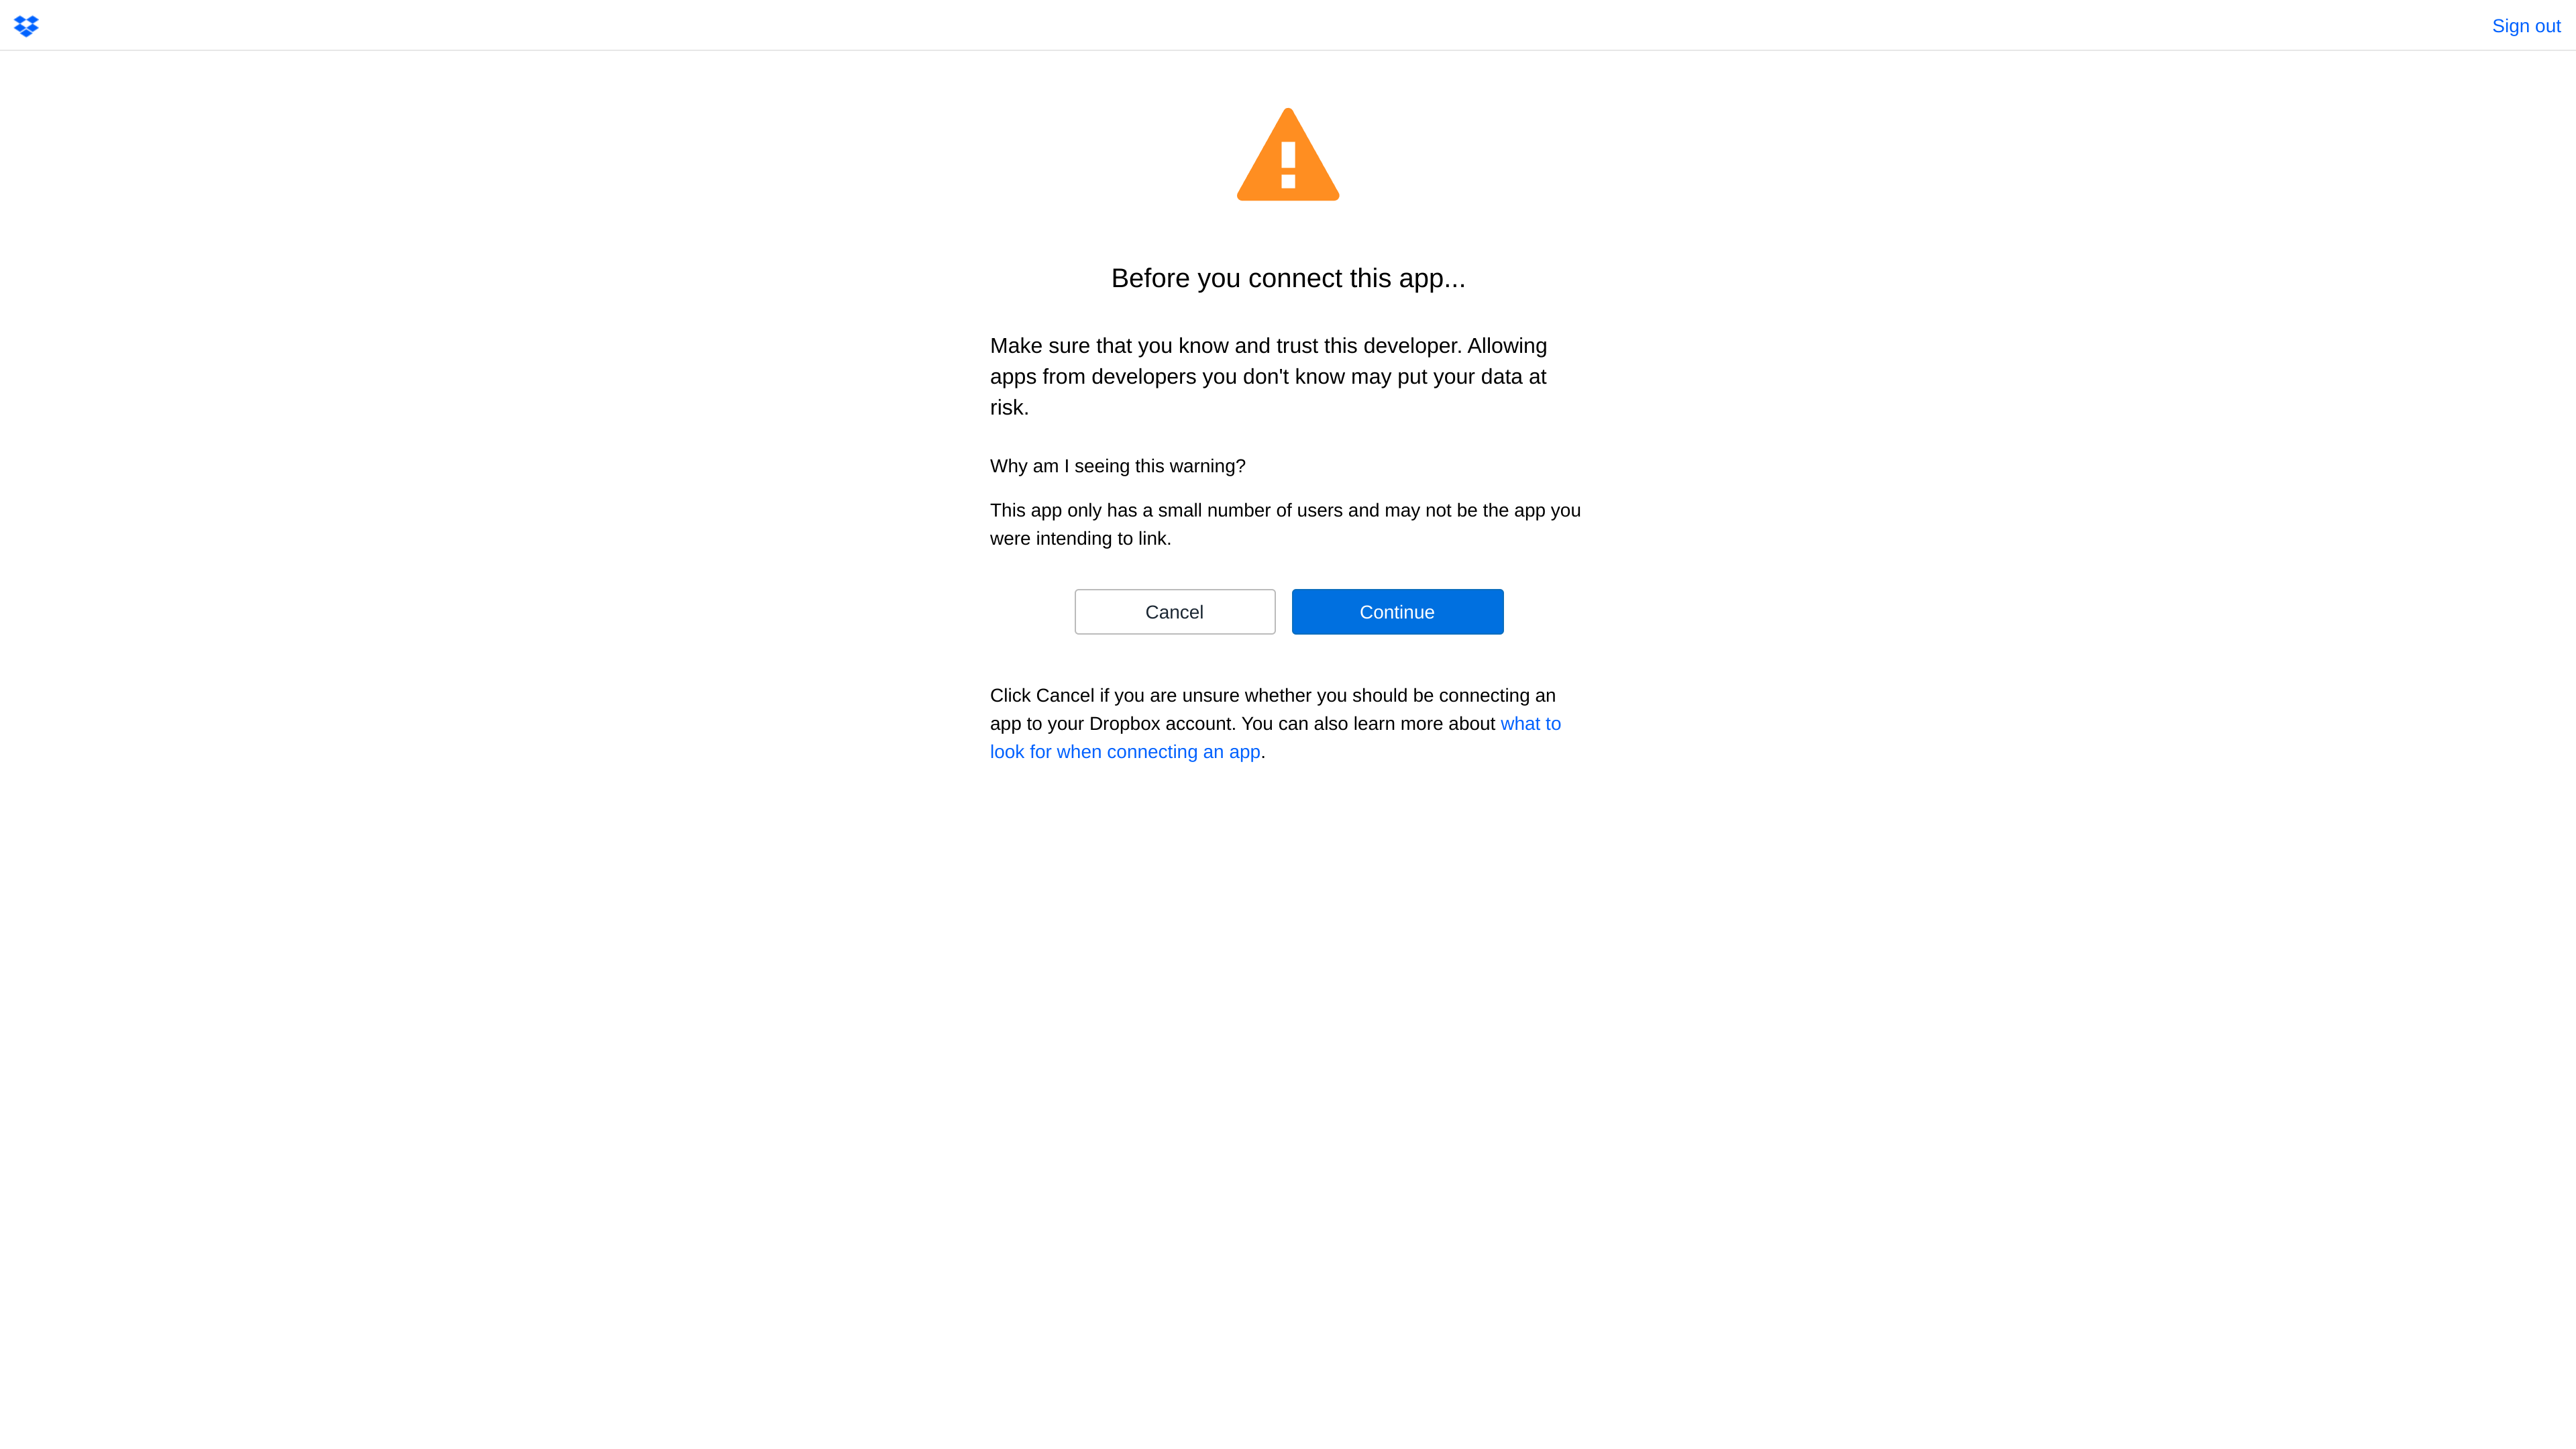
Then press allow in order for RAW Labs Platform to be able to access your data from Dropbox.
Next, an Authorization Code is shown. Copy this code and get back to the RAW Labs application (previous tab).
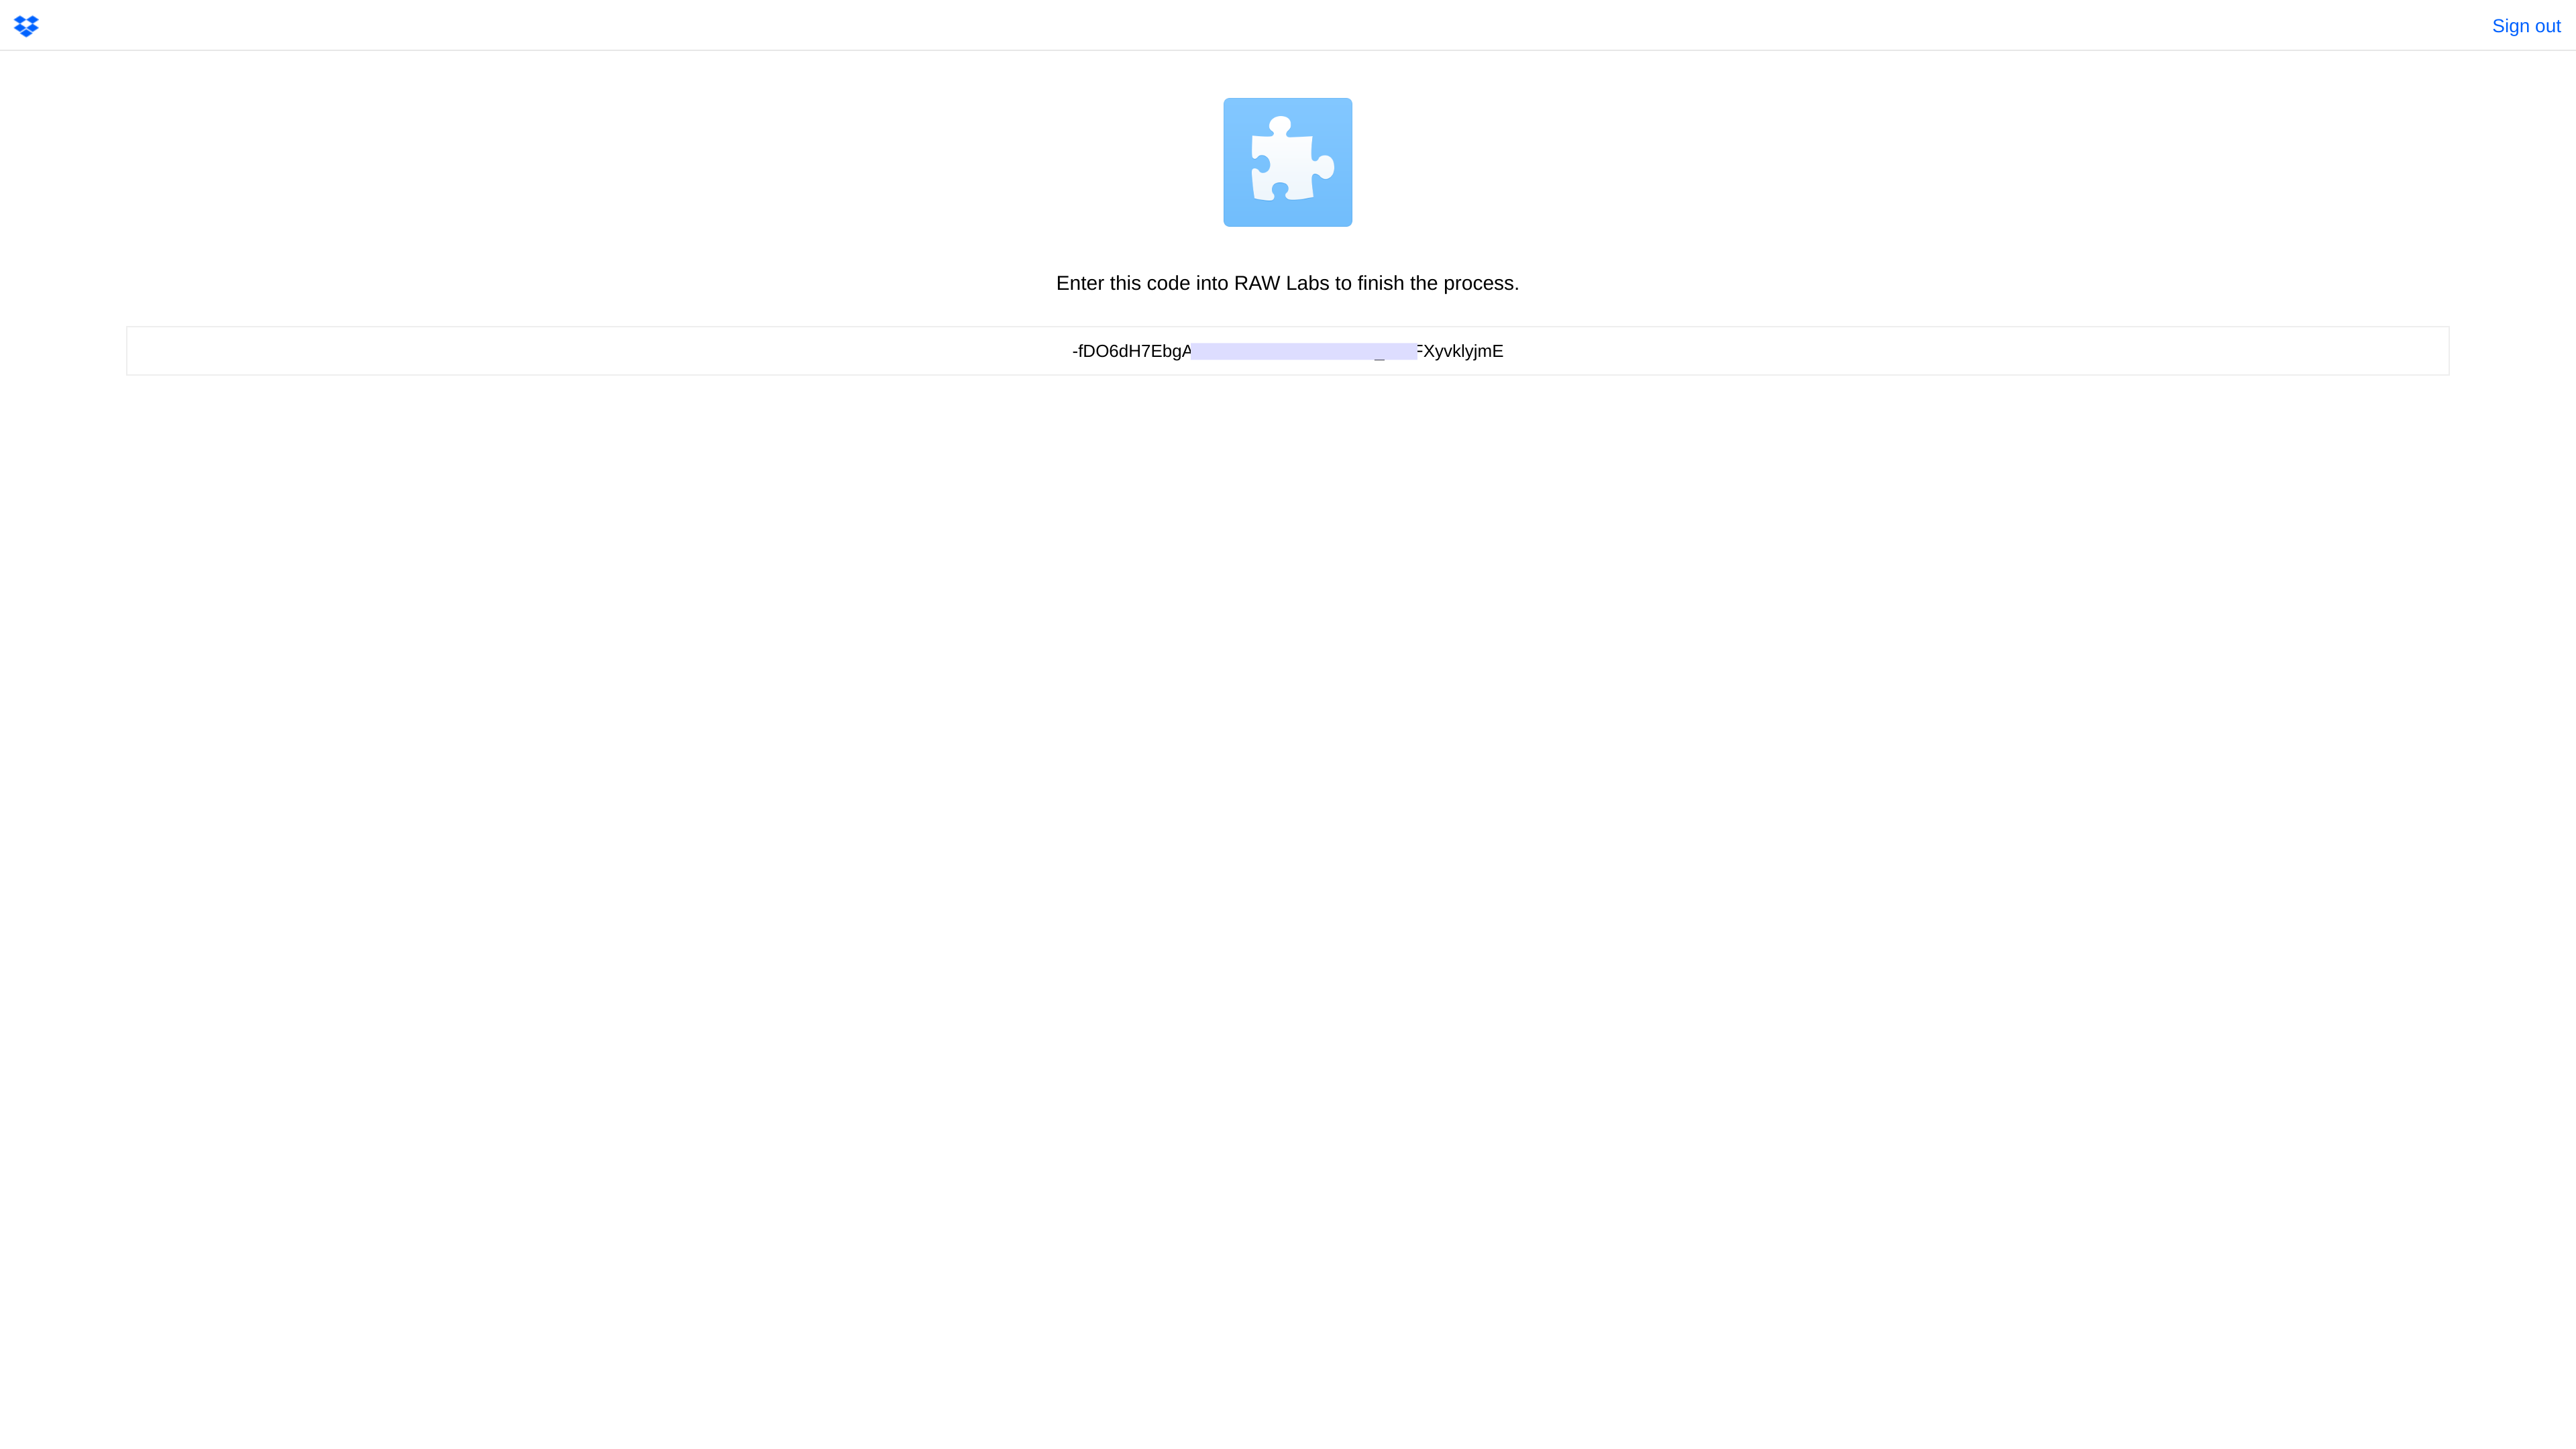
Finally, provide a friendly name for your Dropbox Credential and paste the code in the Authorization Code area.
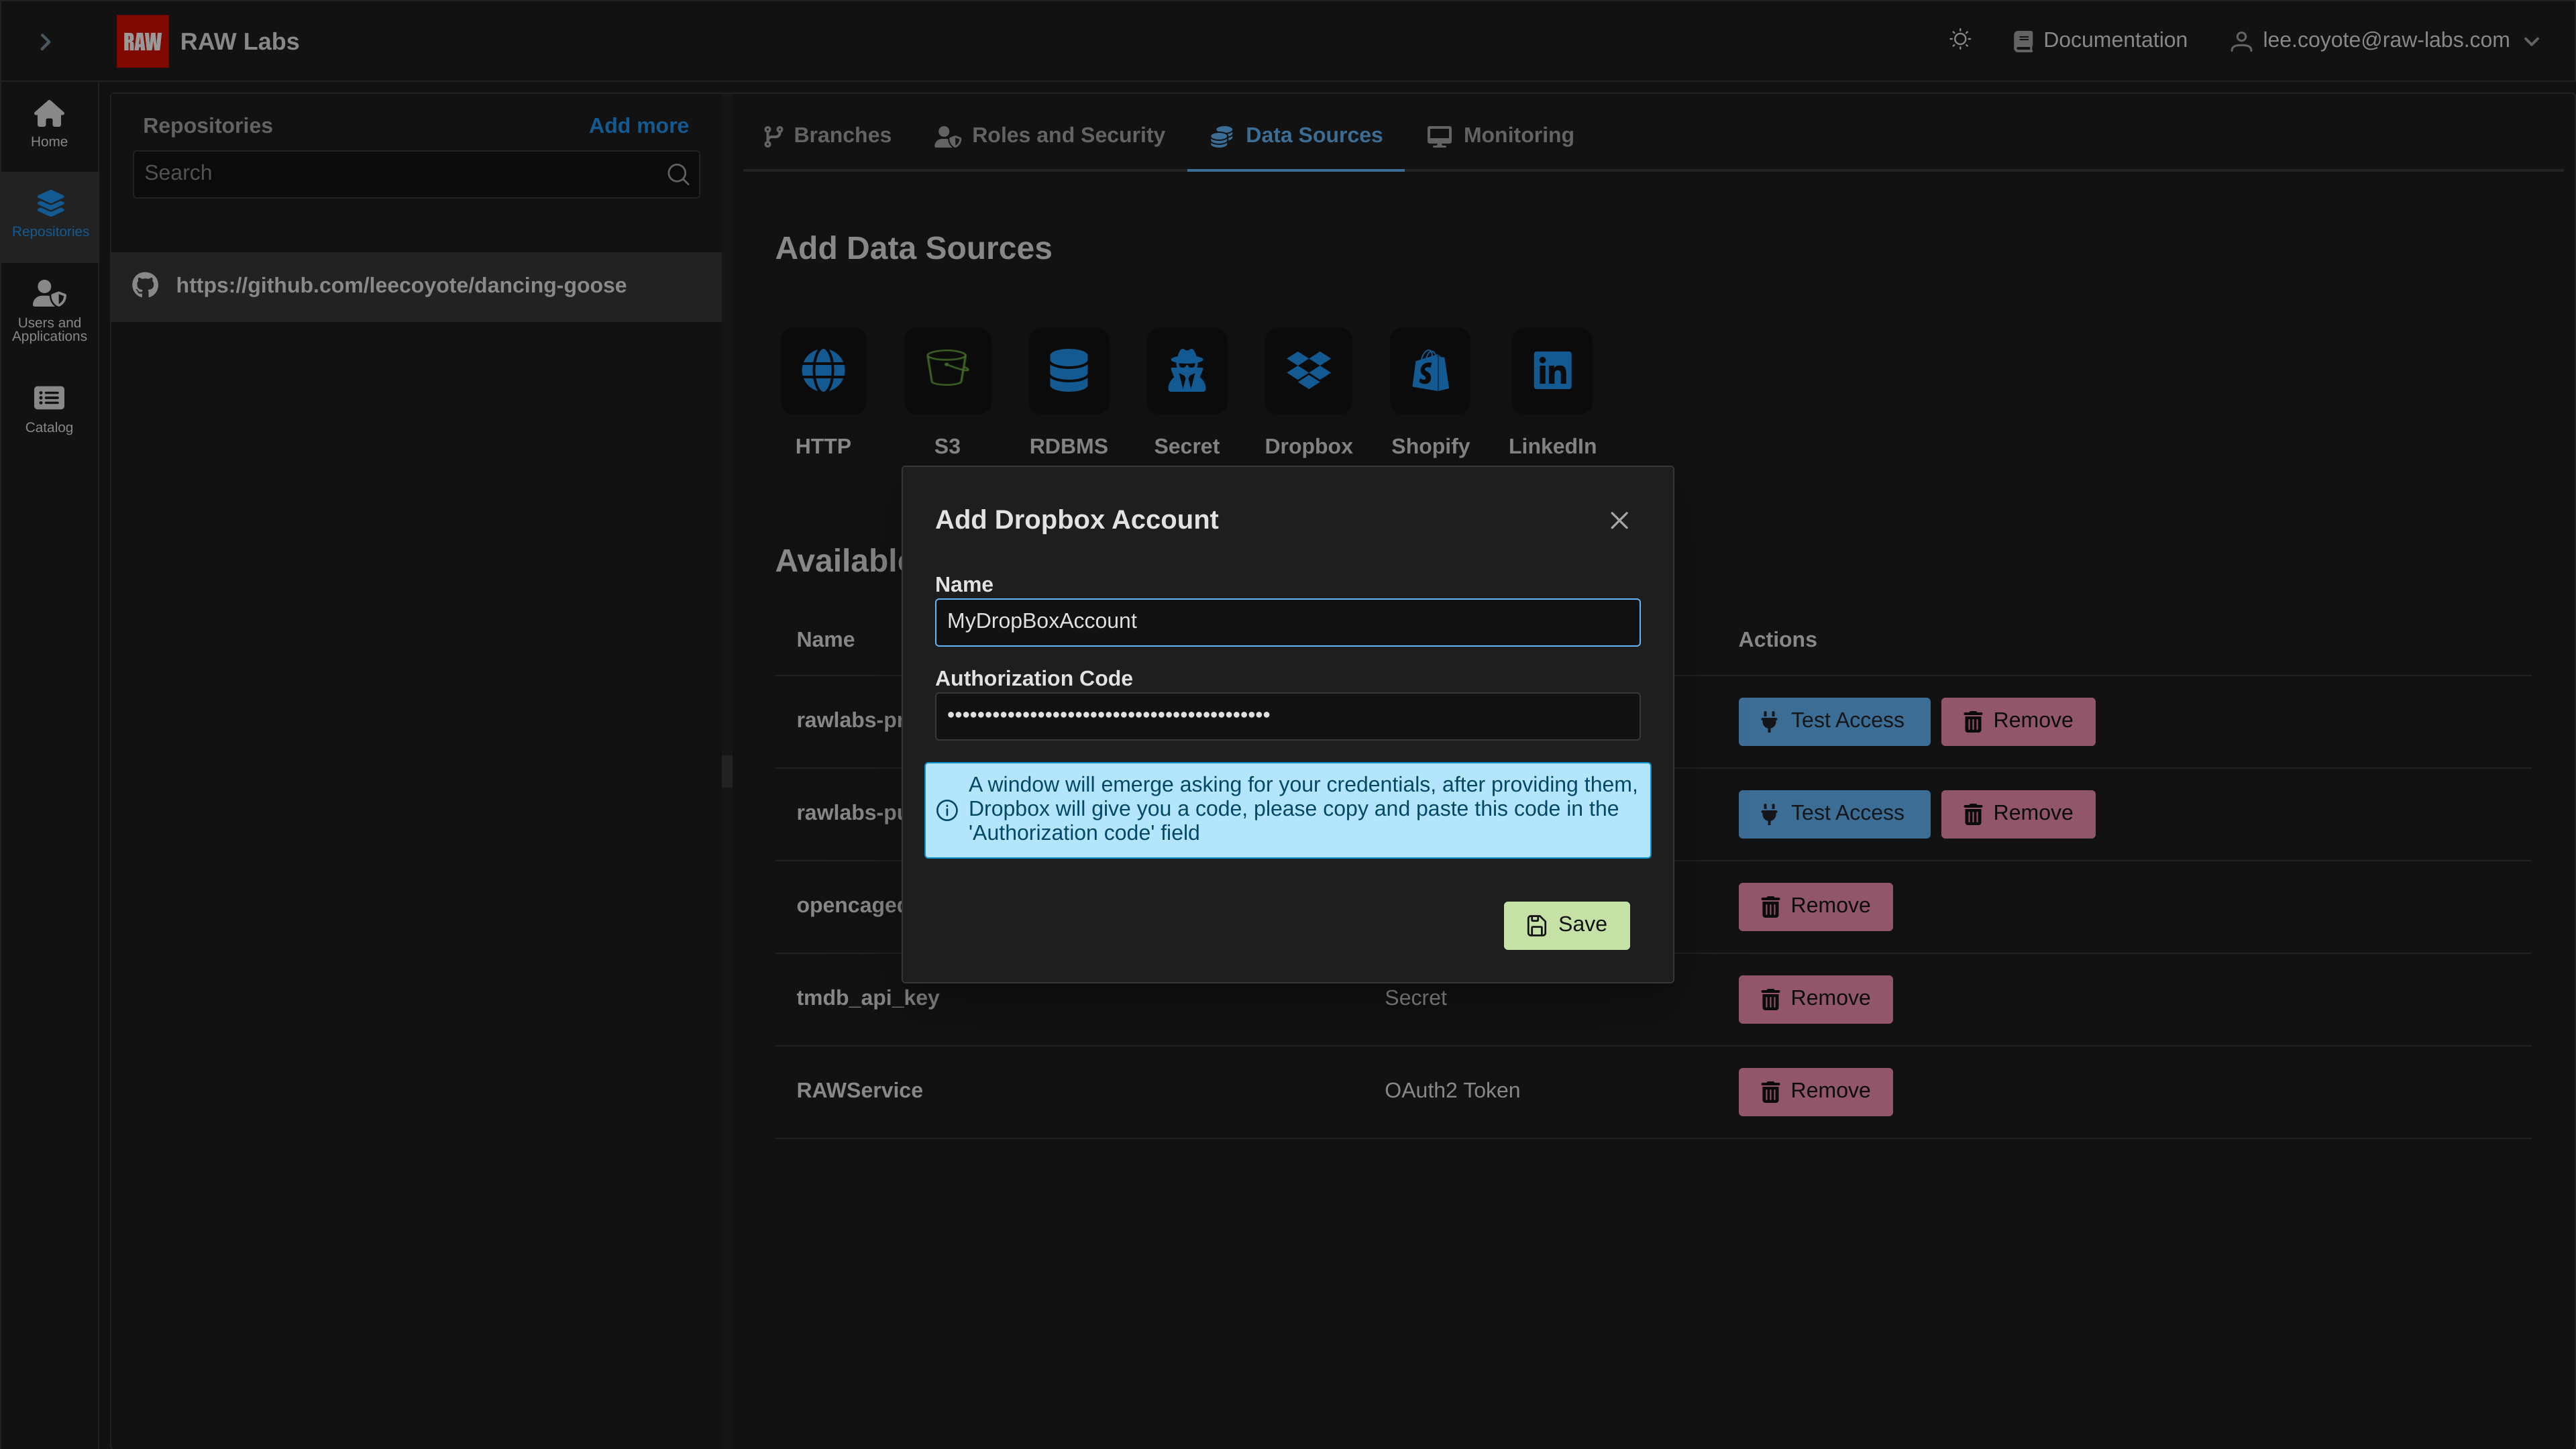
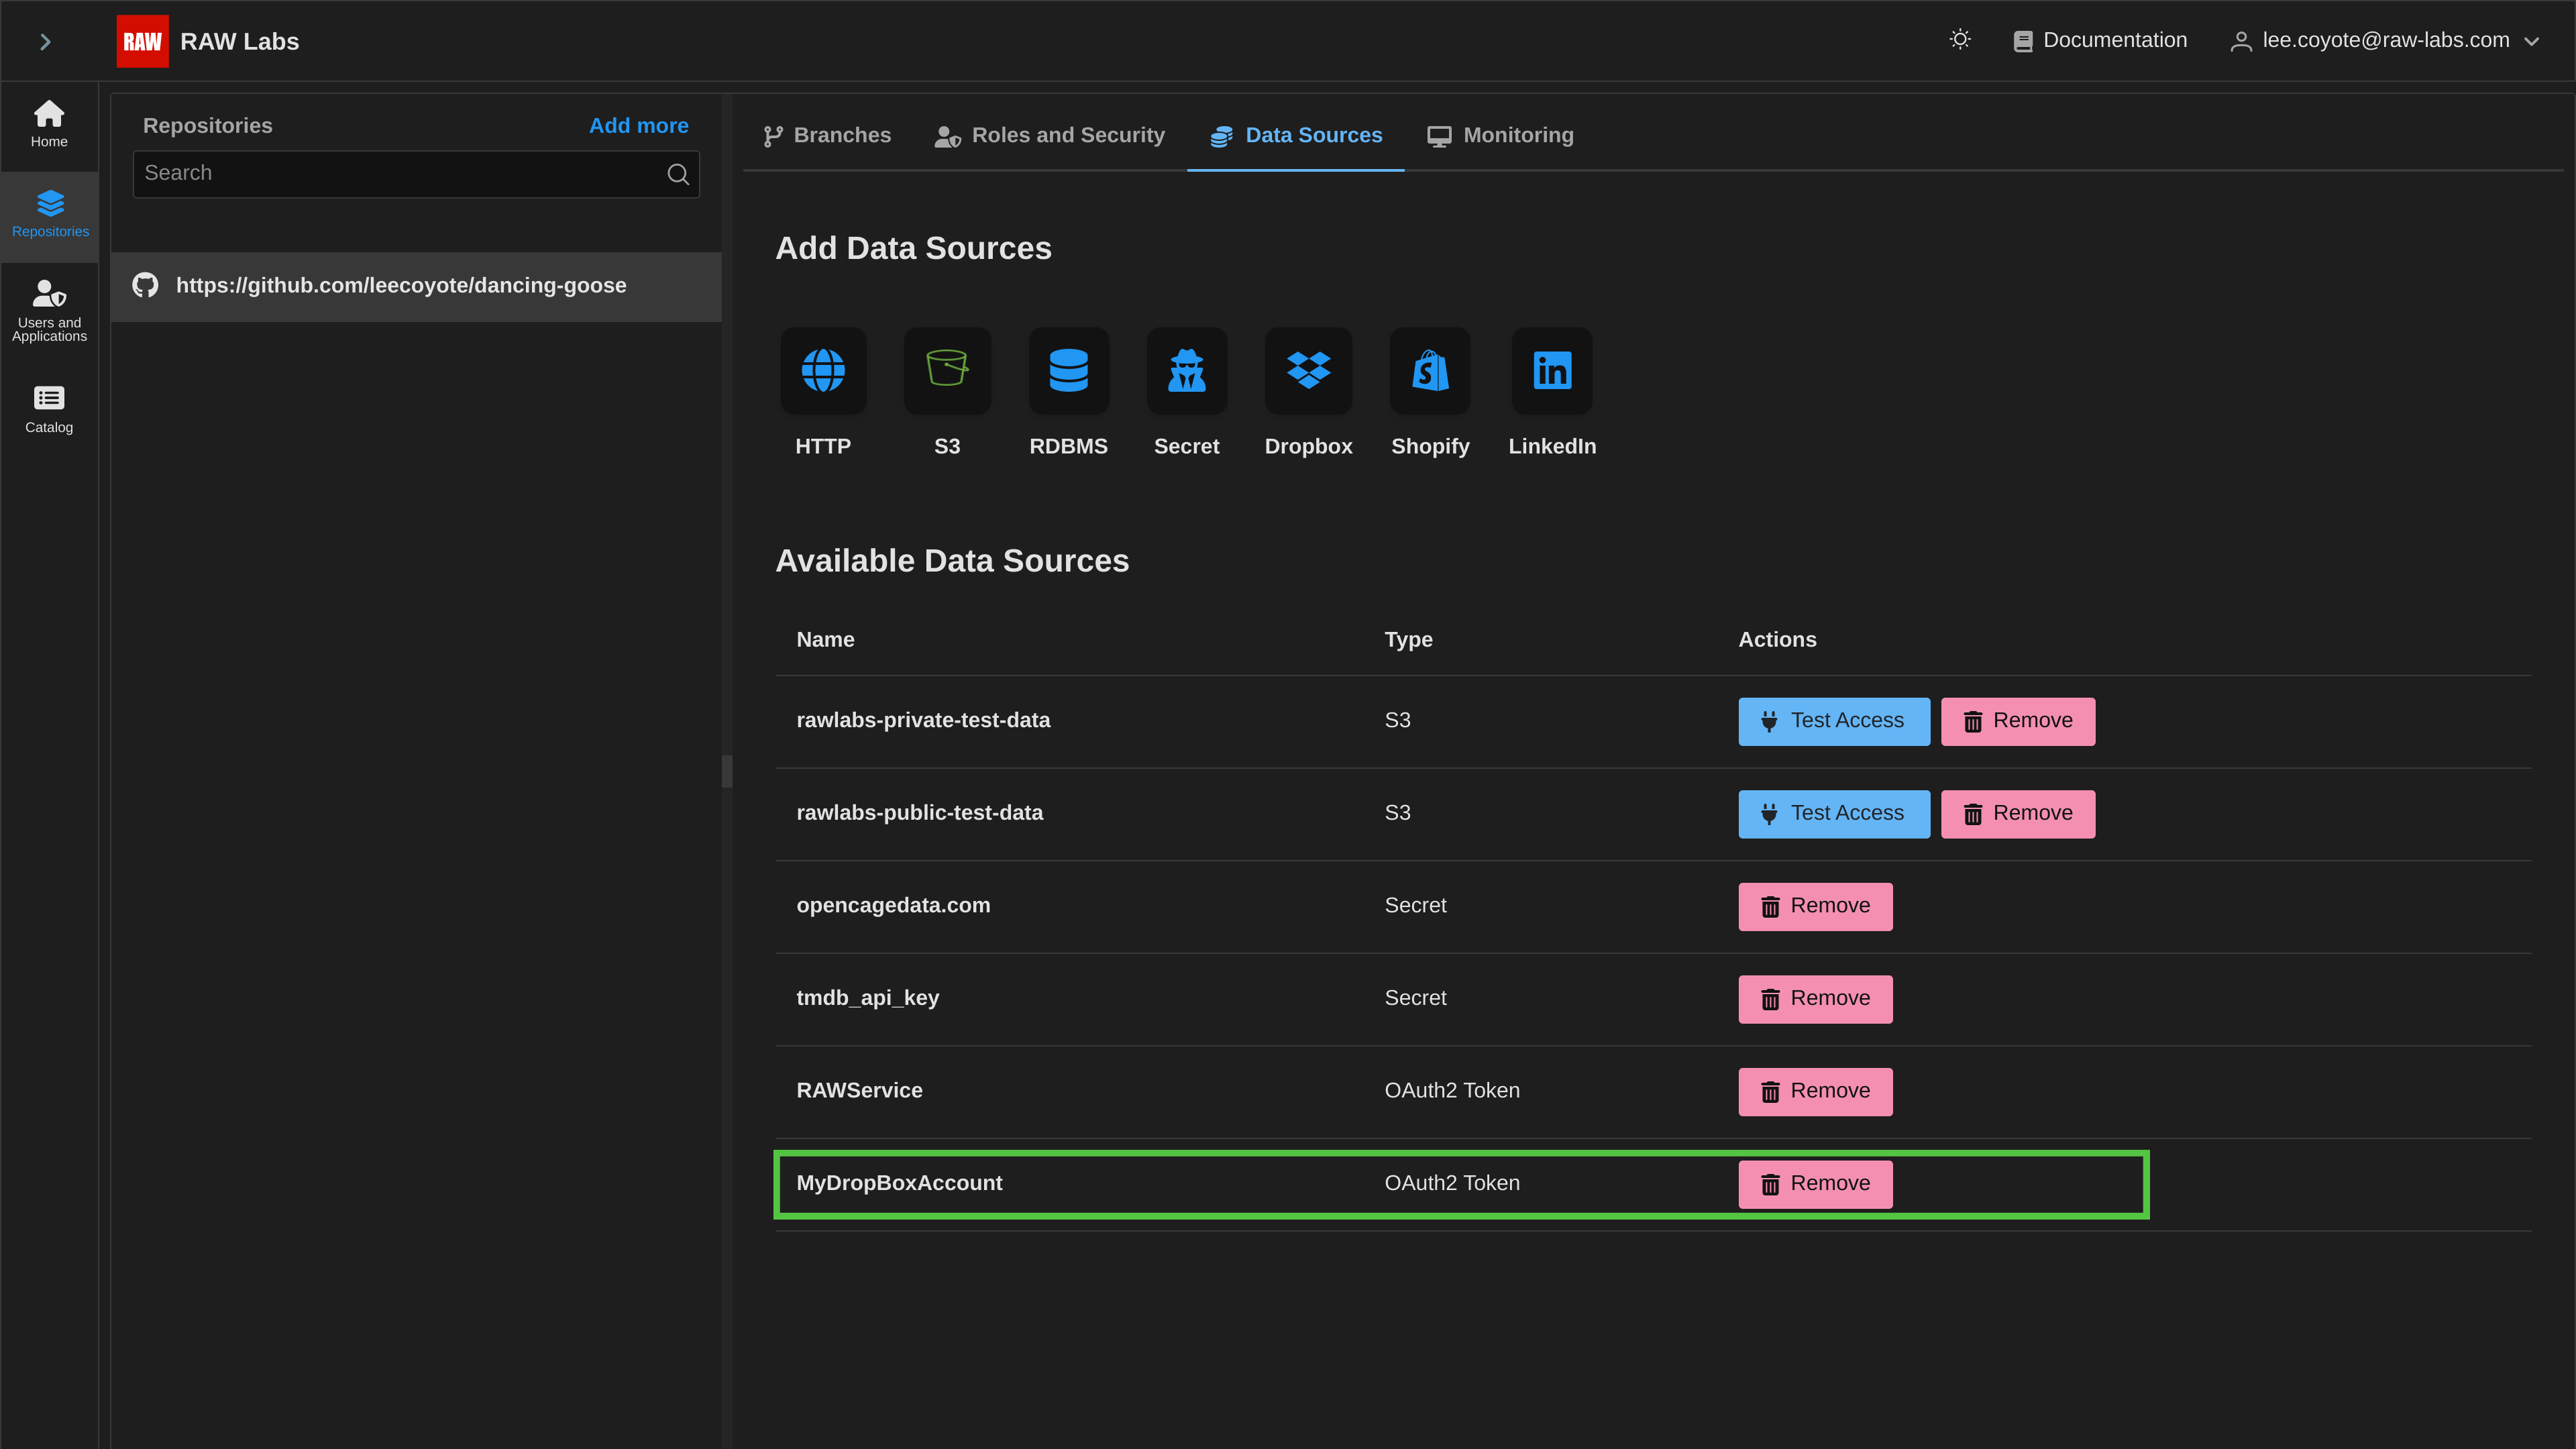
Press save, and you are ready to go!
Example
Syntax for reading dropbox data in Snapi:
dropbox://<credential name>/<path>
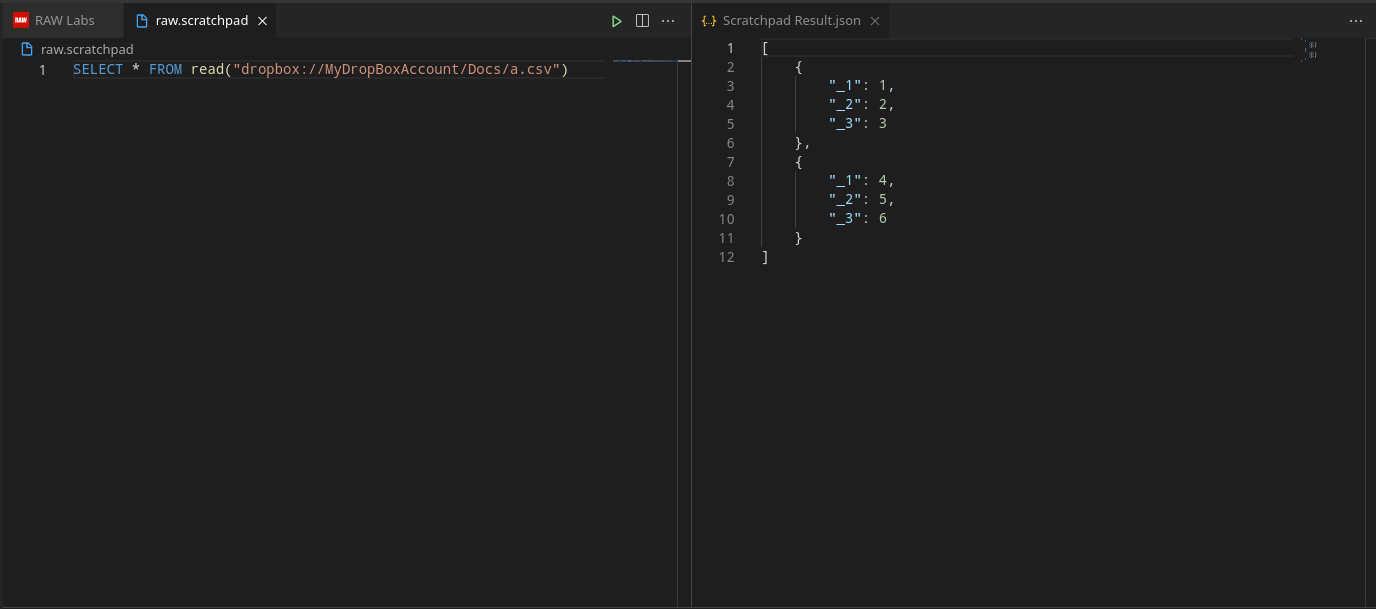
By opening our VS Code Extension, then going to Scratchpad we can read the data from the added dropbox (and then use it in our queries).
Csv.InferAndRead("dropbox://MyDropBoxAccount/Docs/a.csv")
Returns:
LinkedIn
As a prerequisite to accessing LinkedIn's API you will need a LinkedIn developer application. To create a new app you can go to LinkedIn's new app page. Information about LinkedIn's authorization flow can be seen in the authorization code flow page
Creating a new token for your LinkedIn App
First go to LinkedIn apps page, select the app you want to generate the new token.
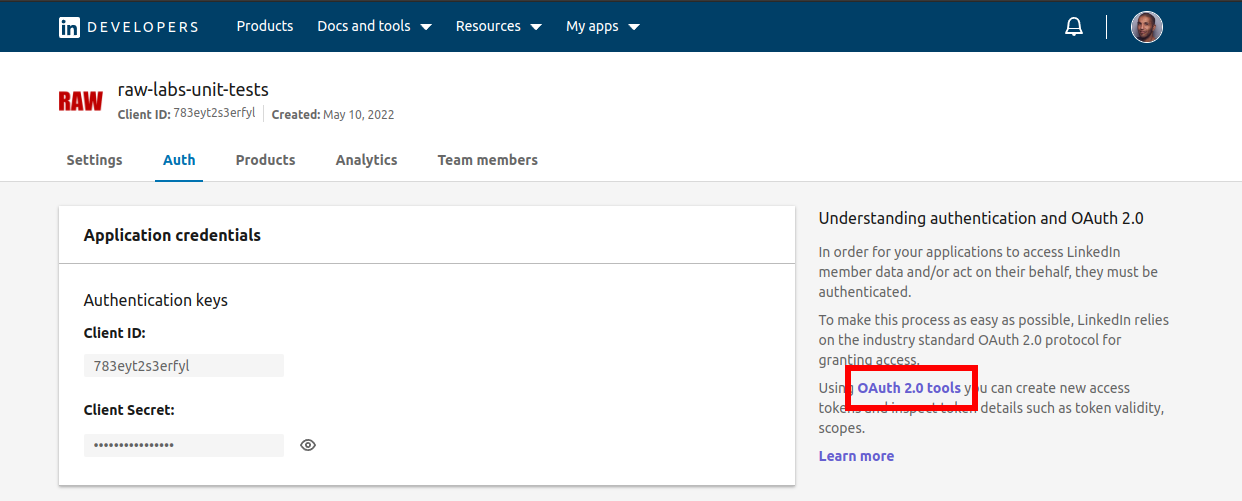
Click on the "Auth" tab and click on the "Oauth 2.0 tools" on the right pane.
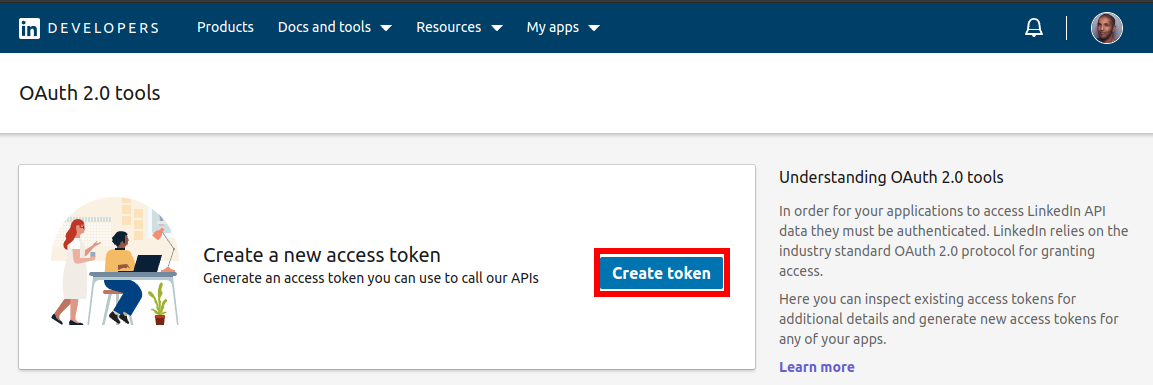
Click on "Create token".
Select the scopes you want to give to the new token.
You will be presented with a new access-token and refresh-token, do not close this page or copy paste the tokens somewhere.

Registering the Generated LinkedIn Token
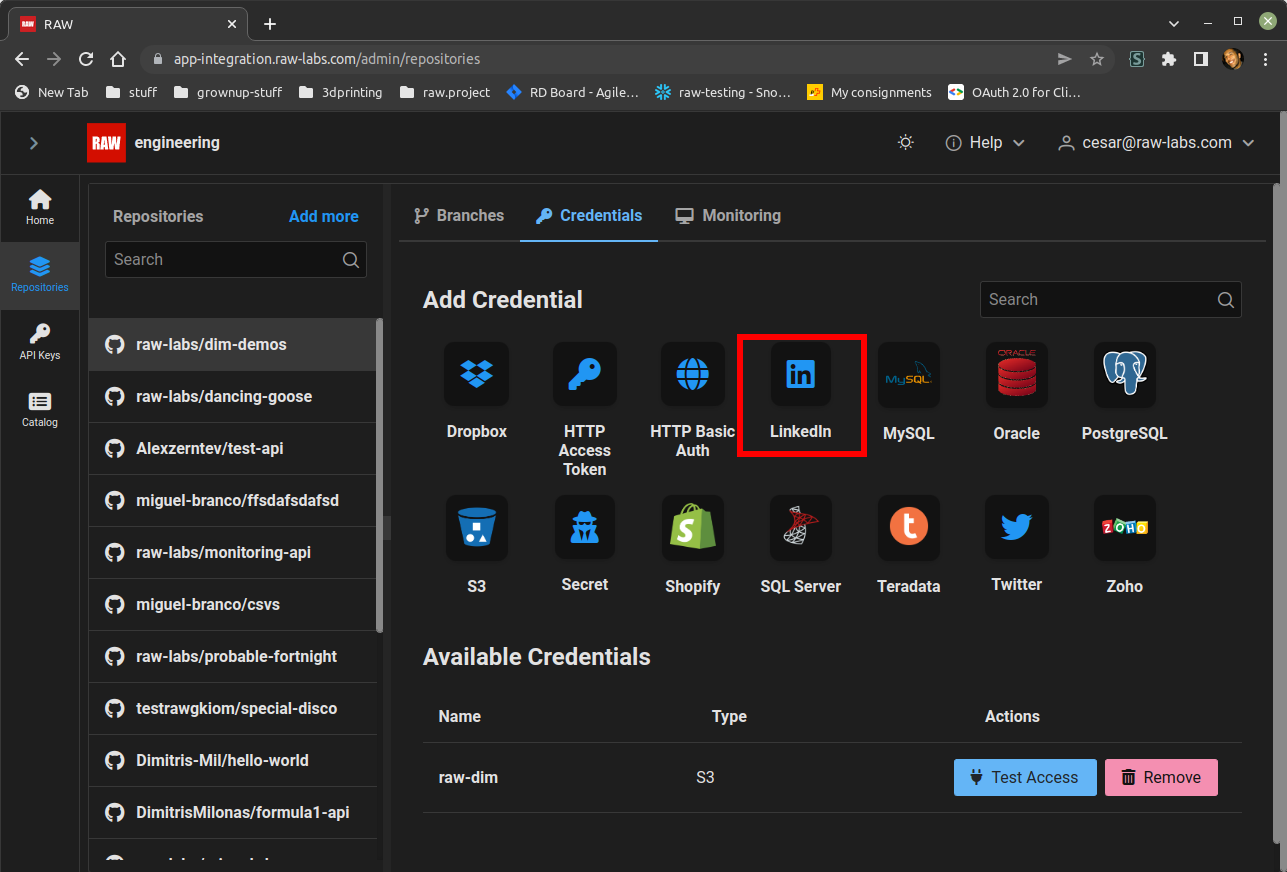
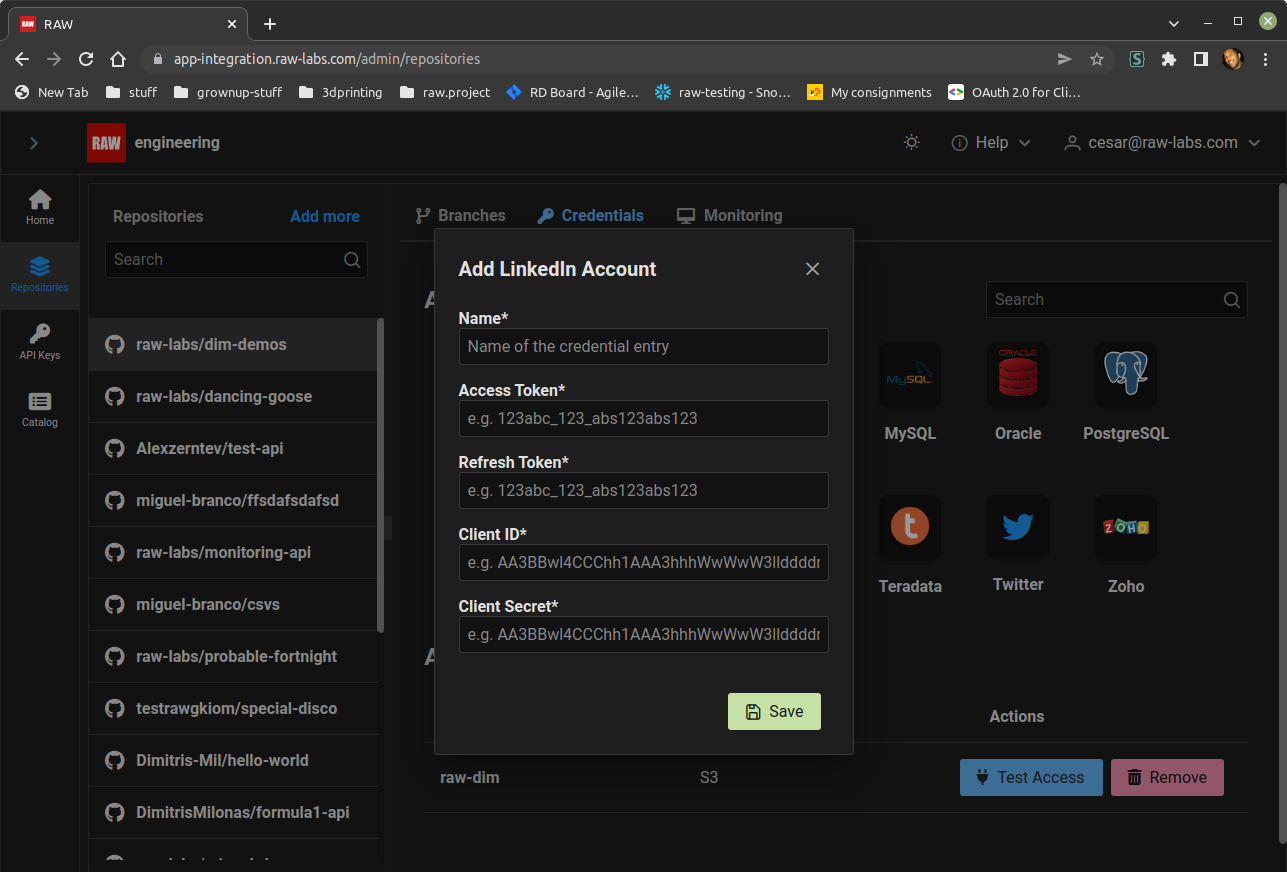
Now we can register the linkedIn credential in your repository.
Go to your RAW-labs admin page, click on "Repositories" -> "Credentials" and click on the LinkedIn icon.
In the popup form add;
The name you want to give to this credential.
The token.
The refresh-token.
The client-ID.
And the client-secret of your app
Example
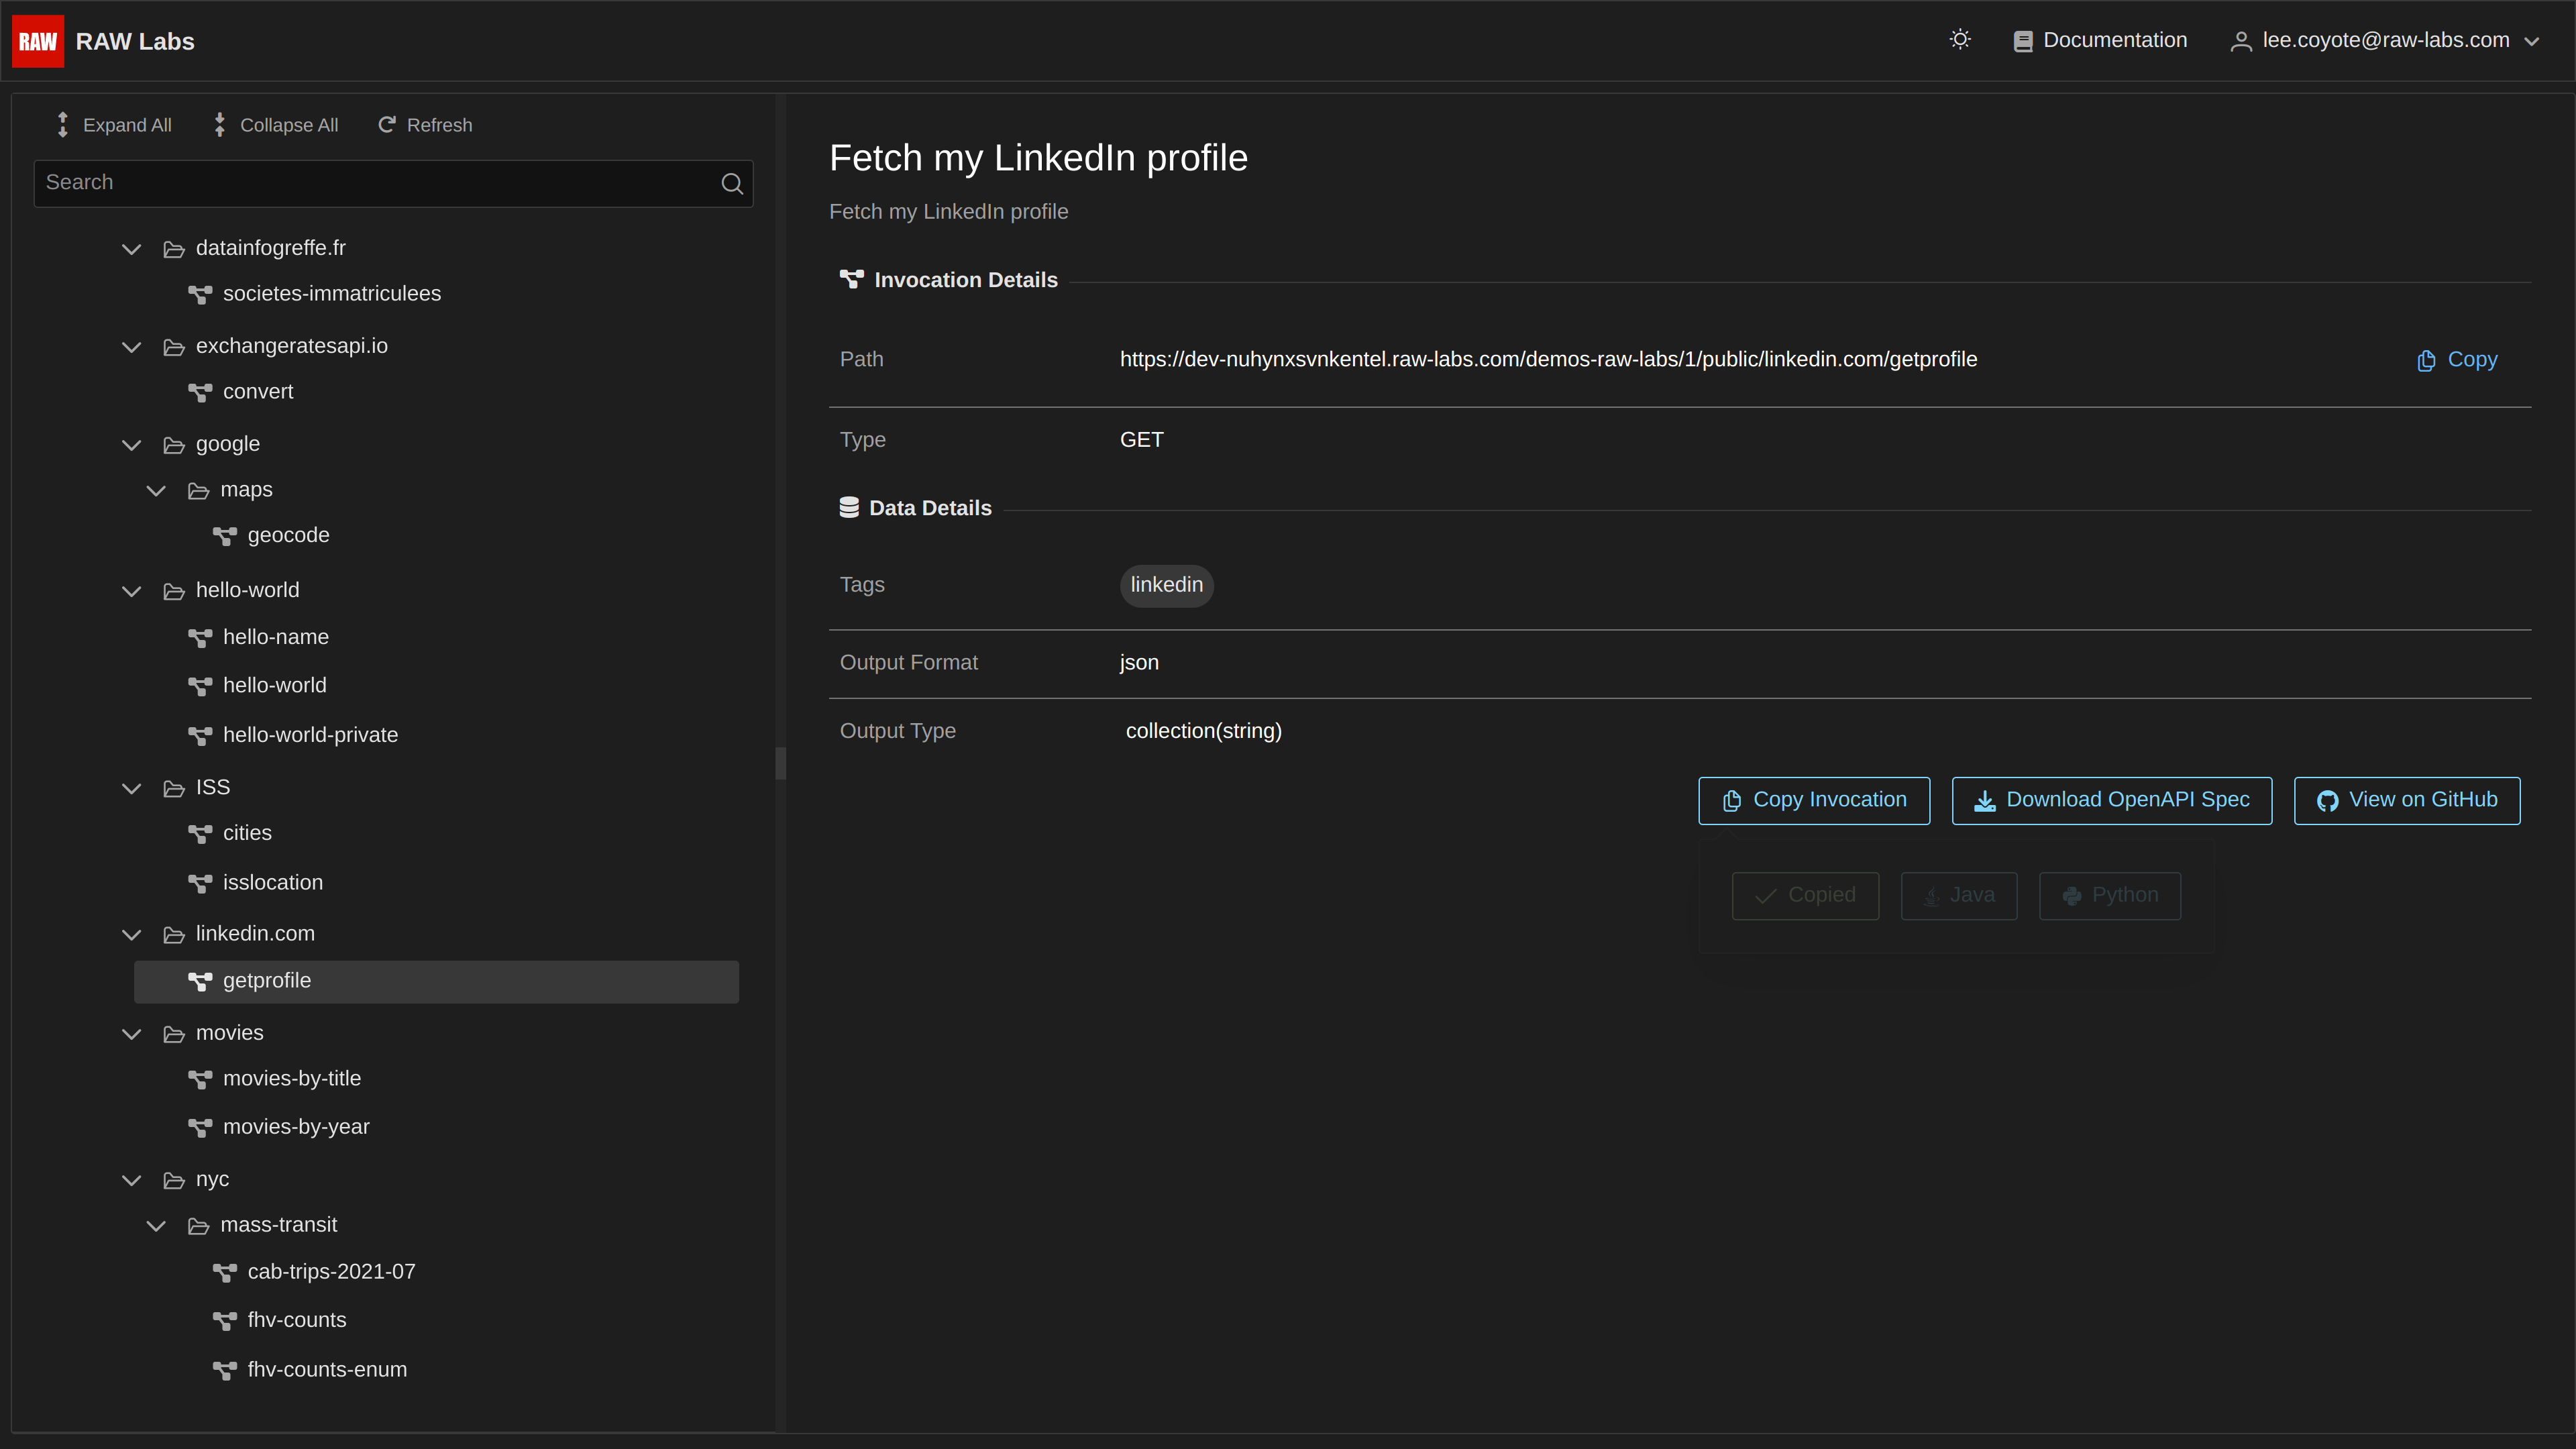
LinkedIn APIs are essentially HTTP-accessible endpoints and as such they can be accessed using READ_LINES SNAPI clause:
SELECT * FROM READ_JSON("https://api.linkedin.com/v2/me", http_method:="GET", http_auth_cred_name := "MyLinkedInToken") AS MyProfileInfo
LinkedIn Credential MyLinkedInToken is defined previously using an access token generated for our test LinkedIn application. For further details, please see LinkedIn documentation and access token generator. Note that instead of using OAuth Token, we could use OAuth Client HTTP type and specify Client ID and Client Secret.
Service https://api.linkedin.com/v2/me provides personal information for the specific LinkedIn user.
You may test it, using our VS Code Extension, then going to Scratchpad and entering the aforementioned SNAPI query. The result would be:
[
    {
        "localizedLastName": "xxx",
        "profilePicture": {
            "displayImage": "urn:li:digitalmediaAsset:xxxx"
        },
        "firstName": {
            "localized": {
            "en_US": "xxx"
            },
            "preferredLocale": {
            "country": "US",
            "language": "en"
            }
        },
        "vanityName": "yyy",
        "lastName": {
            "localized": {
            "en_US": "yyy"
            },
            "preferredLocale": {
            "country": "US",
            "language": "en"
            }
        },
        "localizedHeadline": "xxxx",
        "id": "xxx",
        "headline": {
            "localized": {
            "en_US": "xxx"
            },
            "preferredLocale": {
            "country": "US",
            "language": "en"
            }
        },
        "localizedFirstName": "yyy"
    }
]
This query implements the logic behind the getprofile endpoint which can be seen here:
Twitter
To access Twitter's API you will need an API key and secret Twitter developer app. You can get more information about apps from Twitter's developer documentation
Getting an API Key and Secret
To acquire a API key and secret please follow Twitters instructions from here
Registering Twitter Credentials
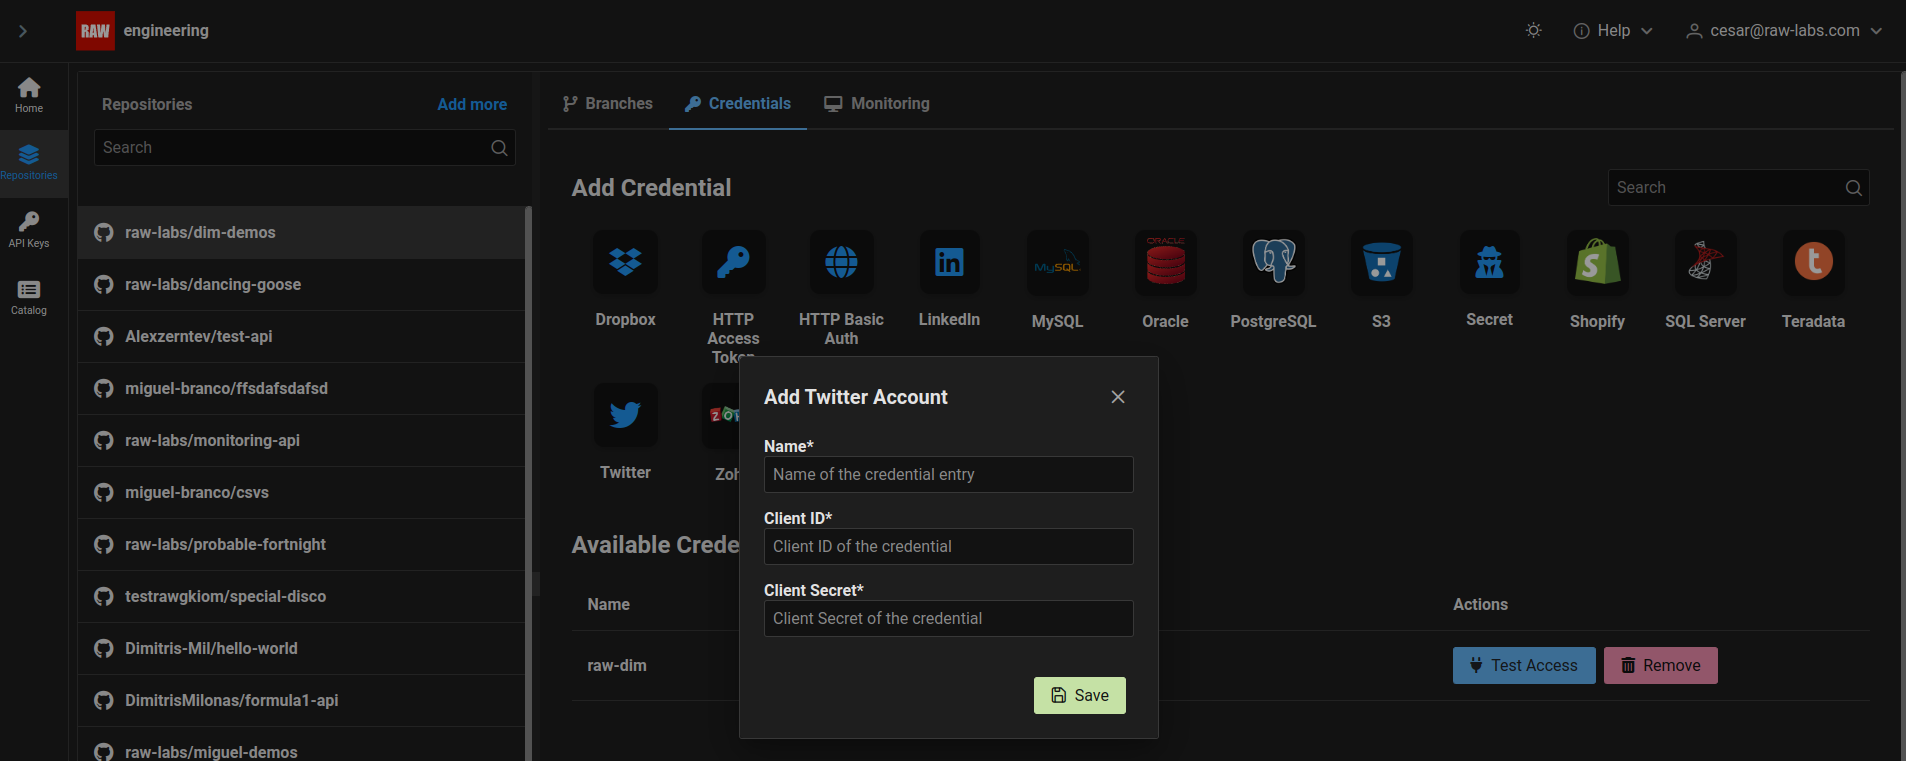
Go to our admin page, click on "Repositories" -> "Credentials" and click on the Twitter icon.
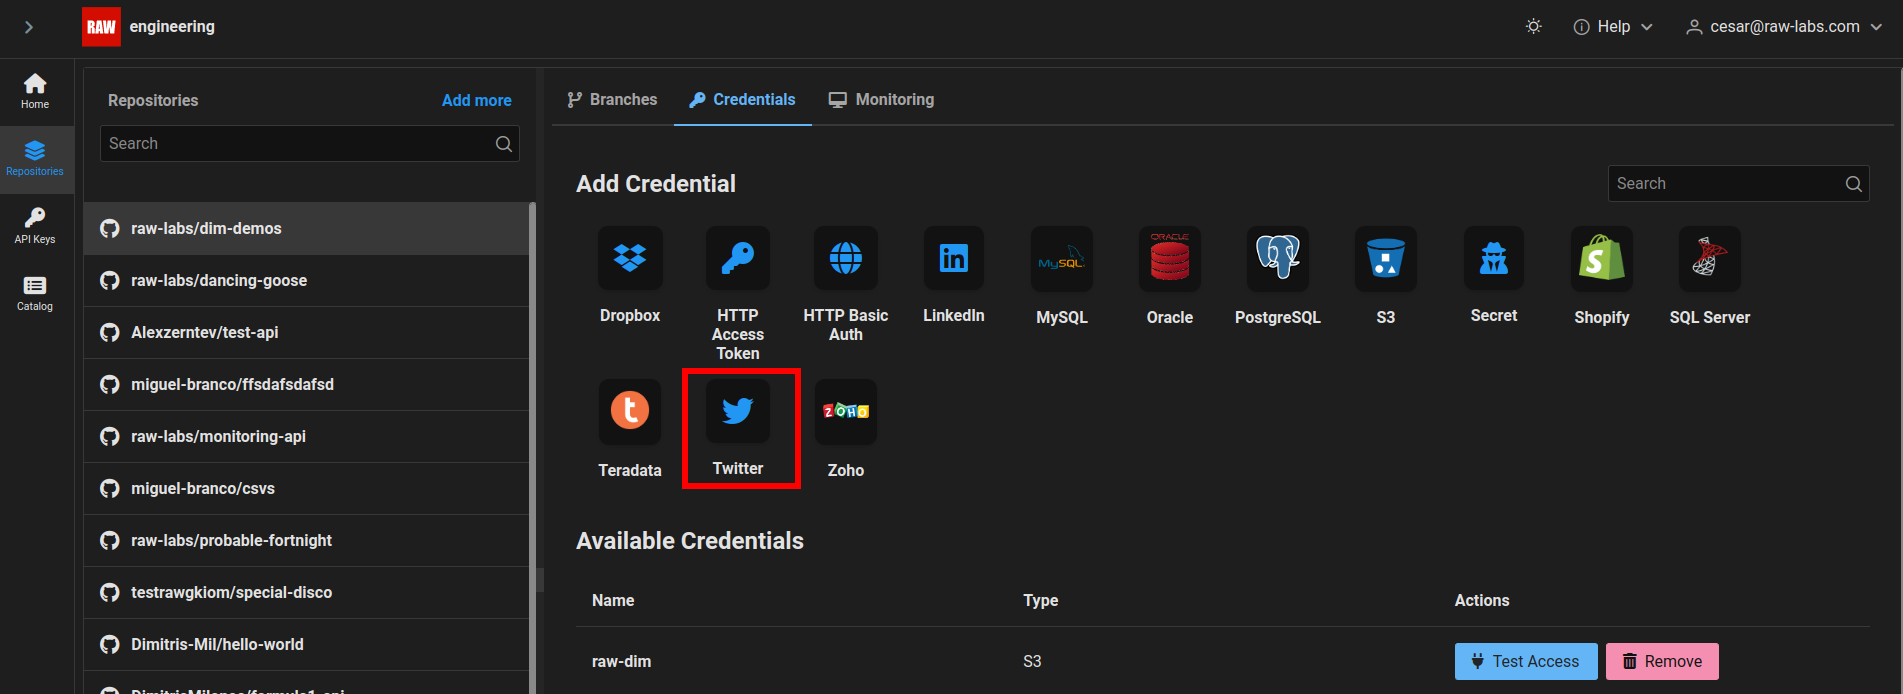
In the popup form add:
The name you want to give to this credential.
The api key as client ID.
The API secret as client secret.
Zoho
To access Zoho API we will need the client-ID and client-secret of a non-browser application client in Zoho.
Creating a Non-browser Application Client
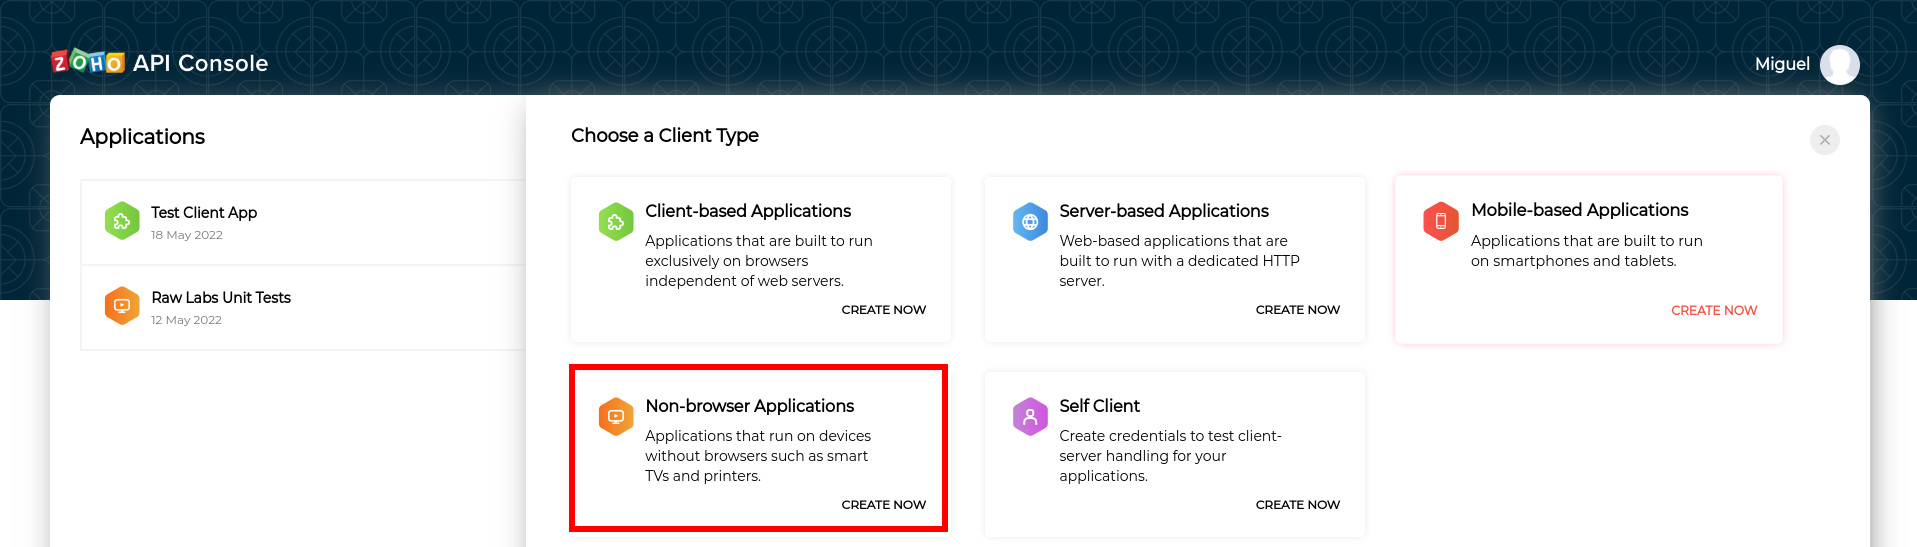
Go to Zoho api console and click "Add client".

From the available list of clients select the "Non-browser Applications".
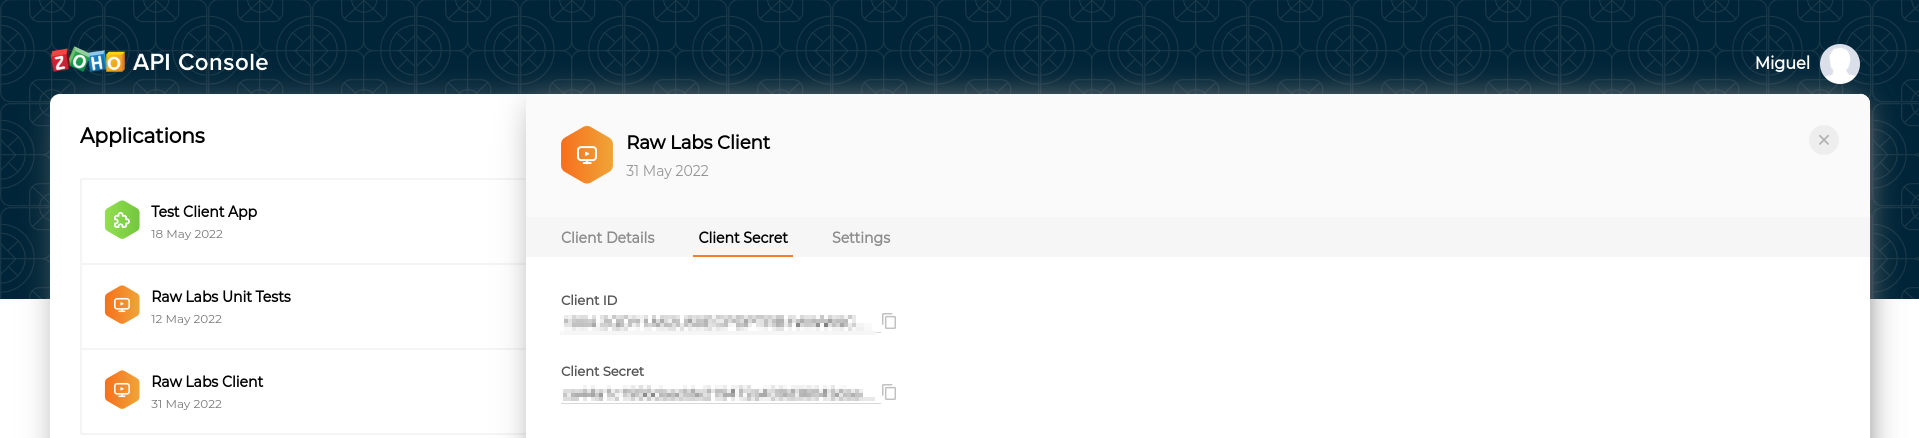
After creating you Non-Browser-Application in the tab "Client Secret" you can find the client-id and client-secret of this client.
Registering a Zoho Credential
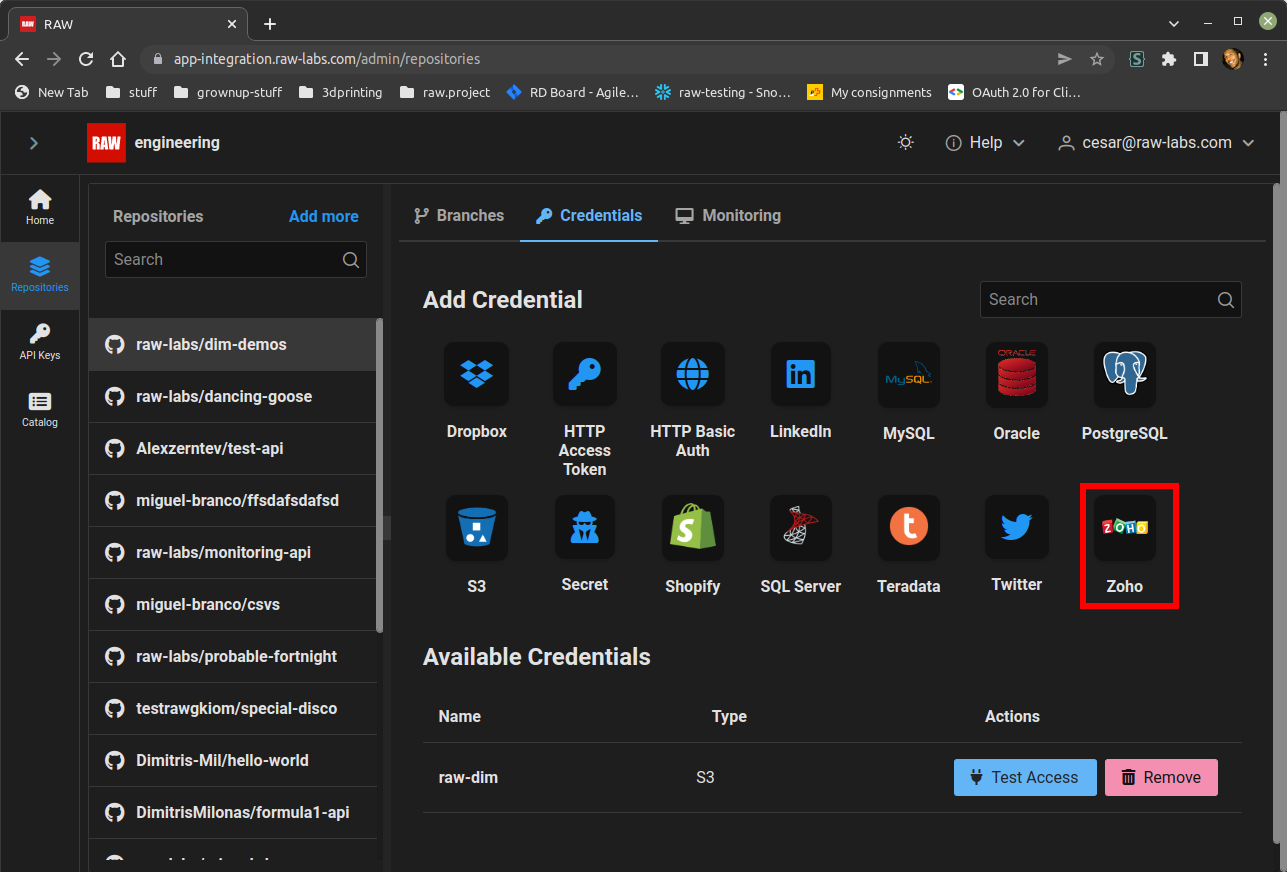
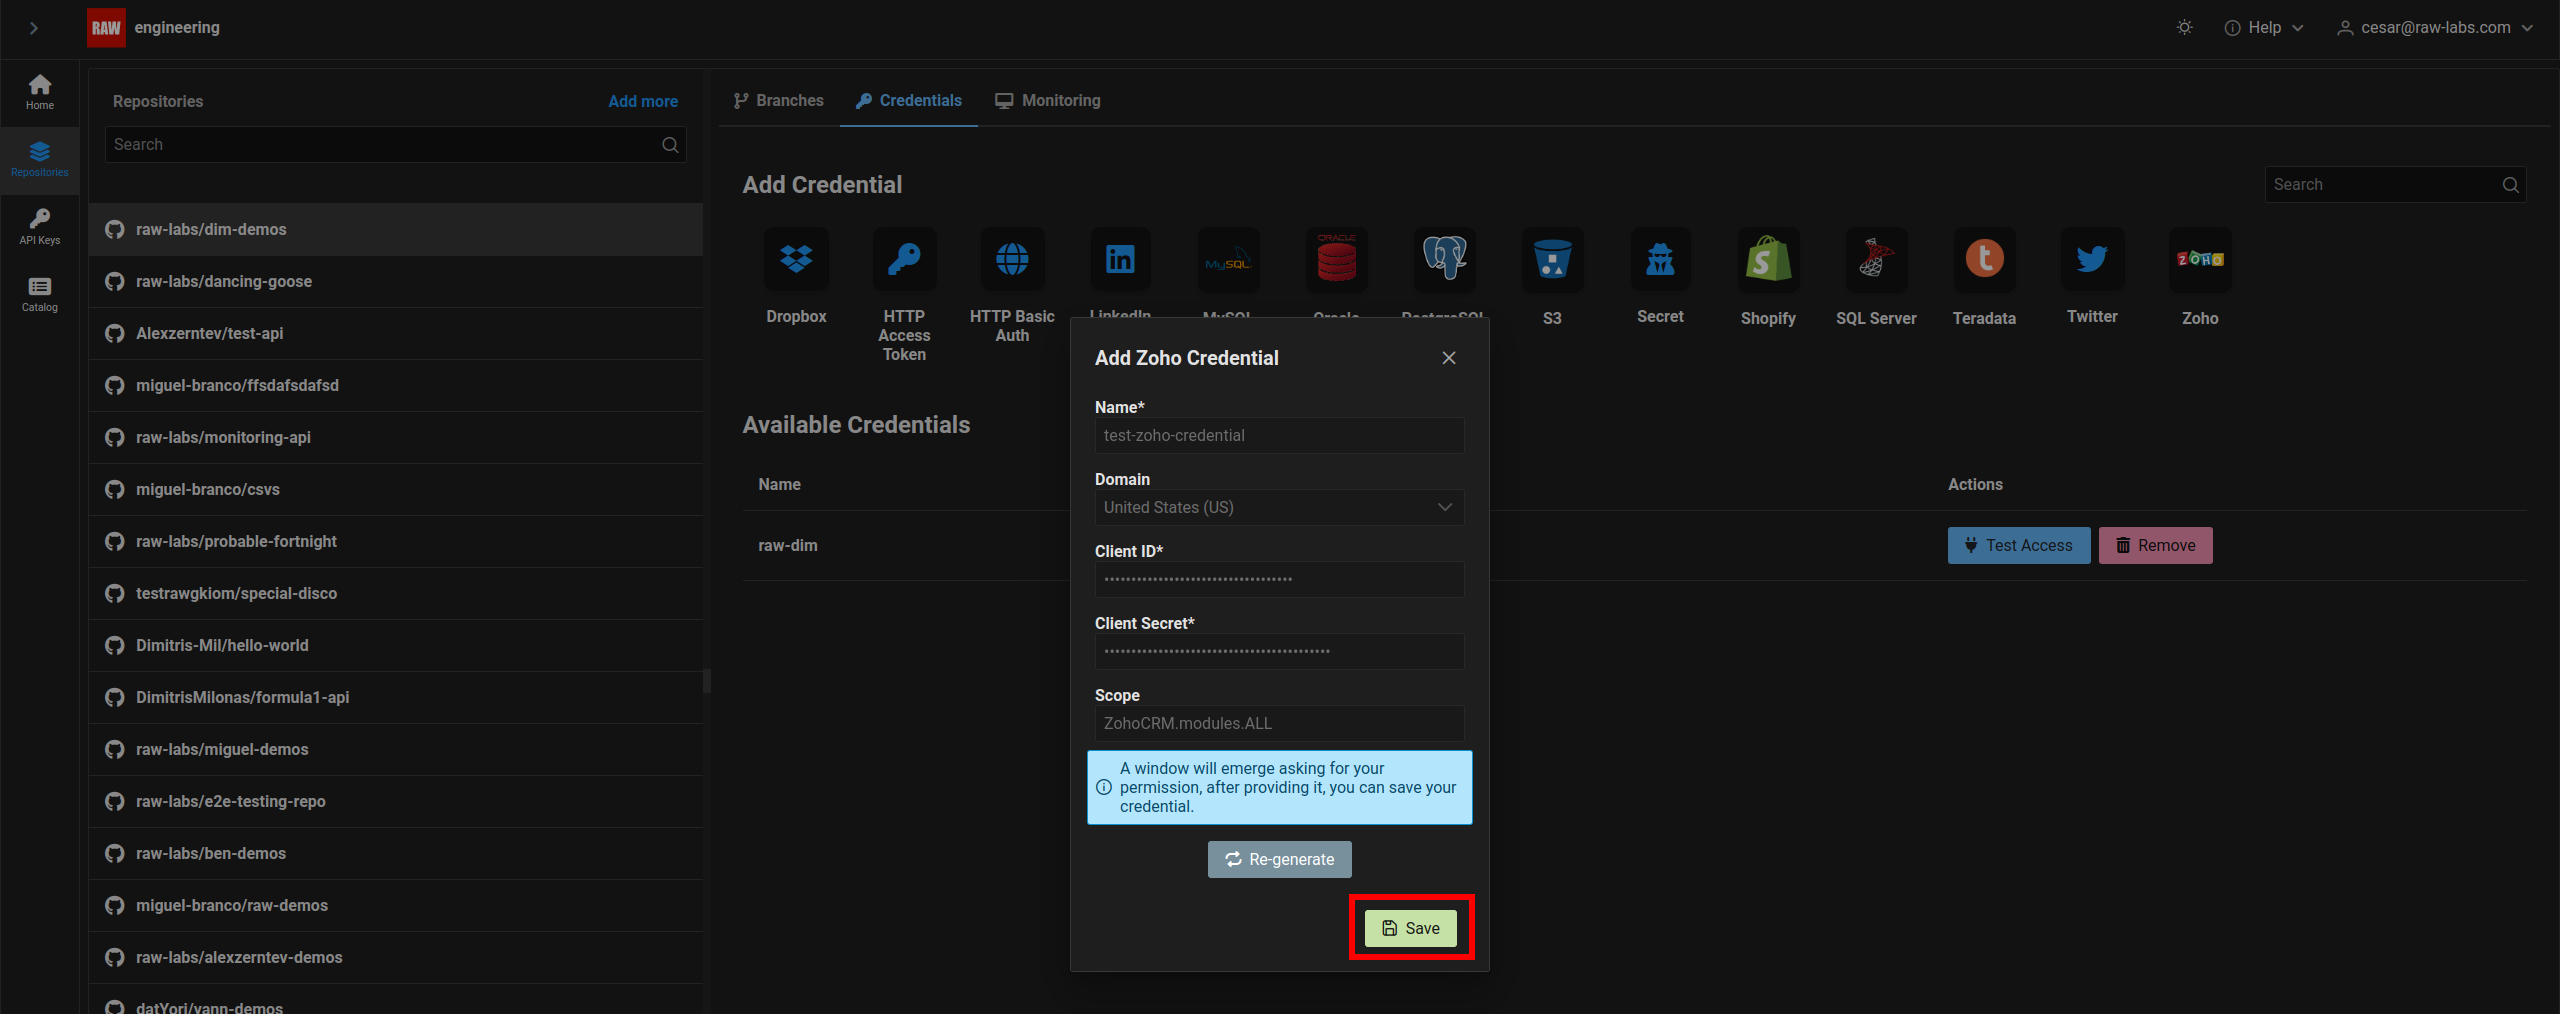
Go to your RAW-labs admin page, click on "Repositories" -> "Credentials" and click on the Zoho icon.
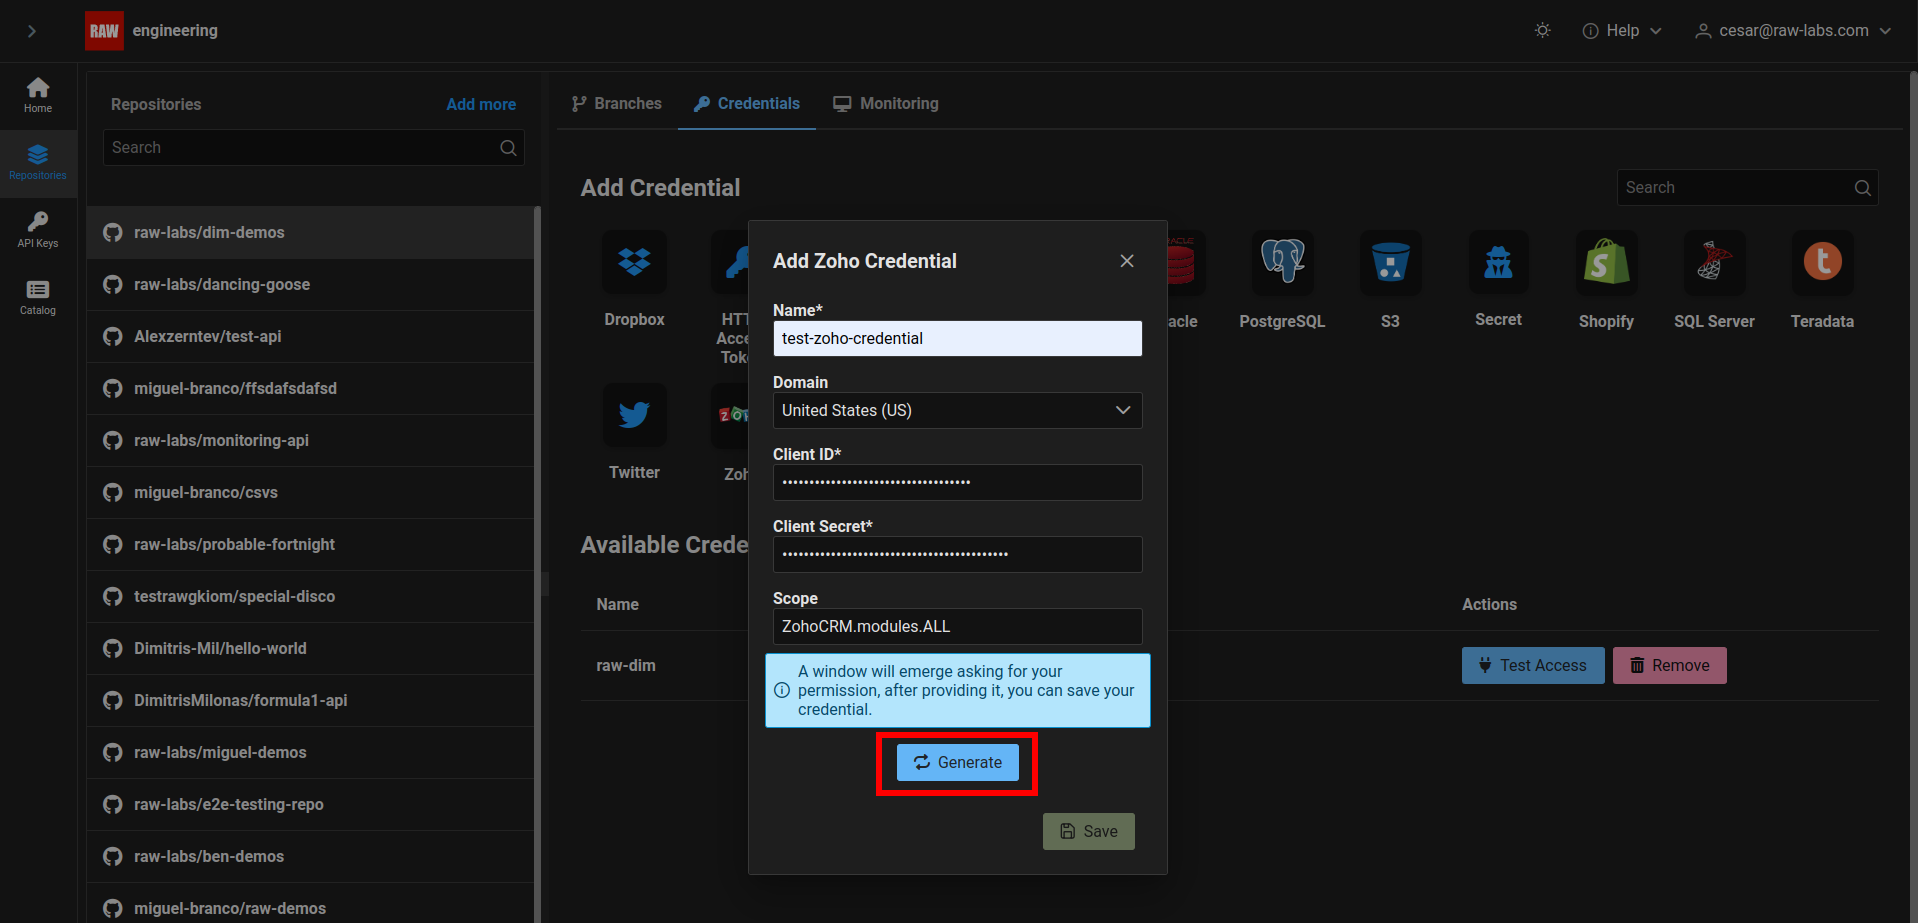
In the popup form add:
The name you want to give to this credential.
Select the domain of you zoho account. List of Zoho domains can be found here.
The client ID of your client.
The client secret of your client.
The scope, access you want to give to this credential.
Click on "Generate".
A new tab will be opened for you to authorize the client, Click on "Accept".

Come back to register credential window and click on "Save" to finally register the credential.
Google Cloud API
RAW works with Google Cloud APIs using OAuth2.0. For more information see the Google Cloud API authentication page. The pre-requisite is to have a Google Acccount and Google Cloud Project.
This set up should work for any Google Cloud API that uses OAuth2.0
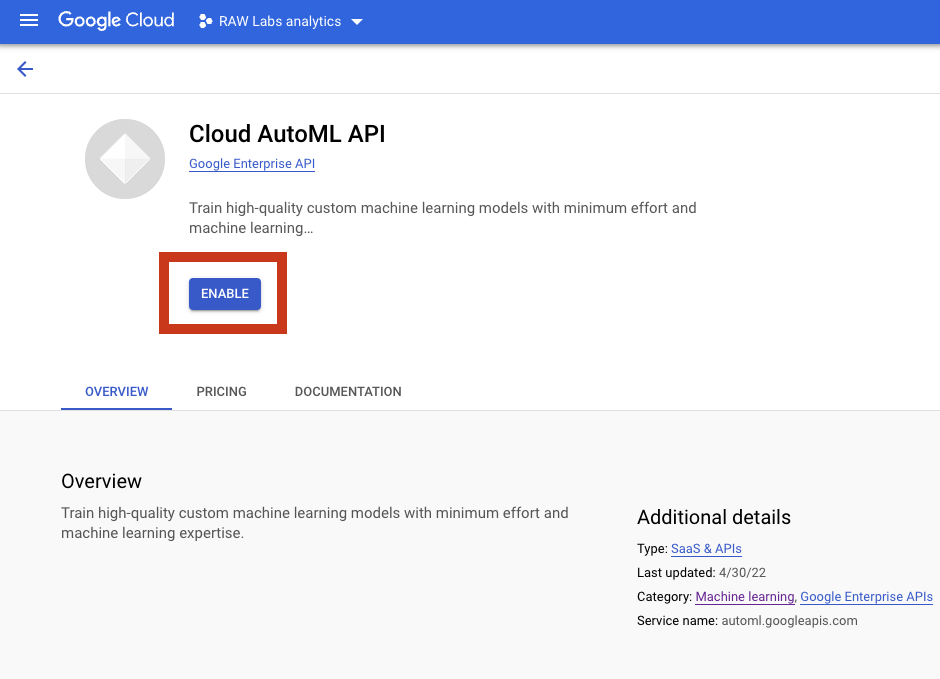
Enable the API under the Project
See the Library of APIs - search and select the API required, and enable it under the Google Cloud Project. For more information see: Enabling an API
Service Accounts
To access a Google Cloud API we will need a Google Service Account, and genereate a Service Account Key. A service account is a special type of Google account intended to be used by an non-human user to authenticate and be authorized to access data in Google APIs.
For more information about this type of credential please check the guides from Google IAM documentation :
OAuth Consent
Ensure that OAuth Consent is set up. Read more about OAuth consent here.
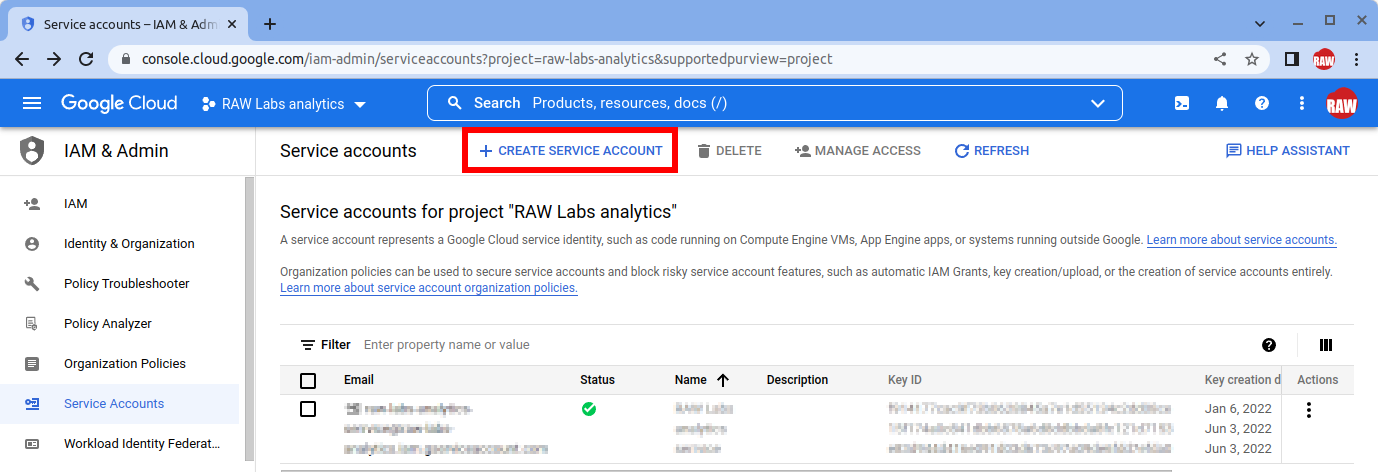
Creating a Service Account and Service Account Key
- Open the Service accounts page. If prompted, select a project. Then click "Create Service Account".
Enter a name and description for the service account. The steps "Grant this service account access to project" and "Grant users access to this service account" are optional. When done click "Done".
After creating your the service account, we need to generate a key. Click on the newly created service account.

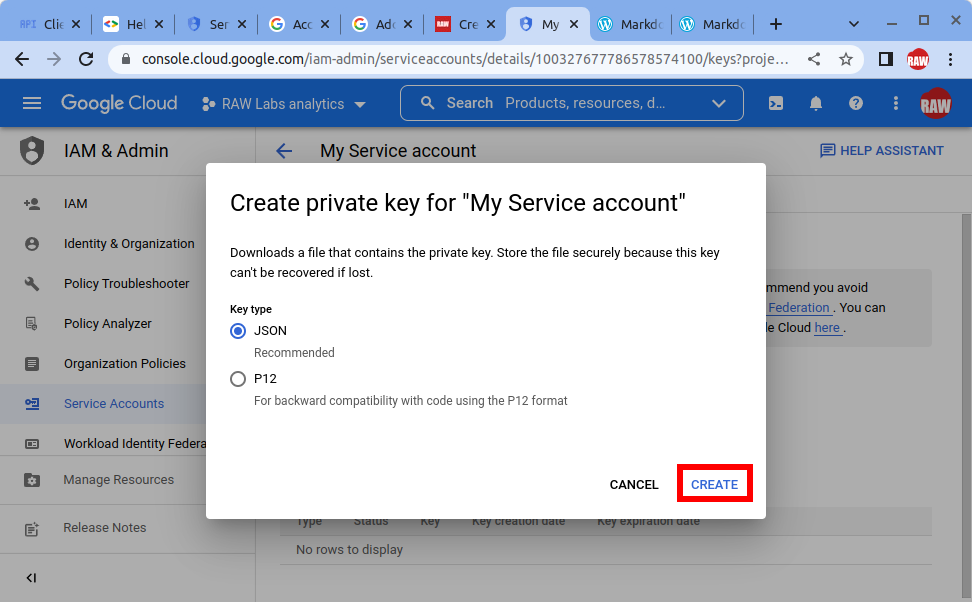
- Select the "Keys" tab, click on "Add Key" at the bottom and select "Create new key".
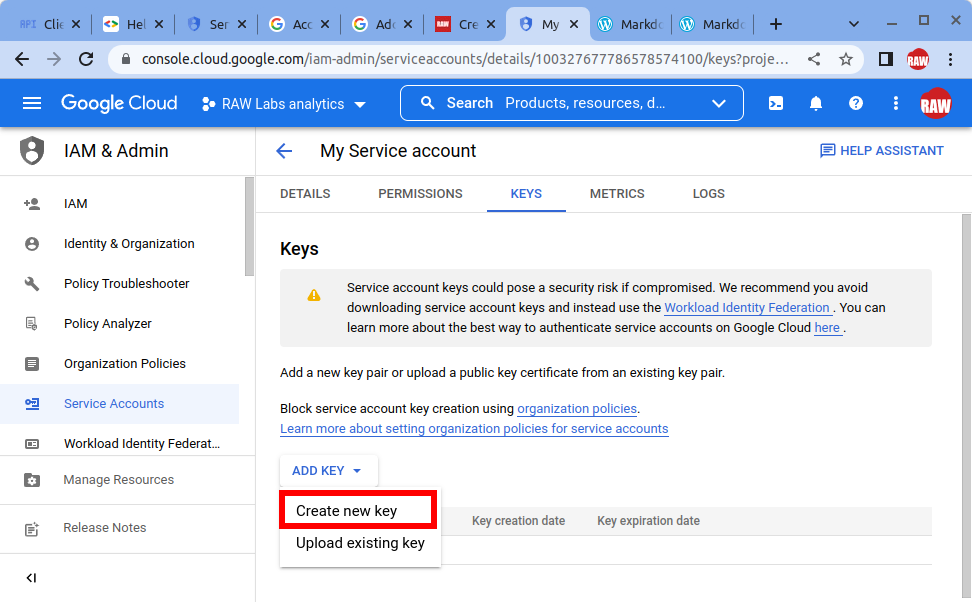
- Select JSON and click Create. Remember where this file was downloaded, we will need it later in the registration process.
Configure the Google Service with Permissions for the Service Account
Each Google Service will have a different mechanism to add users and permission them. The Service Account just created will need to be added as a User of that Google Service. Please refer to the documentation of the API / Service. More information can be found in: Manage access to service accounts.
Registering the Credential in RAW
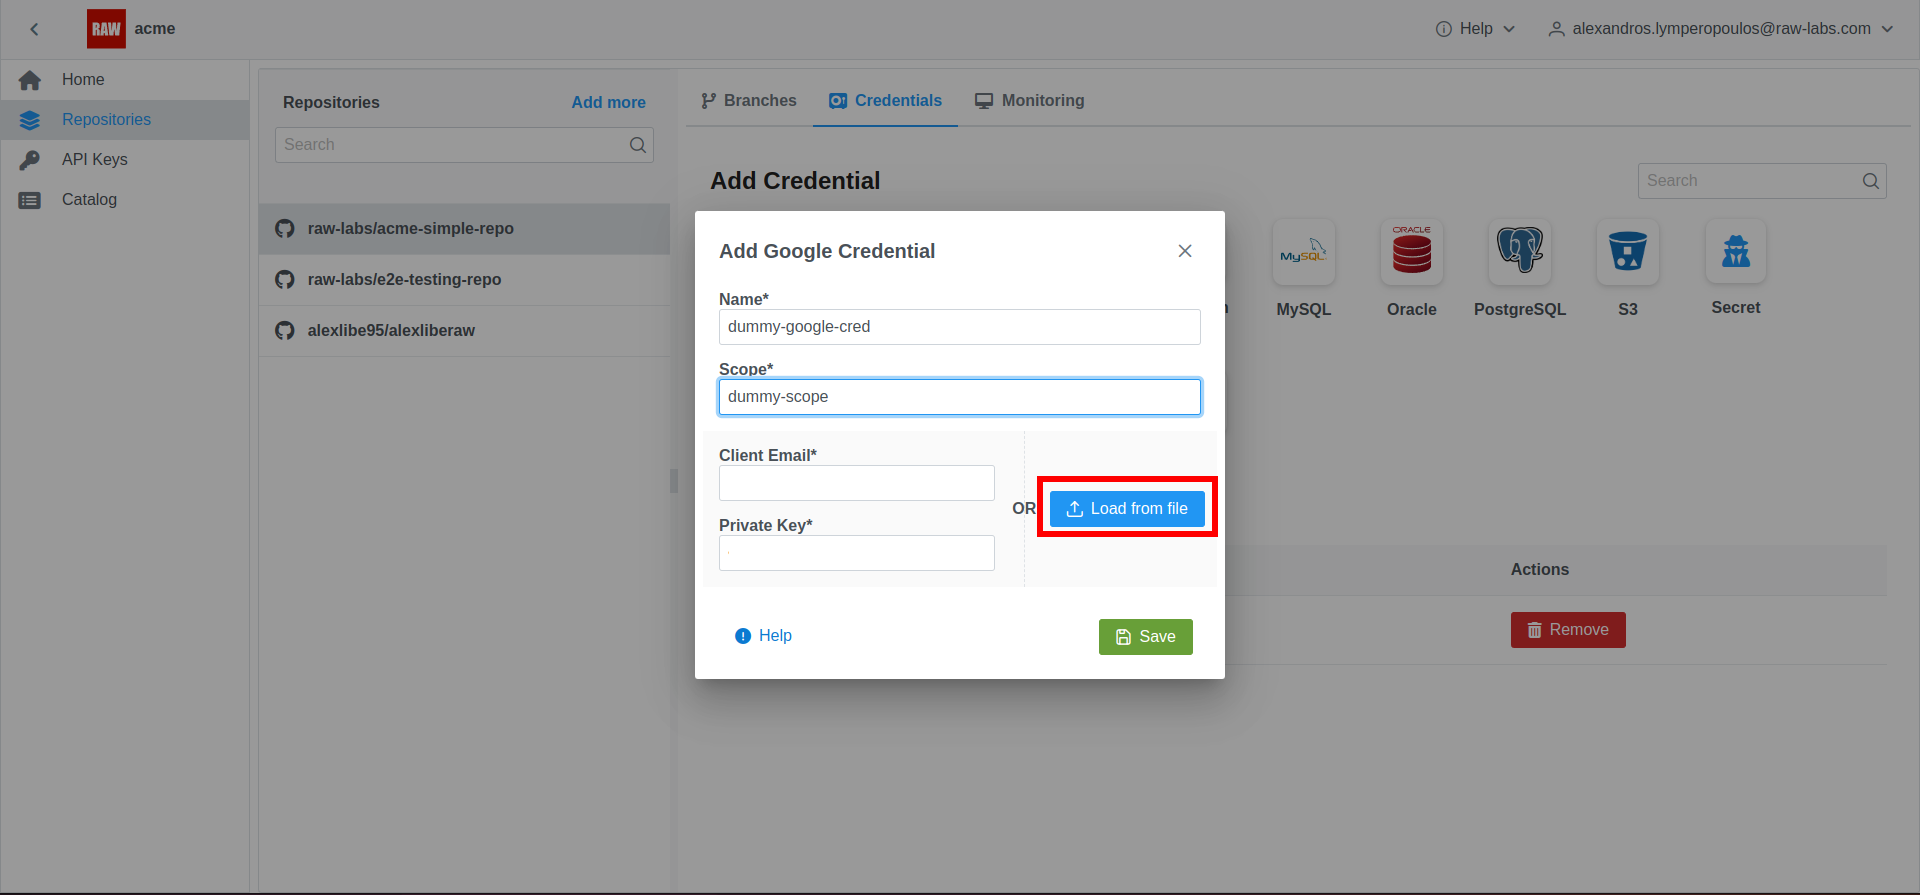
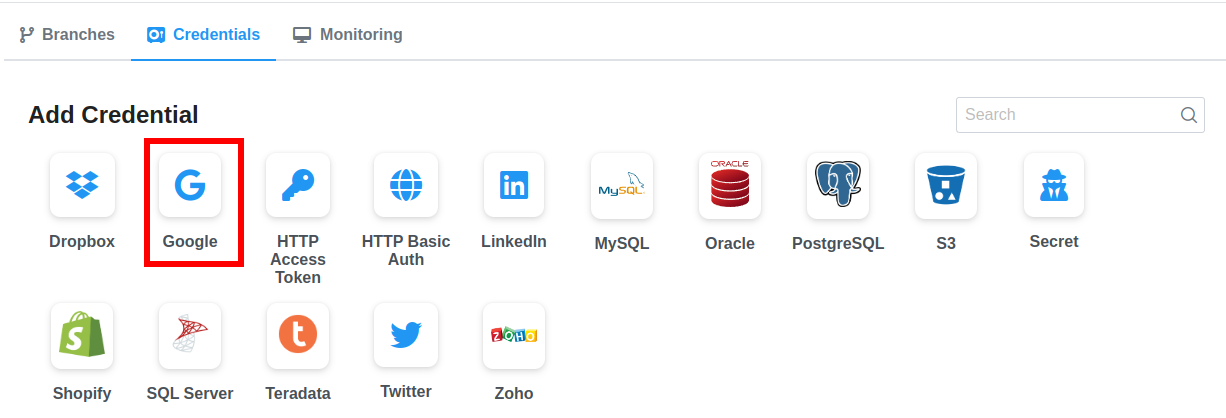
- In the RAW Administration Console, click on "Repositories" -> "Credentials" and click on the Google icon.
- Enter the Name for the Credential, and a Scope for this Credential - For a list of available Scopes for Google Cloud APIs see: OAuth 2.0 Scopes for Google APIs. Then Click on "Load from file" to import the values from the JSON file downloaded earlier. Lastly, save the Credential.